Deploying CloudCADI on AWS
CloudCADI is deployed into the customer’s AWS account using an AWS CloudFormation template, which provisions the required infrastructure, including an Amazon EKS cluster and Amazon RDS for PostgreSQL. The CloudCADI application is then configured and deployed to the EKS cluster using Helm.
CloudFormation Stack Deployment Walkthrough
This document describes the step-by-step procedure to deploy the CloudCADI application on Amazon Elastic Kubernetes Service (EKS) using an AWS CloudFormation stack.
Step 1 - CloudFormation
CloudCADI is recommended to be deployed in the management/billing account
Steps to create stack :
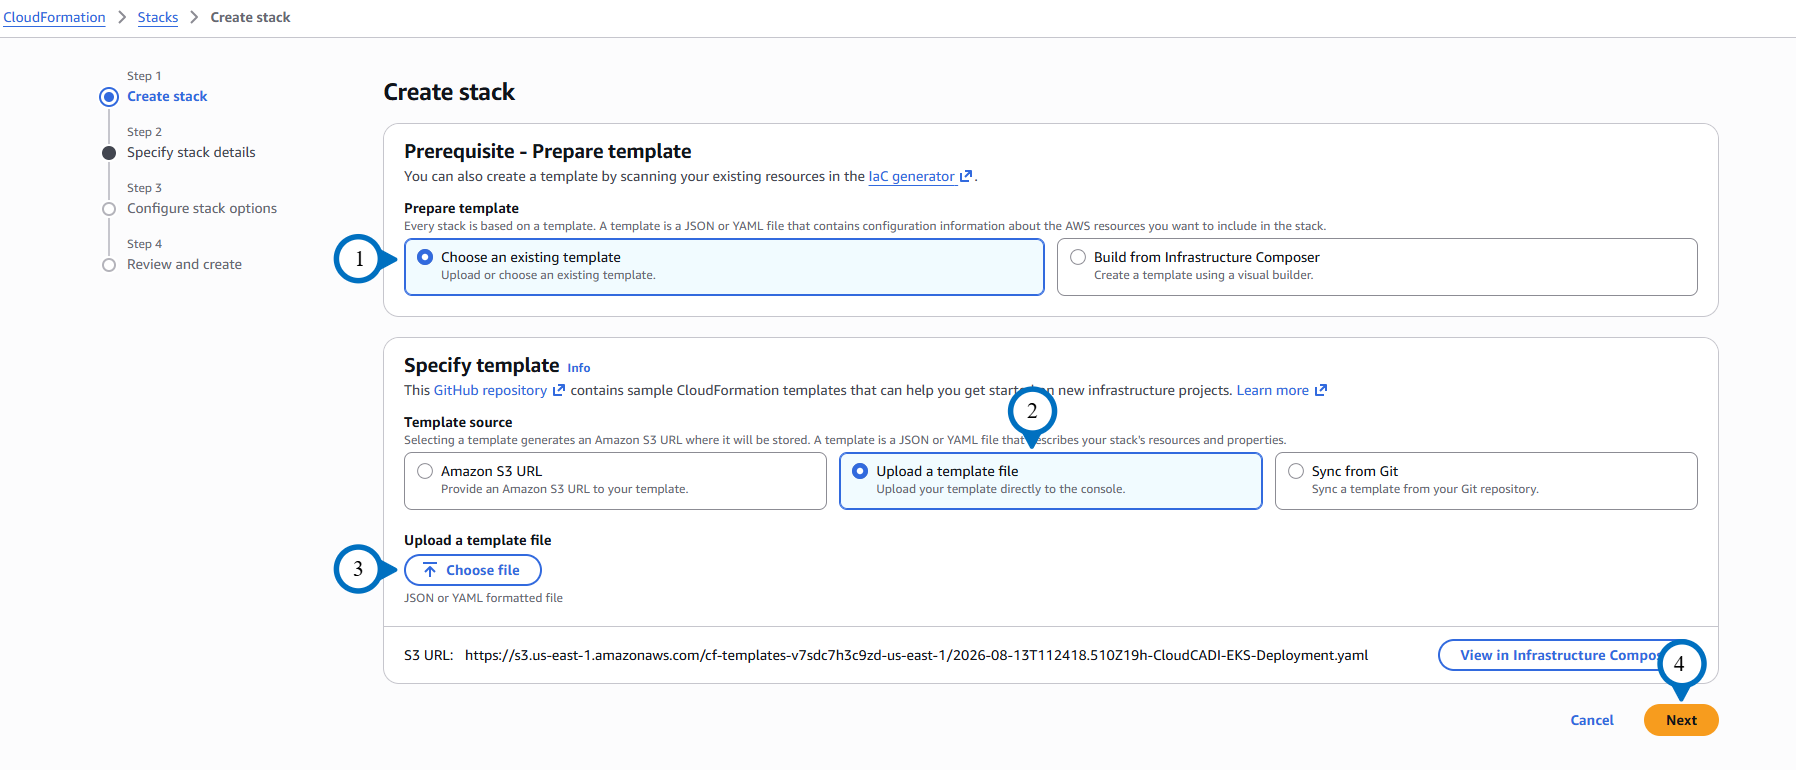
- Go to the AWS CloudFormation Console.
- Select Choose an existing template.
- Under Specify template, select Upload a template file.
- Click Choose file and upload the CloudCADI CloudFormation template.
- Proceed to click on Next.
Step 2 - Specify Stack Details
-
Under Provide a stack name, enter a Stack name (e.g.
Multicloud-cloudcadi). -
Under EKS cluster, provide the following details:
ClusterName: Enter the EKS cluster name (unique per account/region).
KubernetesVersion: Enter the EKS control plane version (e.g.
1.36).NodeInstanceType: Enter the node instance type (e.g.
t3.large).NodeDesiredSize, NodeMinSize, NodeMaxSize: Enter the desired, minimum, and maximum node group size.

-
Under Network, the VpcCidr and public subnet CIDRs (PublicSubnet1Cidr, PublicSubnet2Cidr) can be left at their default values.
-
Under S3 CUR, provide the following details:
S3BucketName: Enter the bucket name. (Refer to Cost & Usage Data Export)
-
Under RDS PostgreSQL, provide the following details:
DBName: Enter the database name.
DBUsername: Enter the RDS master username.
DBPassword: Enter the database password.
DBInstanceClass: Enter the RDS instance class (e.g.
db.t3.small).
-
Under Cross-Account Configuration and Cross-platform Configuration, leave the default ExternalId (or provide your own) and optional AwsTokenIssuerUrl.

Enable Outbound Identity Federation
Follow these steps to obtain the Token Issuer URL used for AwsTokenIssuerUrl:
-
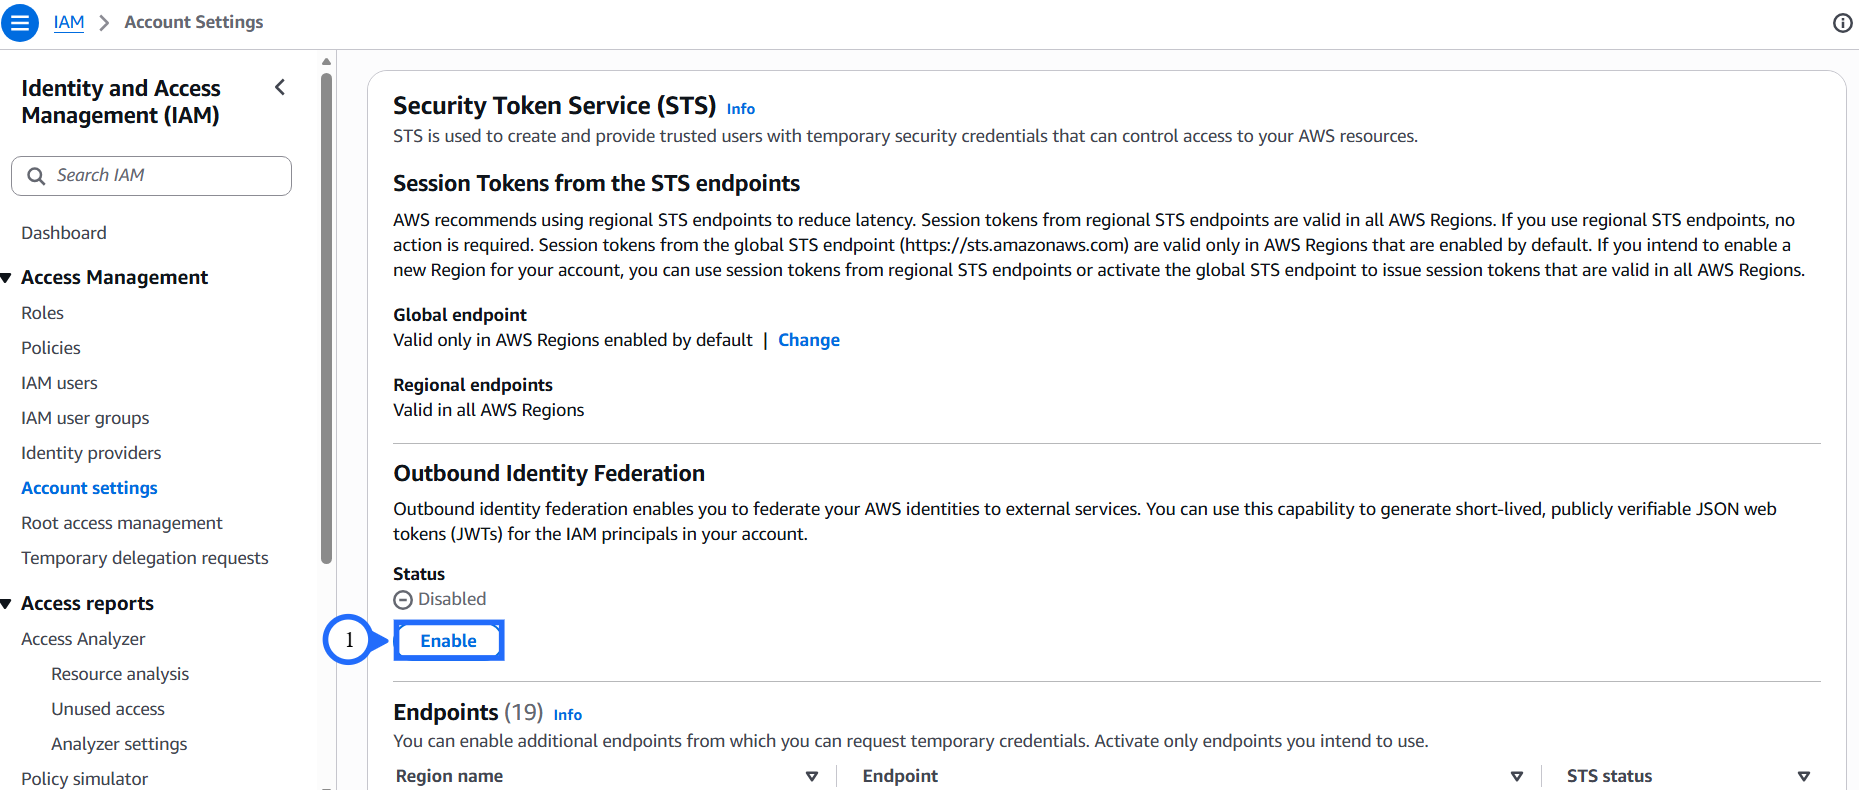
Sign in to the AWS account and open IAM → Account settings.
-
Under Security Token Service (STS), find Outbound Identity Federation and click Enable.
-
Once enabled, copy the Token Issuer URL shown under Outbound Identity Federation and use it as the AwsTokenIssuerUrl value.

-
-
Click Next.
Step 3 - Configure Stack Options
- Add the tags, then click Next.

Step 4 - IAM Access Configuration
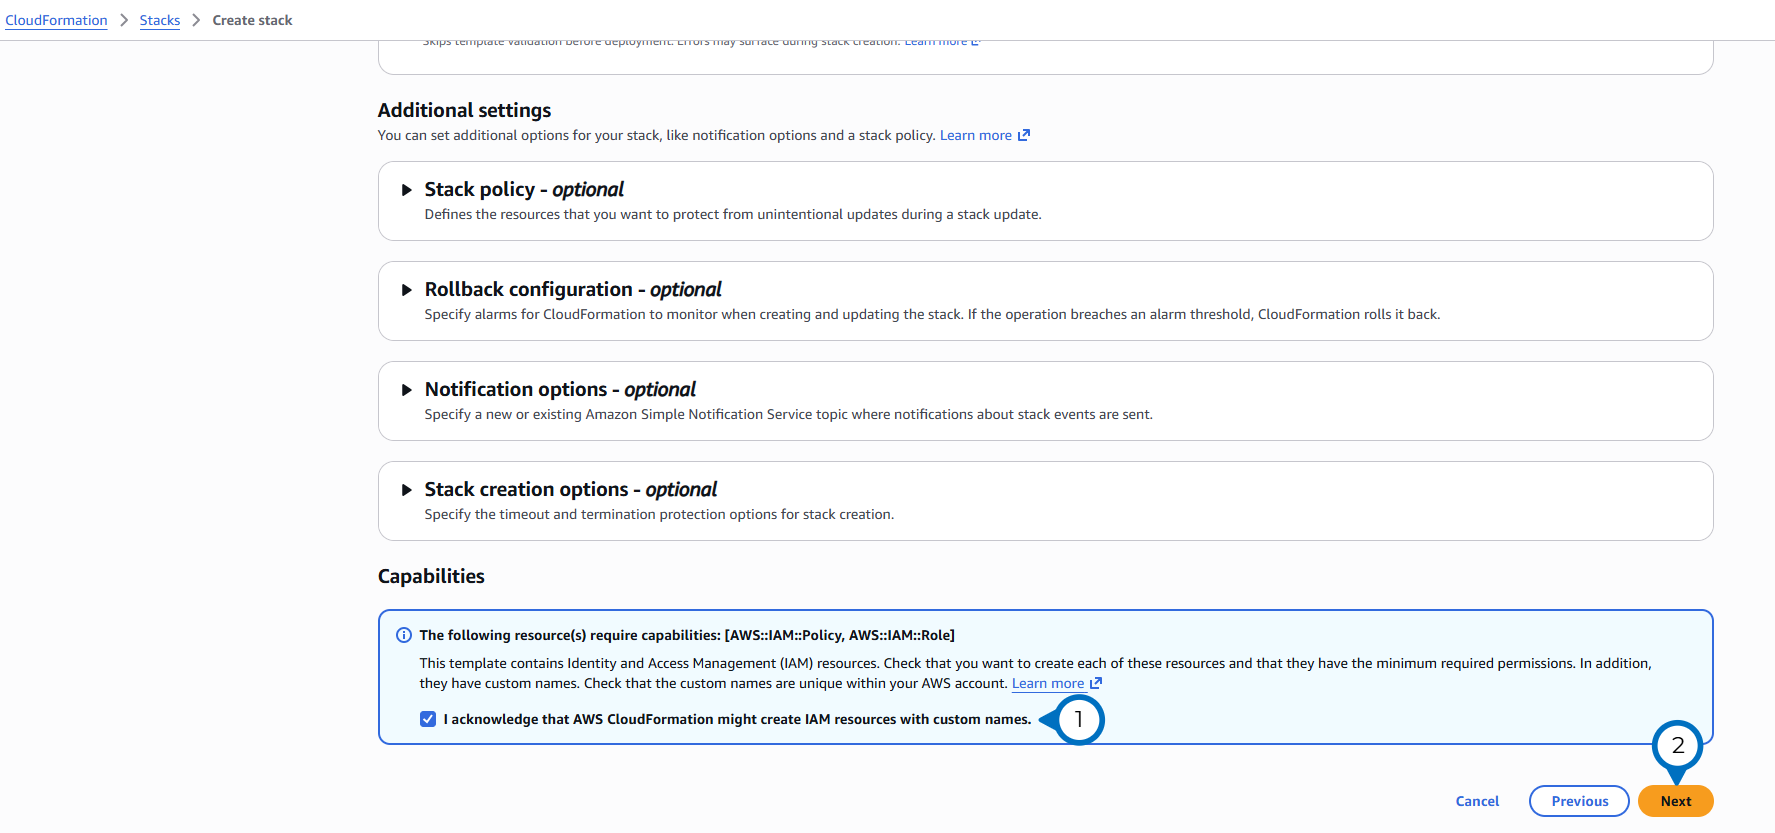
- Under Capabilities, check I acknowledge that AWS CloudFormation might create IAM resources with custom names, then click Next.
- On the Review and create page, review the configuration and click Submit.
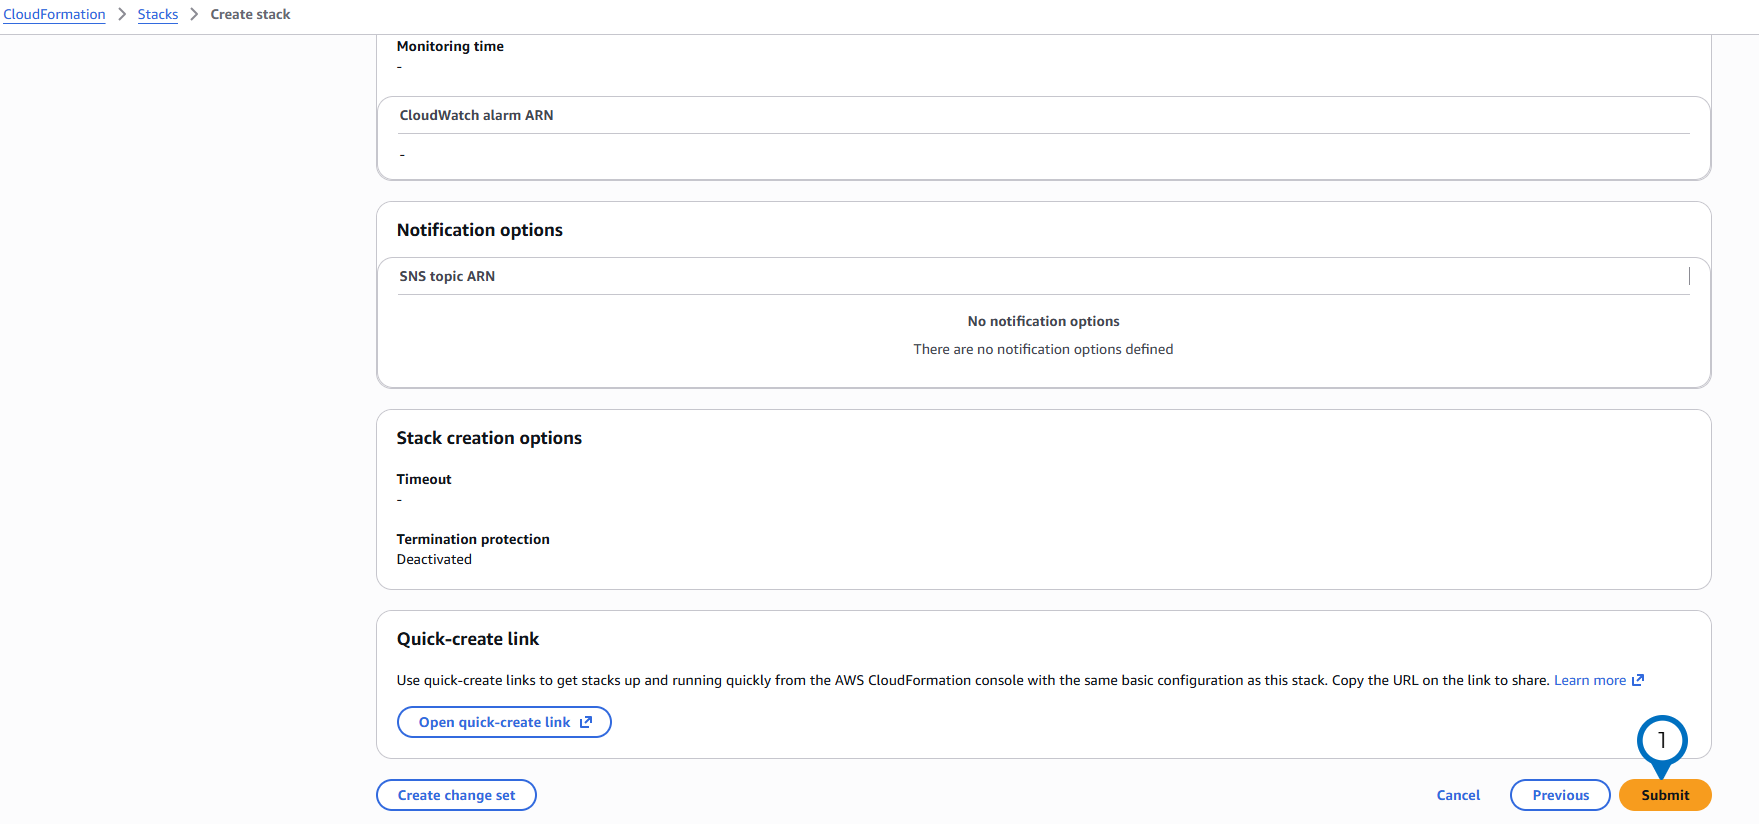
Resource creation may take up to 15 minutes.
Step 5 - Accessing CloudCADI
- Once the stack creation is complete, navigate to CloudFormation → Stacks.
- Select the newly created CloudCADI stack (e.g.
Multicloud-CloudCADI).
- Access the CloudCADI application URL from the stack outputs.
- You will be redirected to the CloudCADI login page.
Architecture
- EKS cluster — ClusterName, KubernetesVersion, NodeInstanceType, node scaling sizes
- Network — VpcCidr, PublicSubnet1Cidr, PublicSubnet2Cidr
- S3 CUR — S3BucketName for Cost & Usage Report access
- RDS PostgreSQL — DBName, DBUsername, DBPassword, DBInstanceClass
- Cross-account / Cross-platform — ExternalId, AwsTokenIssuerUrl
- Manual (current) — CloudFormation stack steps, customer-run
- Automatic (planned) — SSO login, backend-run end to end
- Amazon EKS (Kubernetes)
- RDS for PostgreSQL
- Amazon S3 (CUR)
- AWS CloudFormation + Helm