Deploying CloudCADI on Azure
CloudCADI deploys into your own Azure tenant as an ARM template that provisions AKS + Azure Database for PostgreSQL + Storage, then installs the app via Helm.
Flow - Manual
- You'll receive the ARM template
- Deploy the ARM template into your own resource group
- Follow the CLI steps to create an App Registration and assign the required roles
- Follow the CLI steps to run the Helm deploy
Manual Deployment Walkthrough
This walkthrough has two parts: getting the identities and permissions in place, then running the ARM template itself.
Step 1 - Register Resource Providers
- Azure Portal → Subscriptions → select the target subscription → Settings→ Resource providers (left menu).
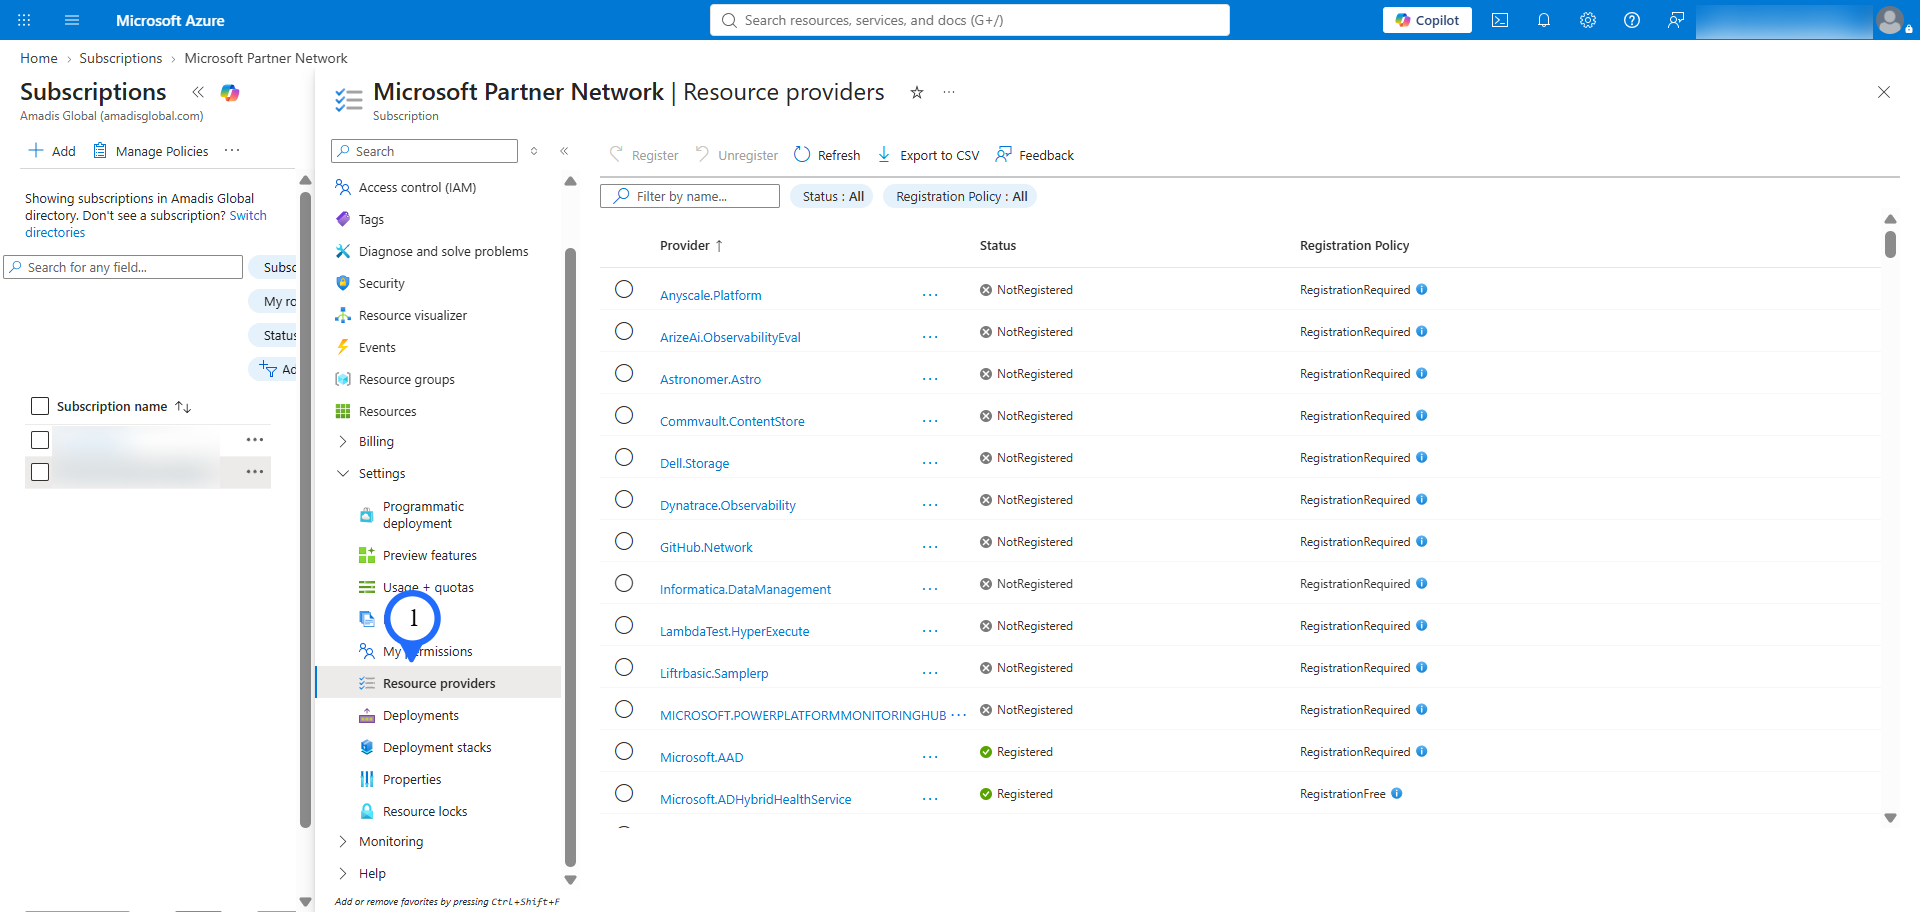
- Search for and confirm Registered status for:
Microsoft.ContainerService,Microsoft.DBforPostgreSQL,Microsoft.OperationalInsights,Microsoft.OperationsManagement,Microsoft.Storage,Microsoft.Insights,Microsoft.ManagedIdentity,Microsoft.Resources. - If any show NotRegistered, select it → Register → wait ~1–2 minutes.
Step 2 - App Registration (for clientId, tenantId, objectId)
- Azure Portal → Microsoft Entra ID → App registrations → New registration.
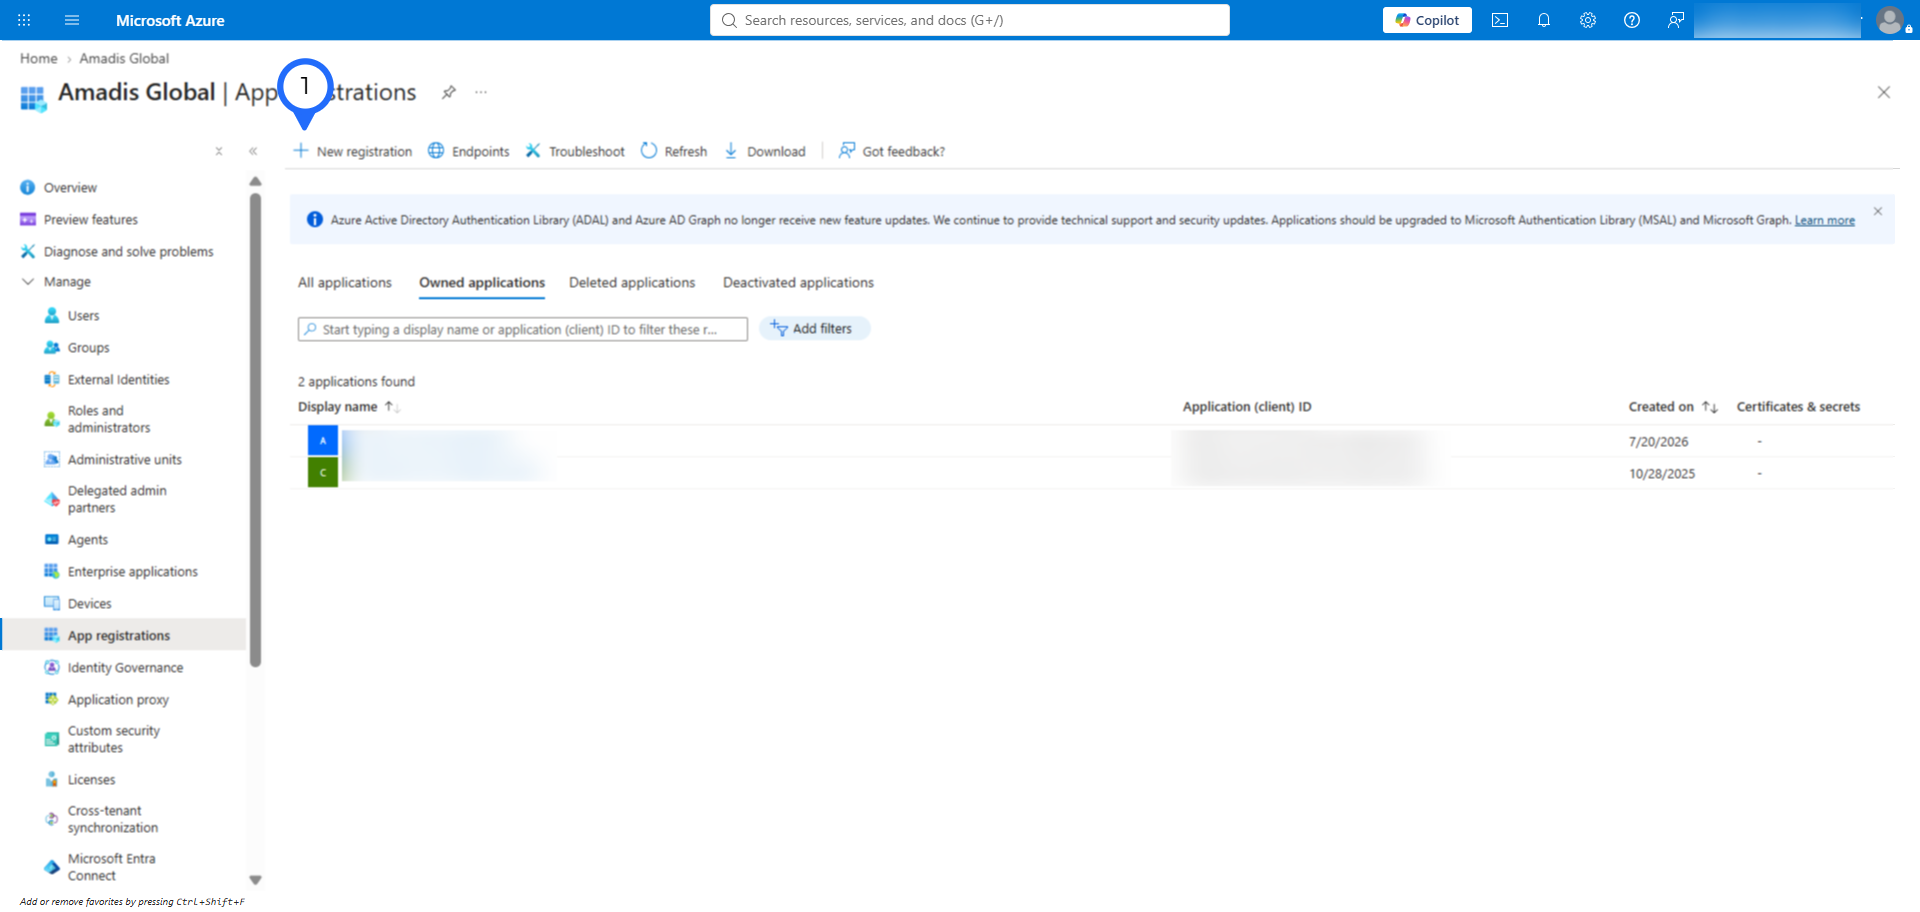
- Name it (e.g.
CloudCADI-app), leave the supported account type as single tenant → Register.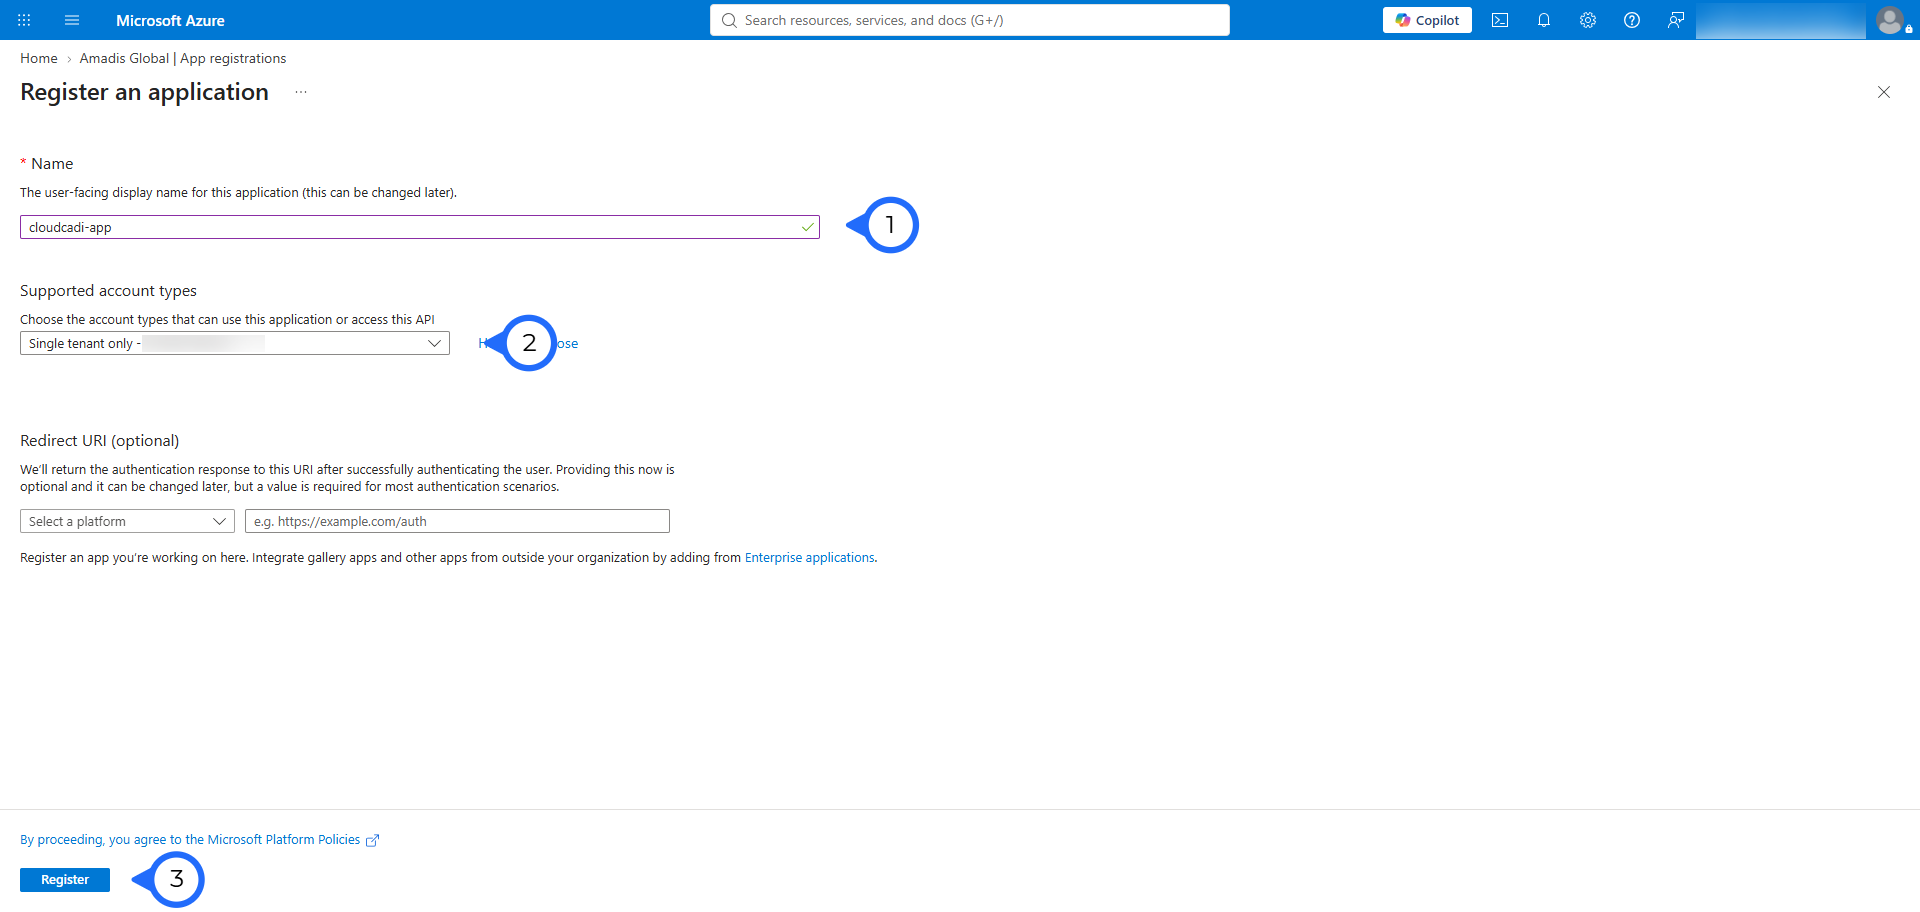
- On the Overview page, copy:
- Application (client) ID → this is your
clientId - Directory (tenant) ID → this is your
tenantId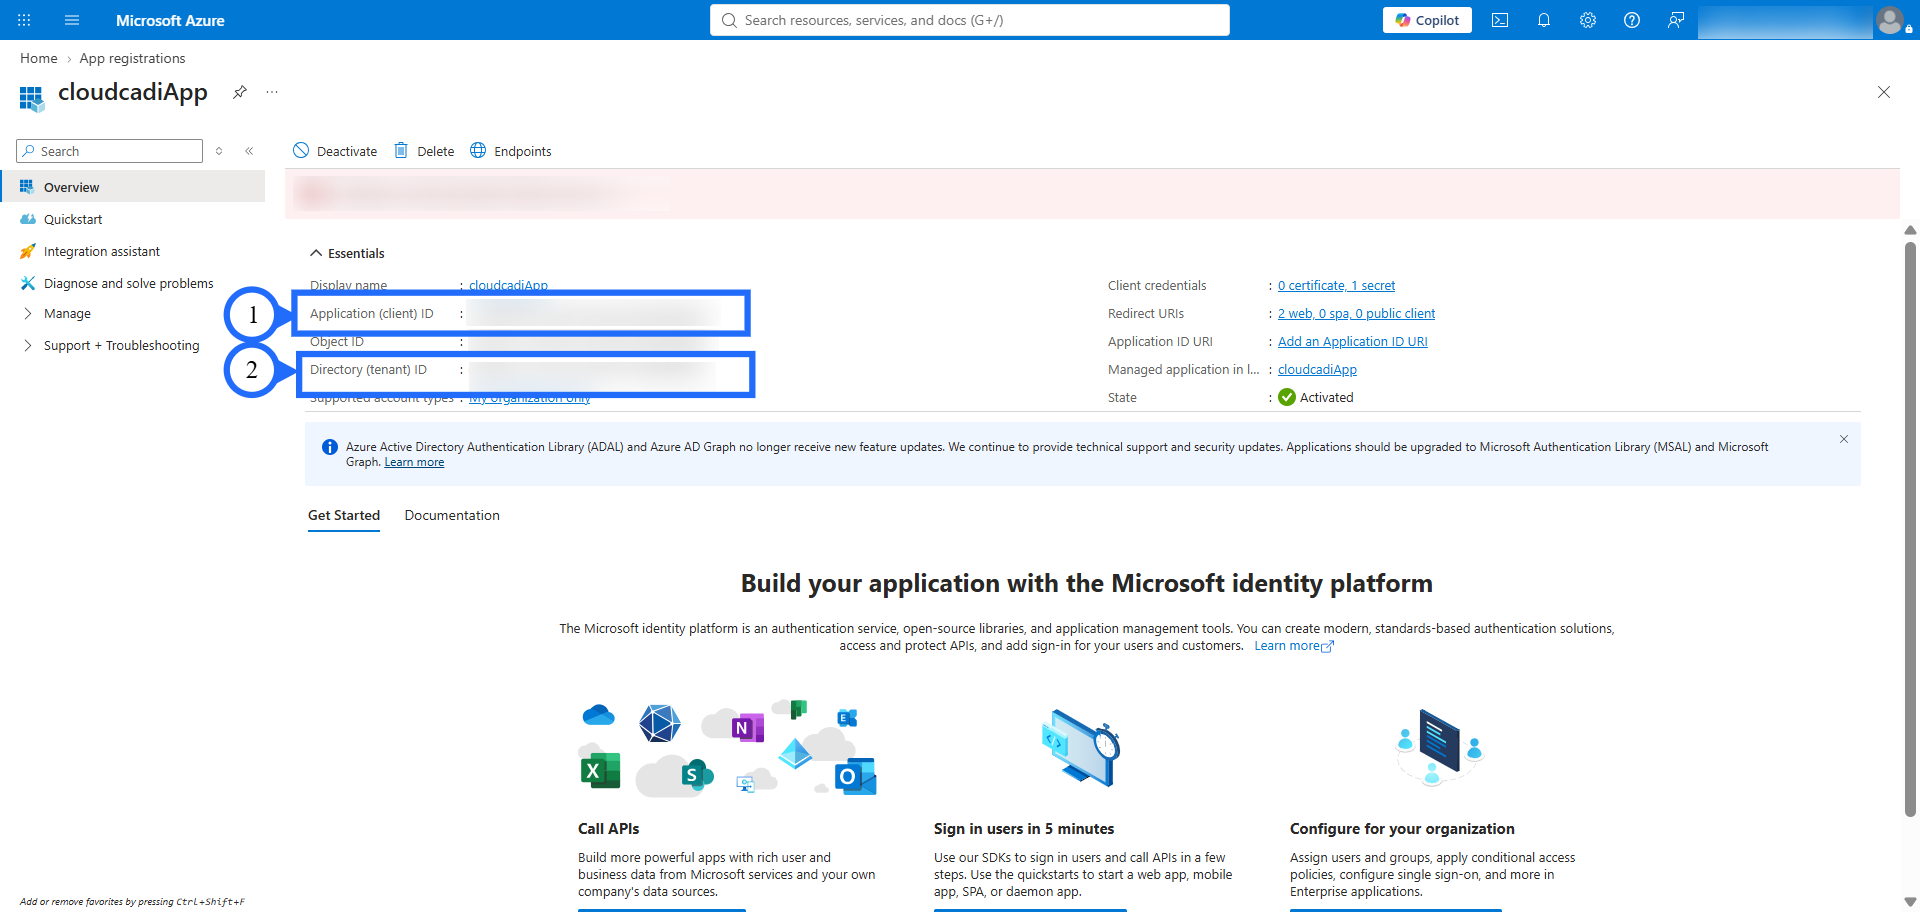
- Application (client) ID → this is your
- For
objectId, go to Microsoft Entra ID → Enterprise applications → search the same app name → open it → copy its Object ID. This is different from the App registration's own object ID - the template wants the service principal's object ID, which lives under Enterprise Applications.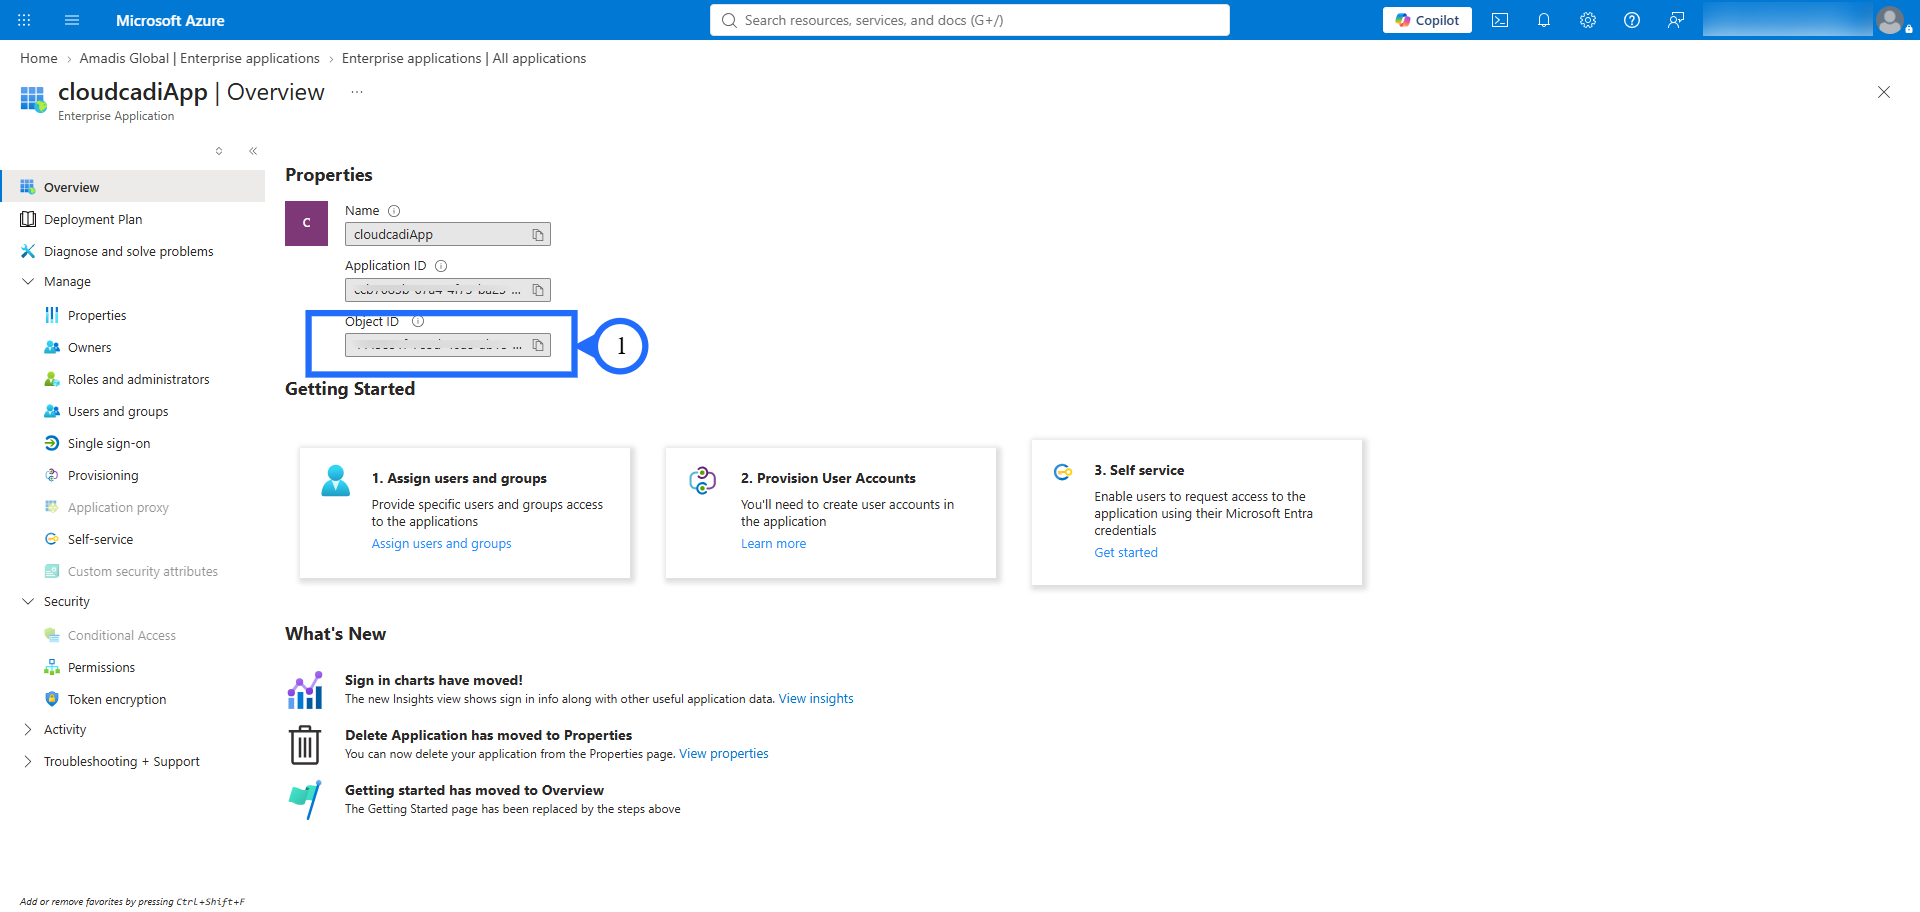
- Assign the following roles to this service principal in whichever subscription you want to onboard - repeat sub-steps i–iv once per role:
- Reader
- Log Analytics Contributor
- Monitoring Contributor
- Virtual Machine Contributor
- Azure Kubernetes Service Contributor Role
- Cost Management Contributor
- Storage Account Contributor
- Storage Blob Data Reader - assign this one on the subscription where cost data is exported
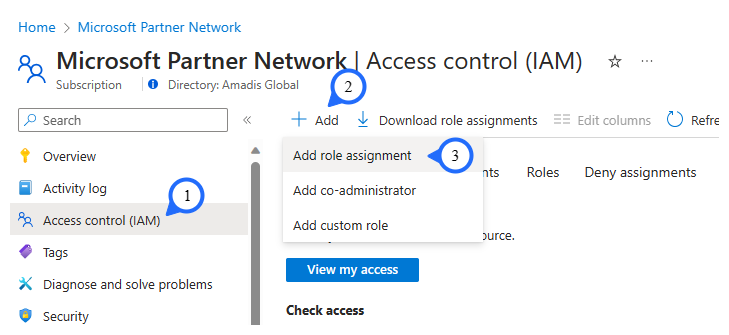
- Azure Portal → Subscriptions → select the target subscription → Access control (IAM) → + Add → Add role assignment.
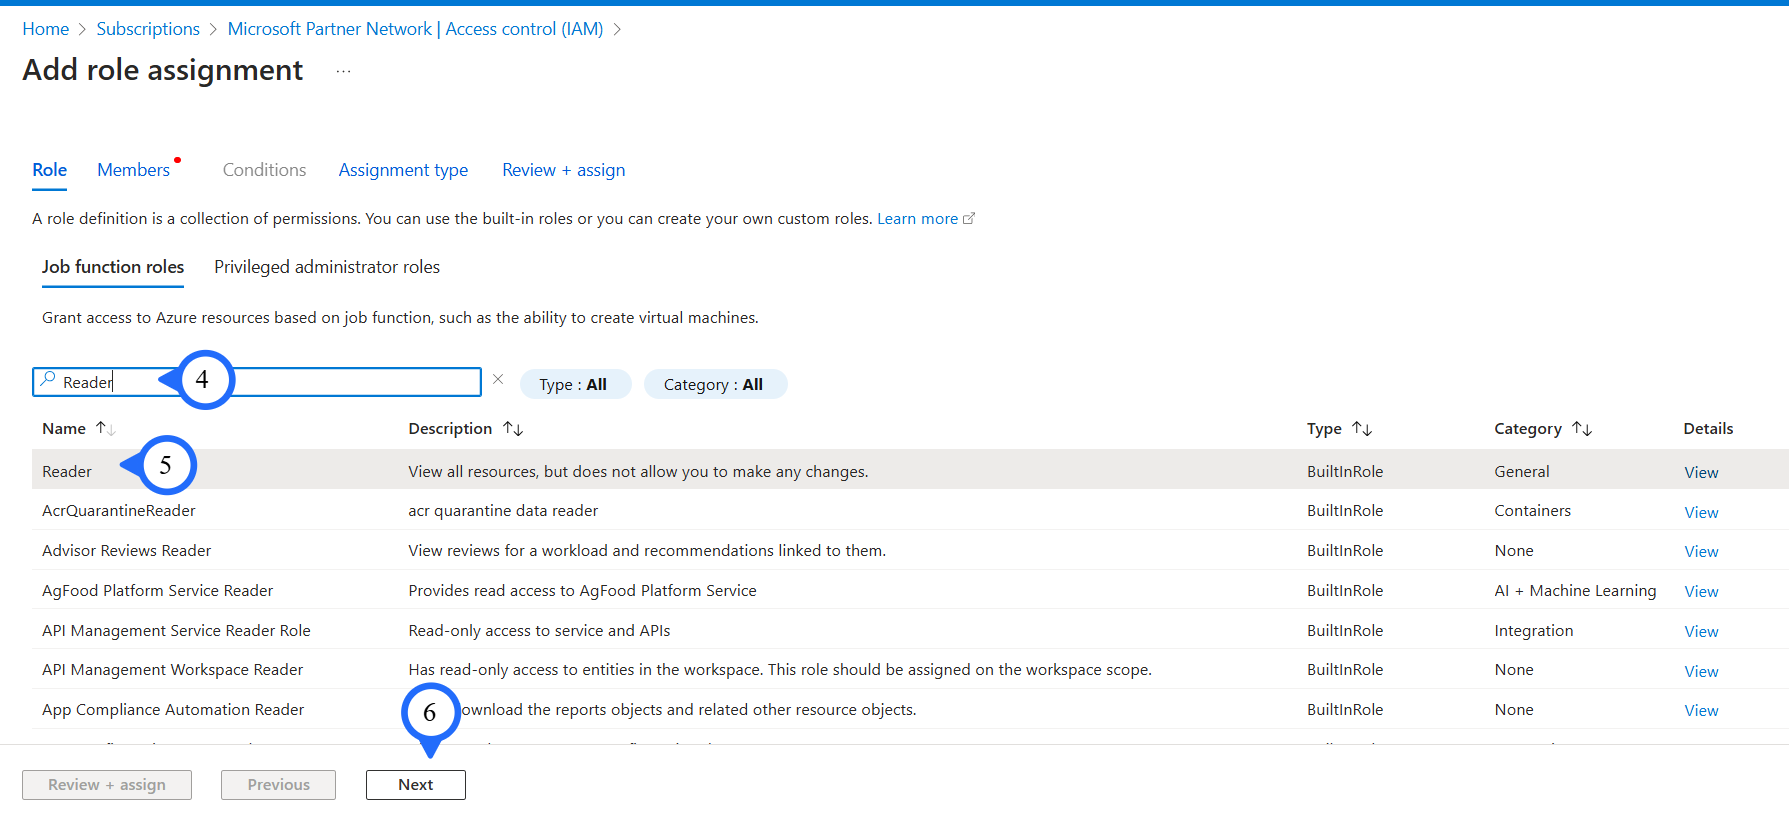
- On the Role tab, search for and select the role → Next.
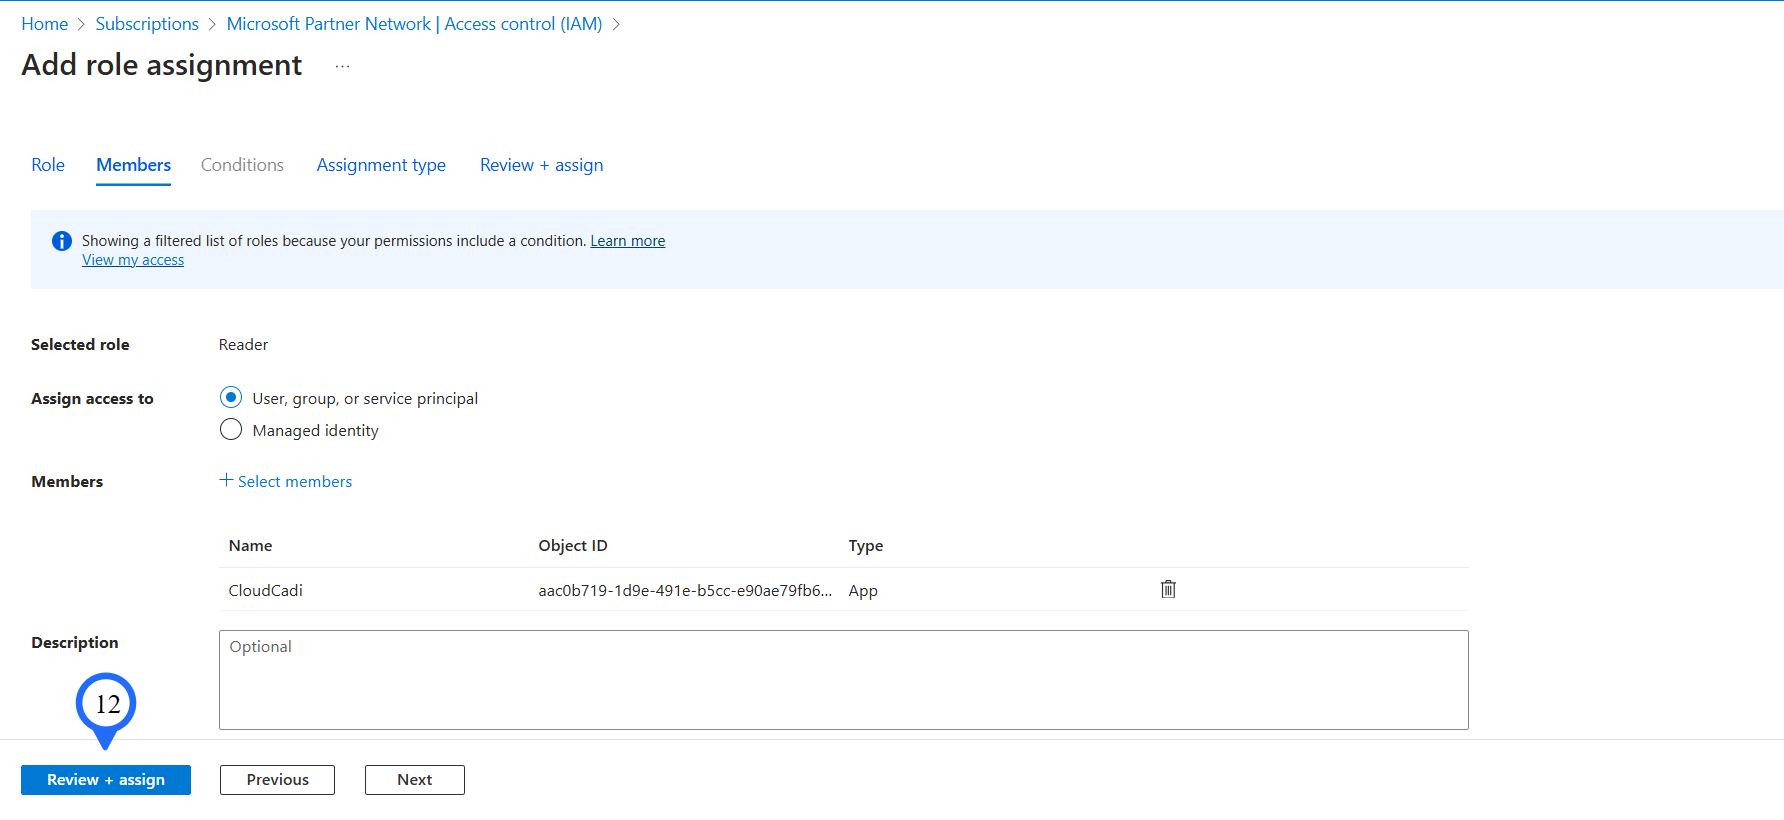
- On the Members tab, leave Assign access to on User, group, or service principal → + Select members → search for the app registration created above (e.g.
CloudCADI) → select it → Select.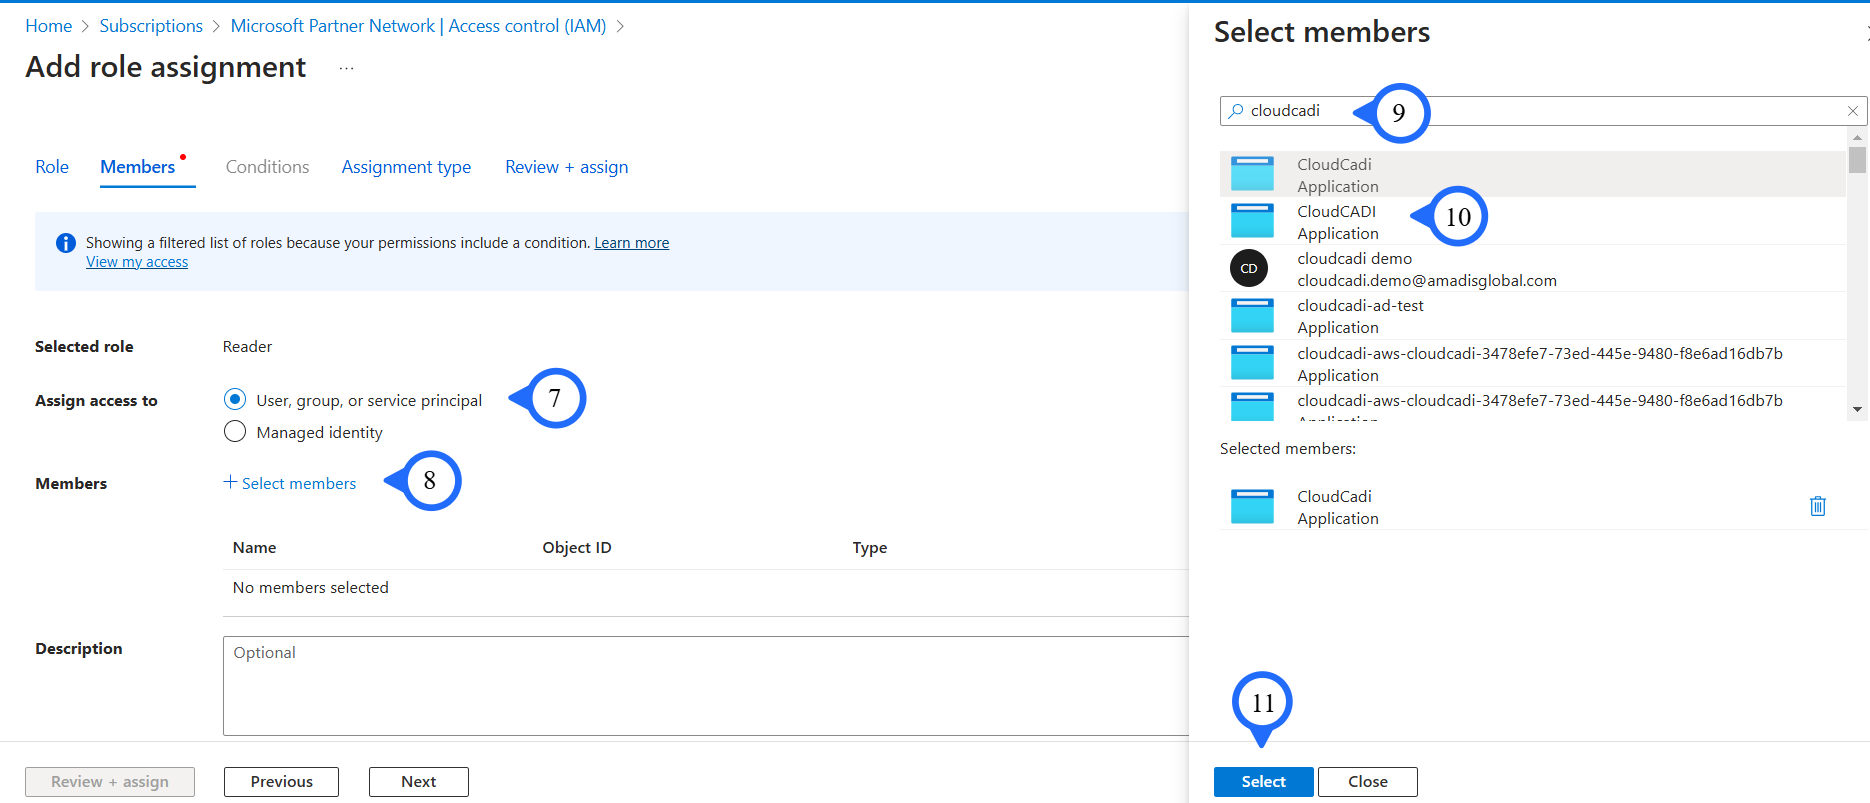
- Confirm the service principal is listed under Members → Review + assign.
Step 3 - User-Assigned Managed Identity + RBAC
-
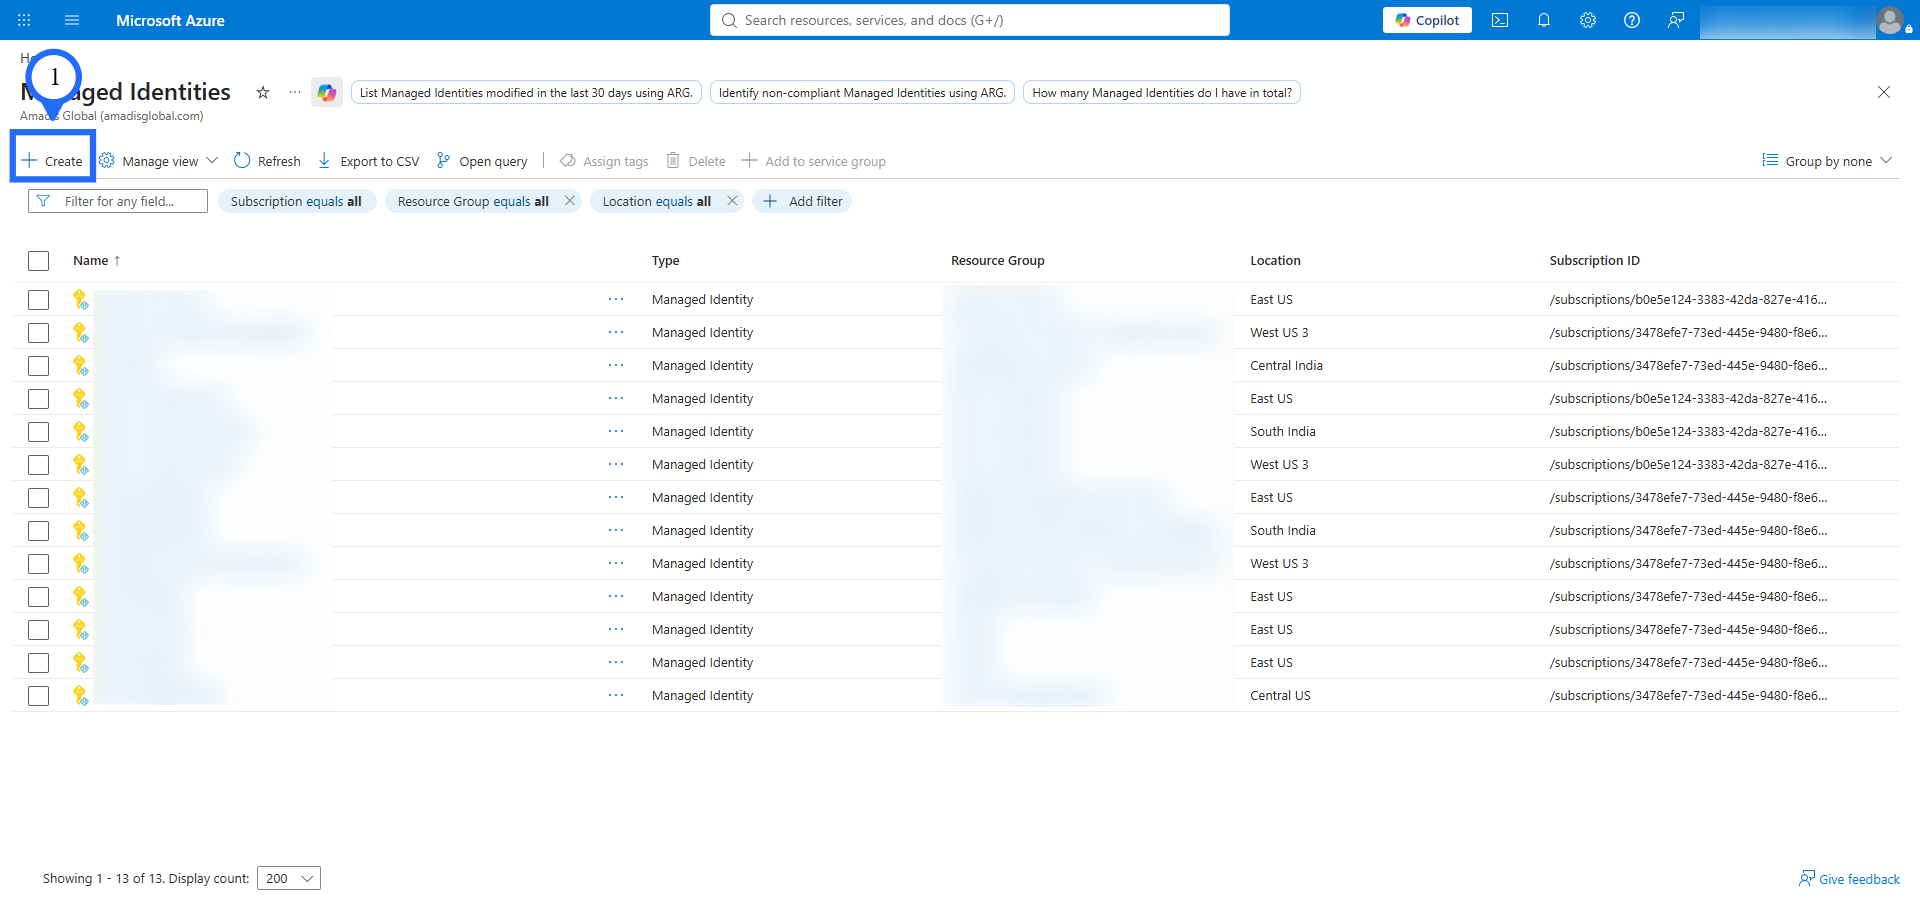
Azure Portal -> search Managed Identities → Create.
-
Pick the target resource group and region, name it (e.g.
CloudCADI-deploy-identity) → Review + create → Create.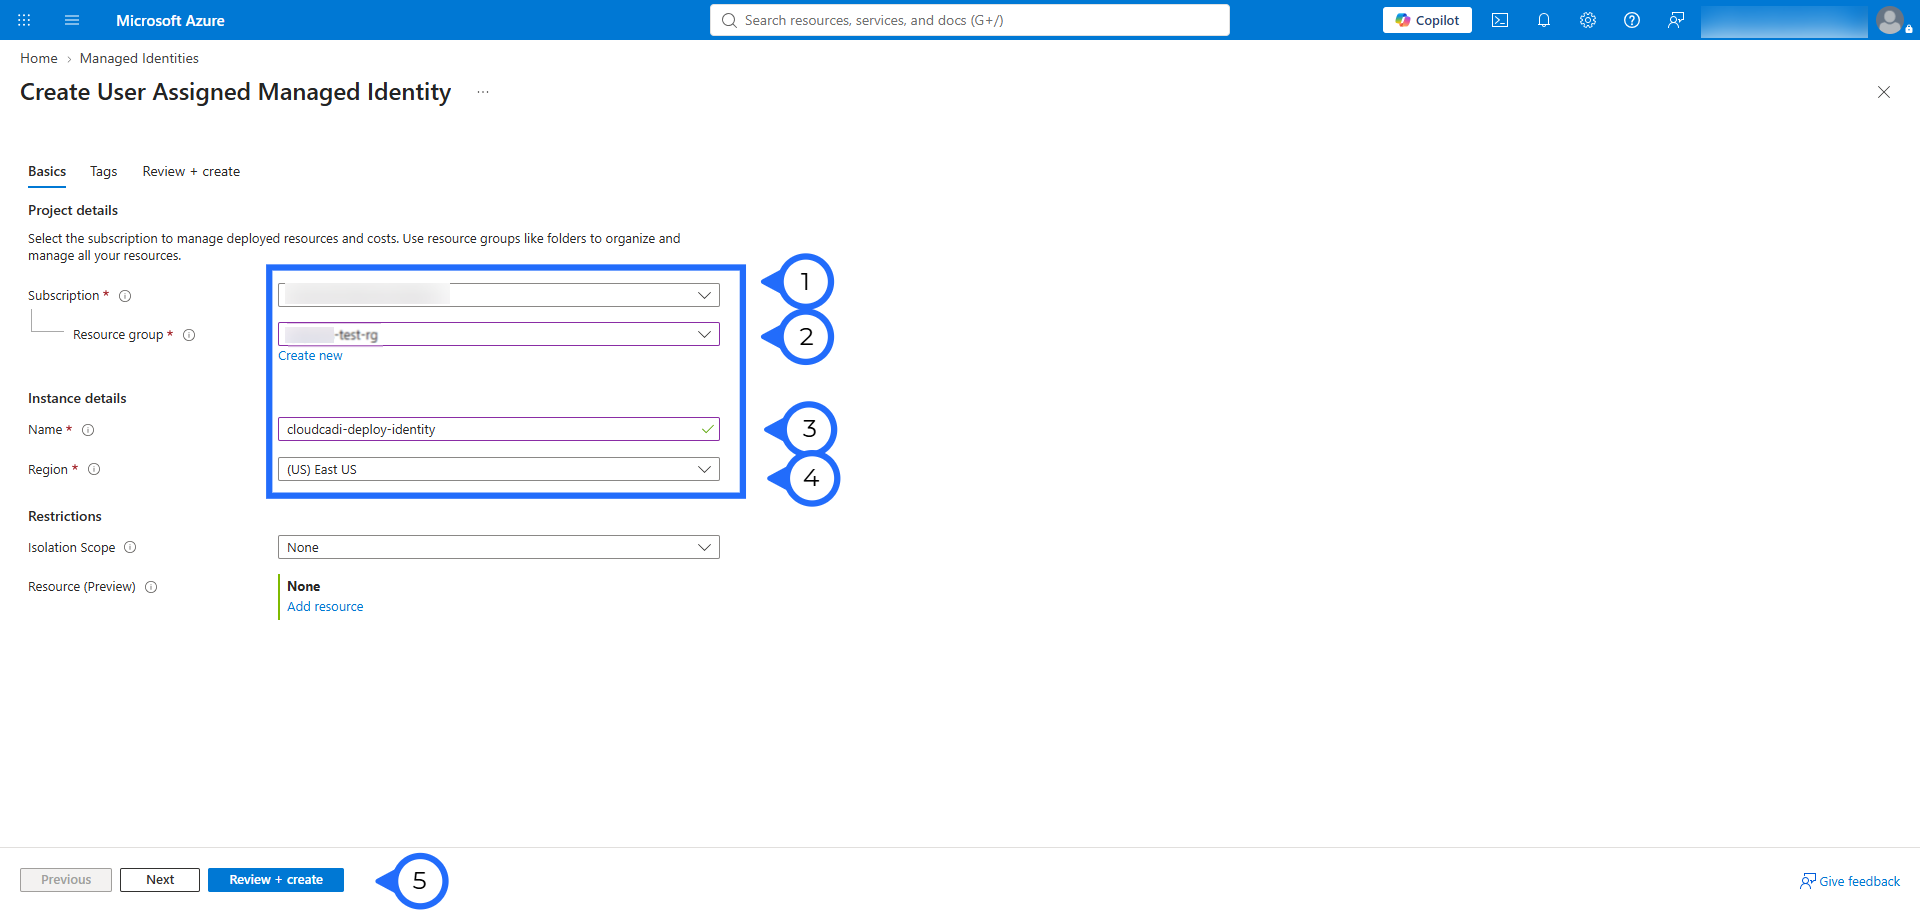
-
Once created, copy its Resource ID (Overview page → JSON view, or the "Resource ID" shown at the top) - this is your
managedIdentityparameter value.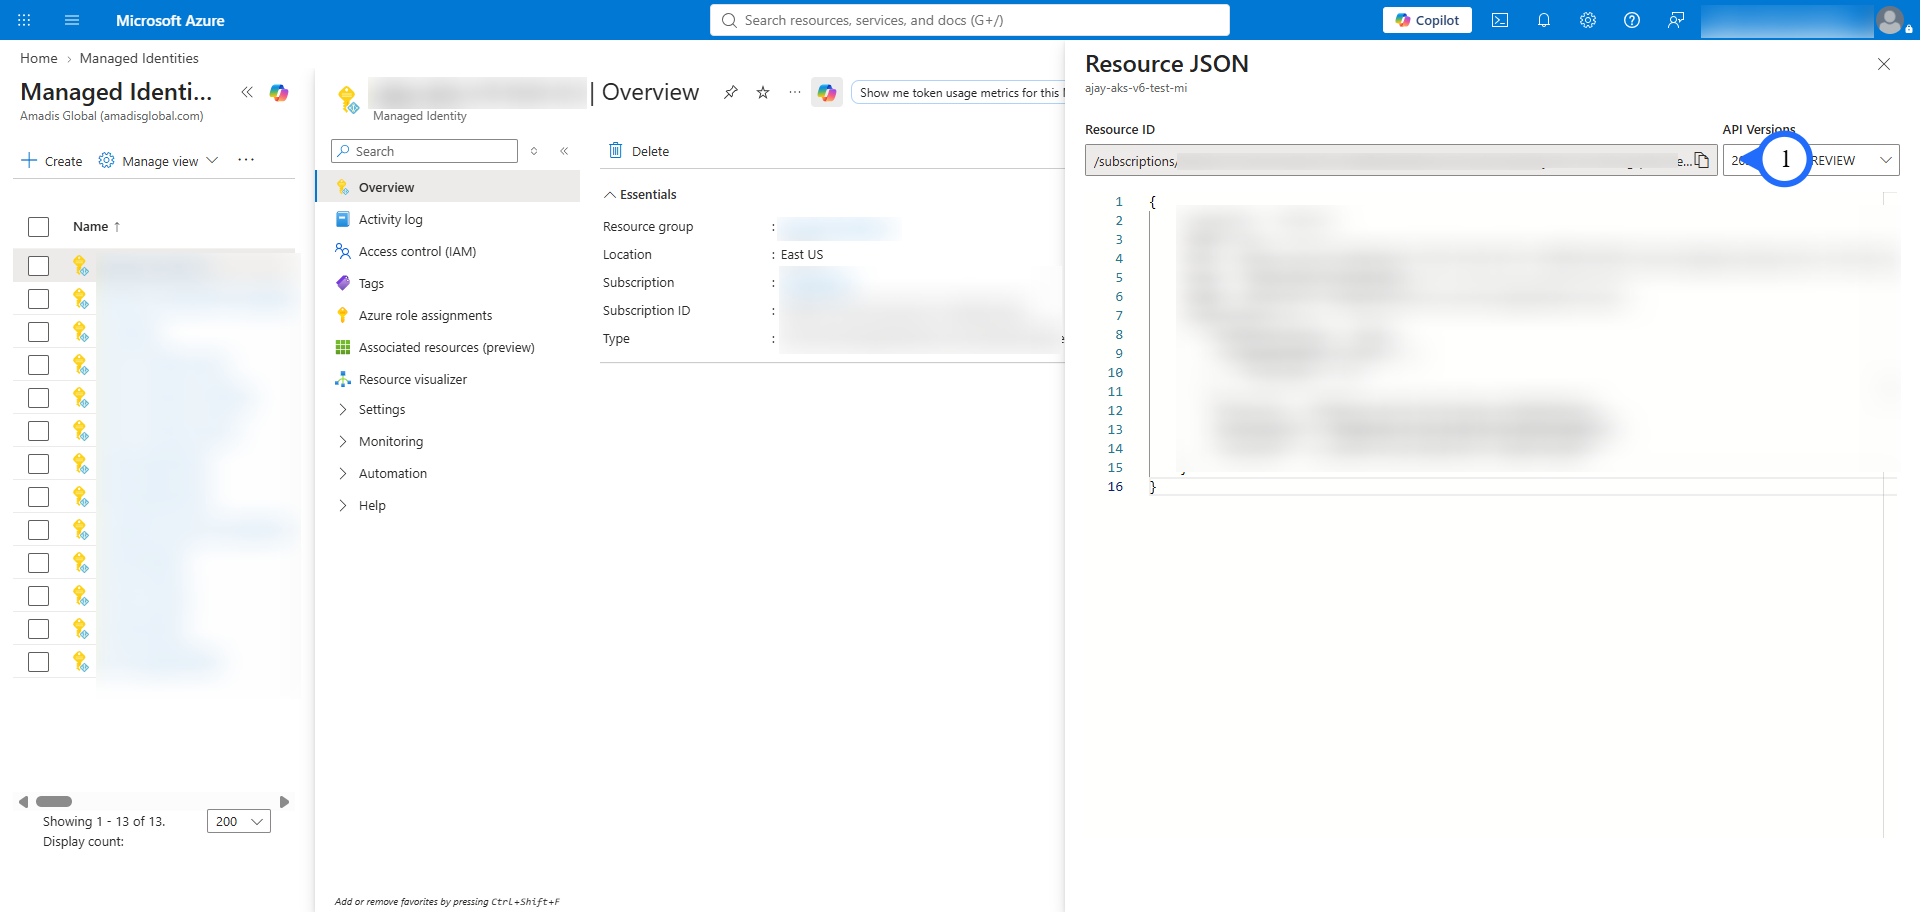
-
Go to the target resource group (the one you'll deploy CloudCADI into) → Access control (IAM) → Add role assignment.
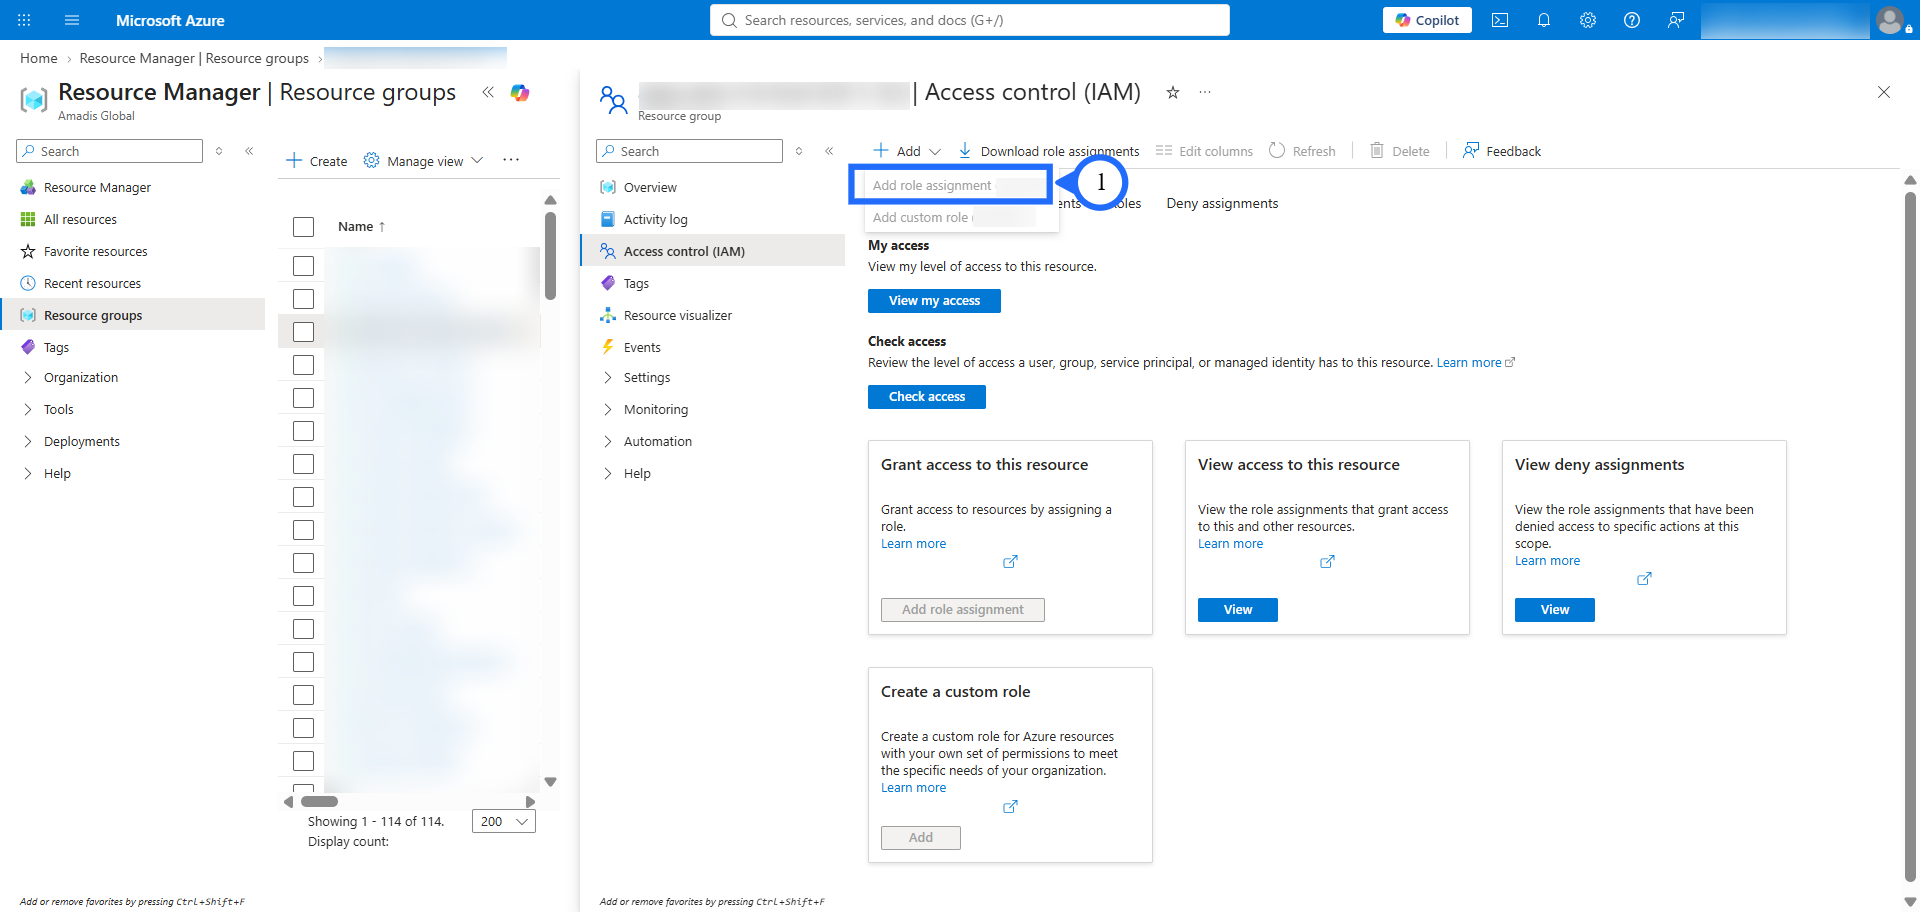
-
Assign Azure Kubernetes Service Contributor Role and Reader to the identity. Run through the same four sub-steps once per role:
- On the Role tab, search for the role name and select it → Next.
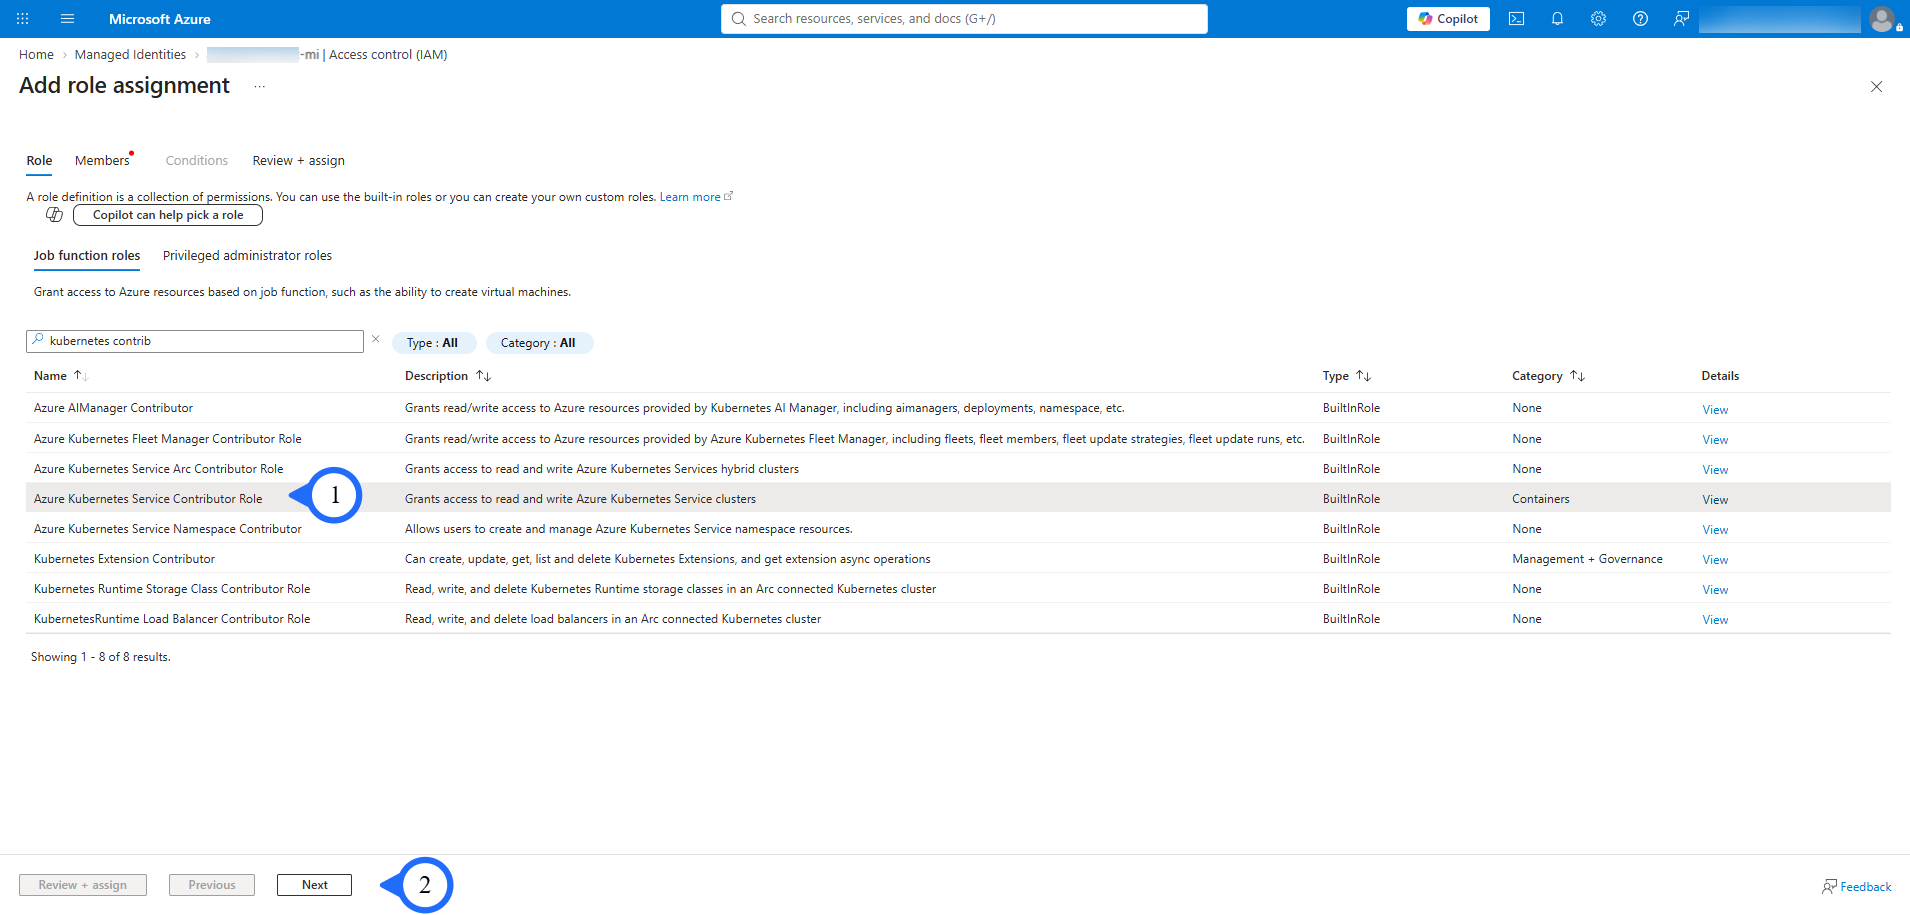
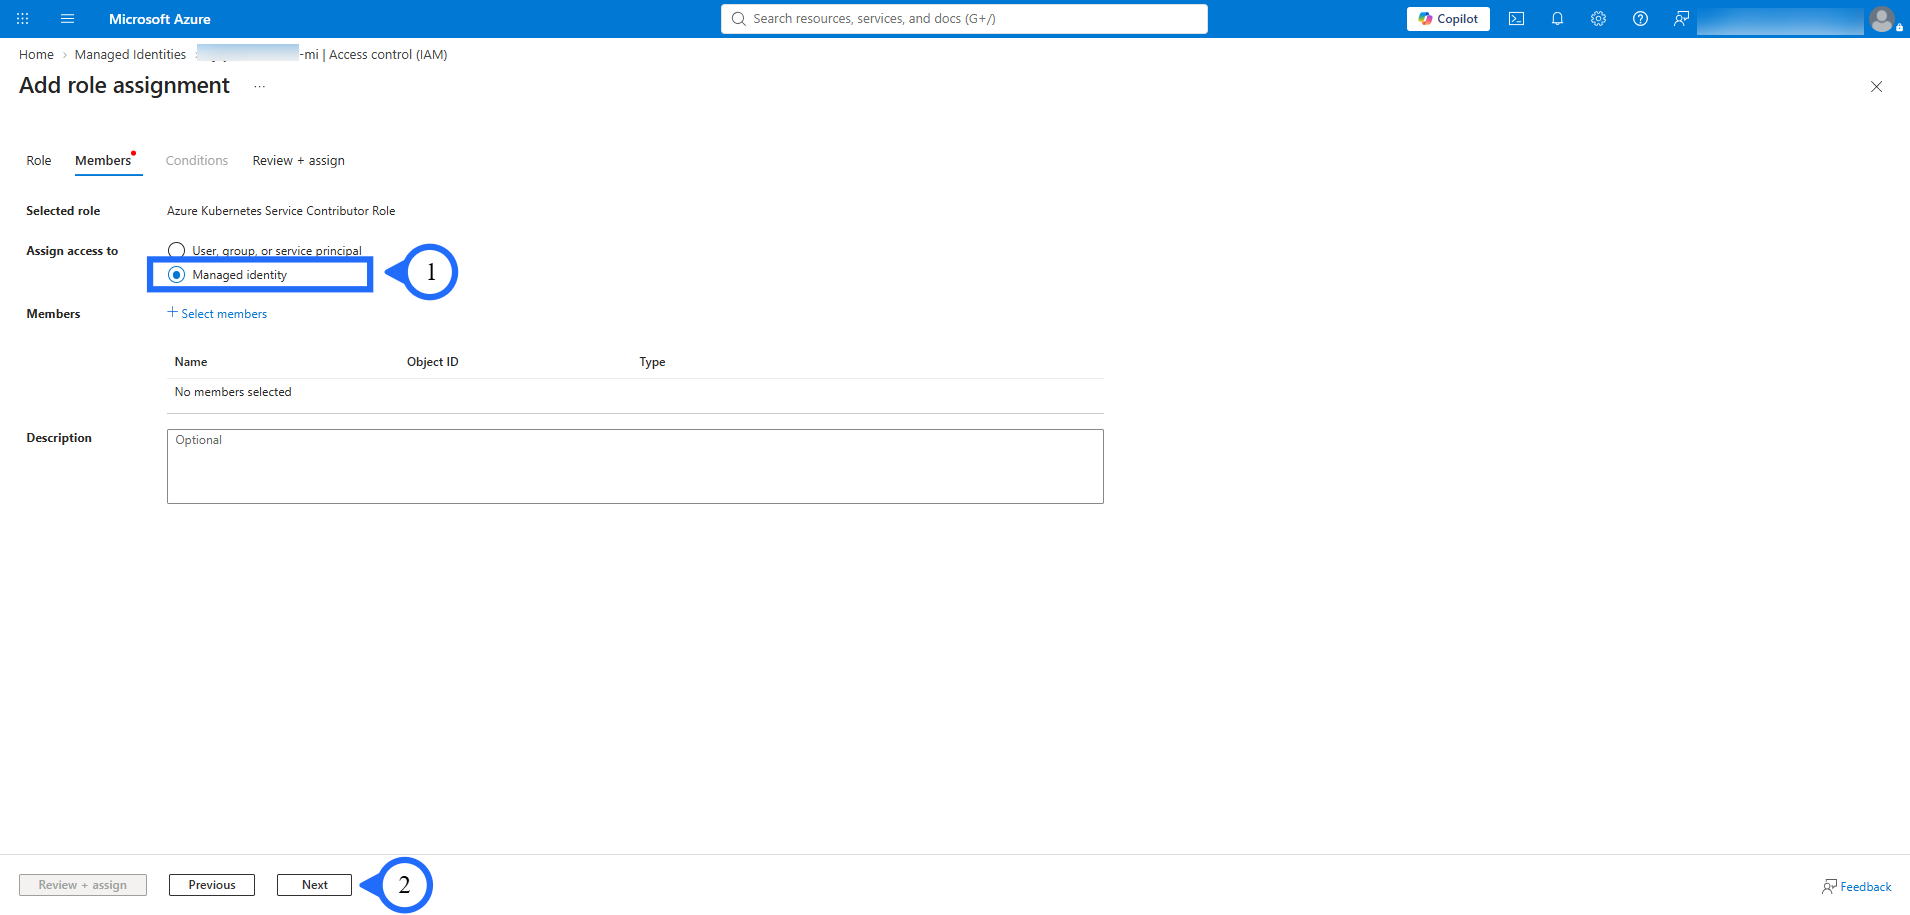
- On the Members tab, choose Managed identity → + Select members.
- In the Select managed identities panel, pick the Subscription, then select the identity created in step 1–3 above from the list → Select.
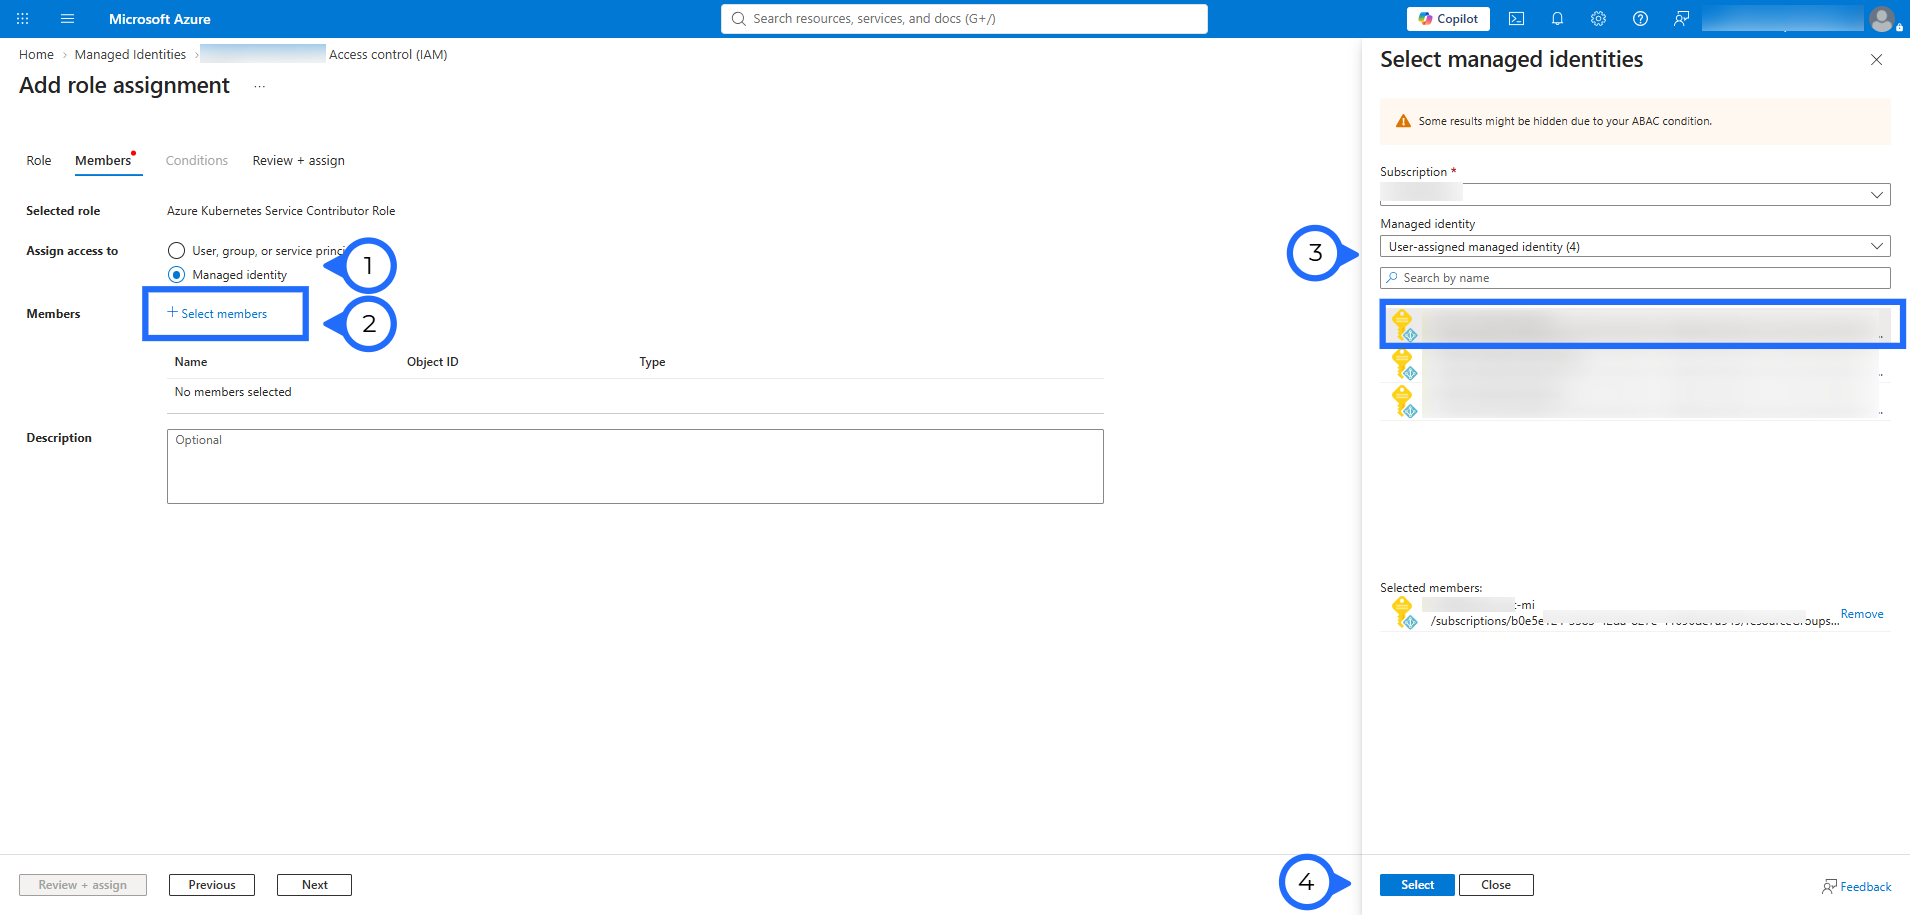
- Back on the Members tab, confirm the identity is listed → Review + assign.
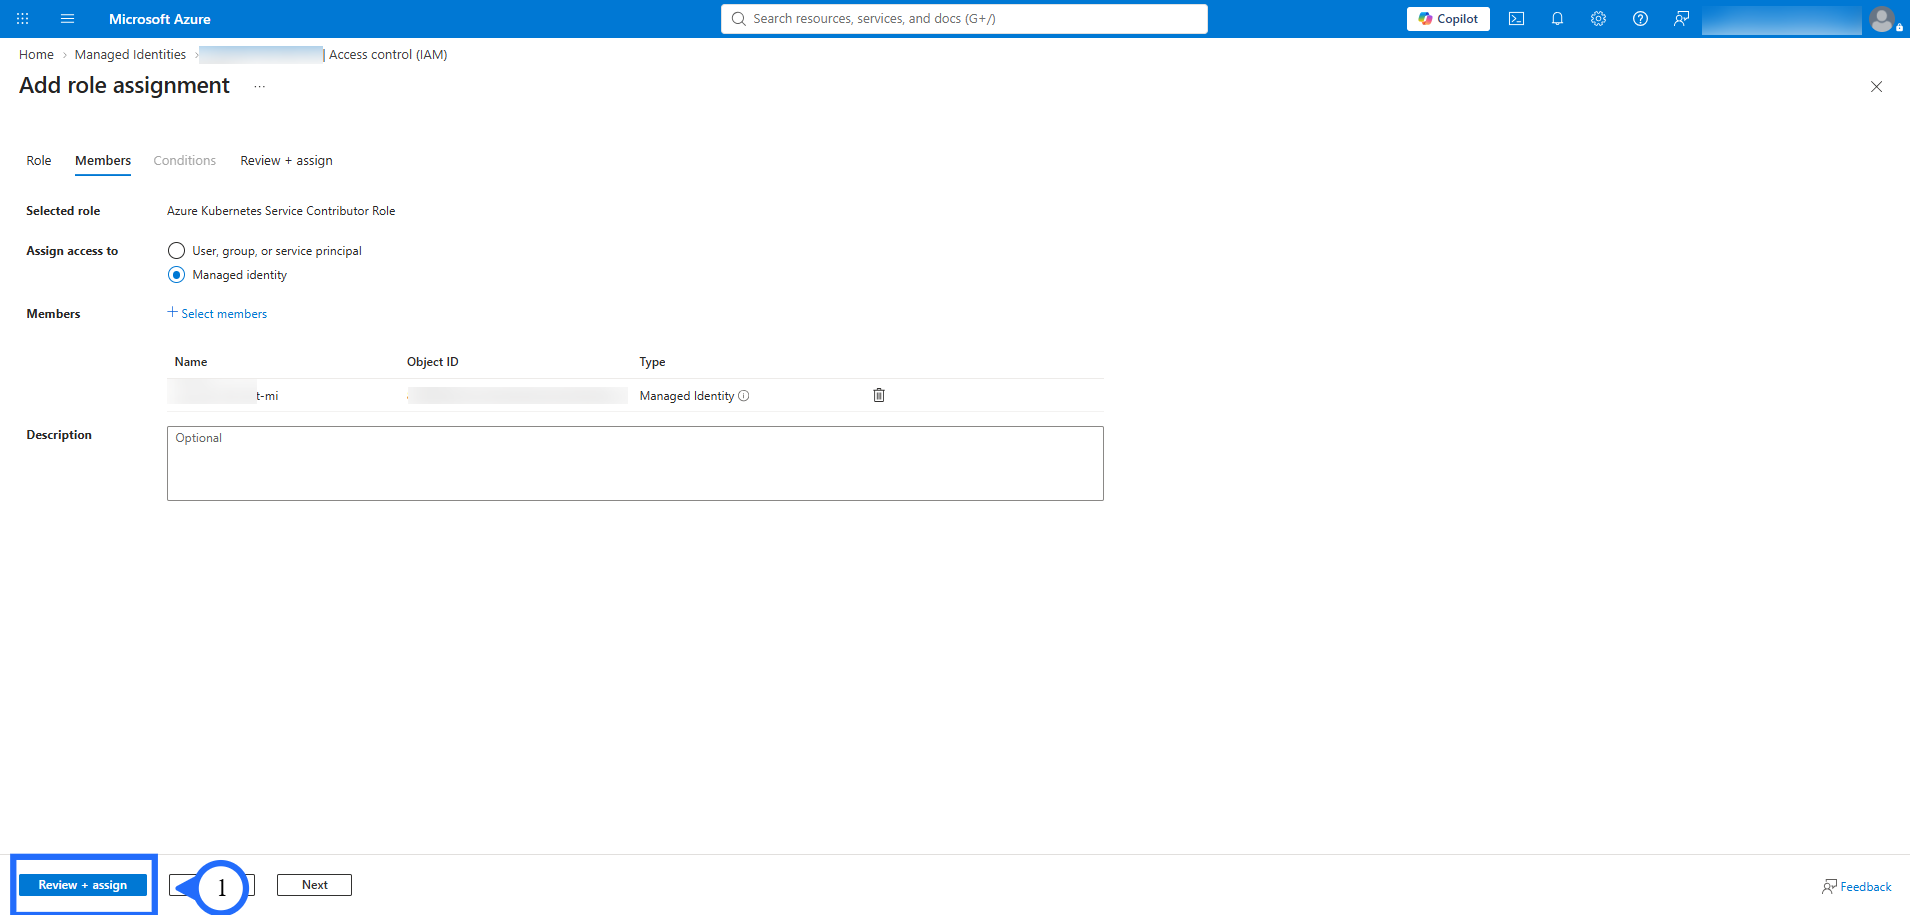
Repeat i–iv a second time for the other role - first pass for Azure Kubernetes Service Contributor Role, second pass for Reader. (See Deploy Identity Permissions below for why exactly these two roles.)
- On the Role tab, search for the role name and select it → Next.
-
Wait ~5 minutes for the role assignment to propagate before deploying.
Step 4 - Custom Deployment (ARM Template)
-
Azure Portal search bar → "deploy a custom template".
-
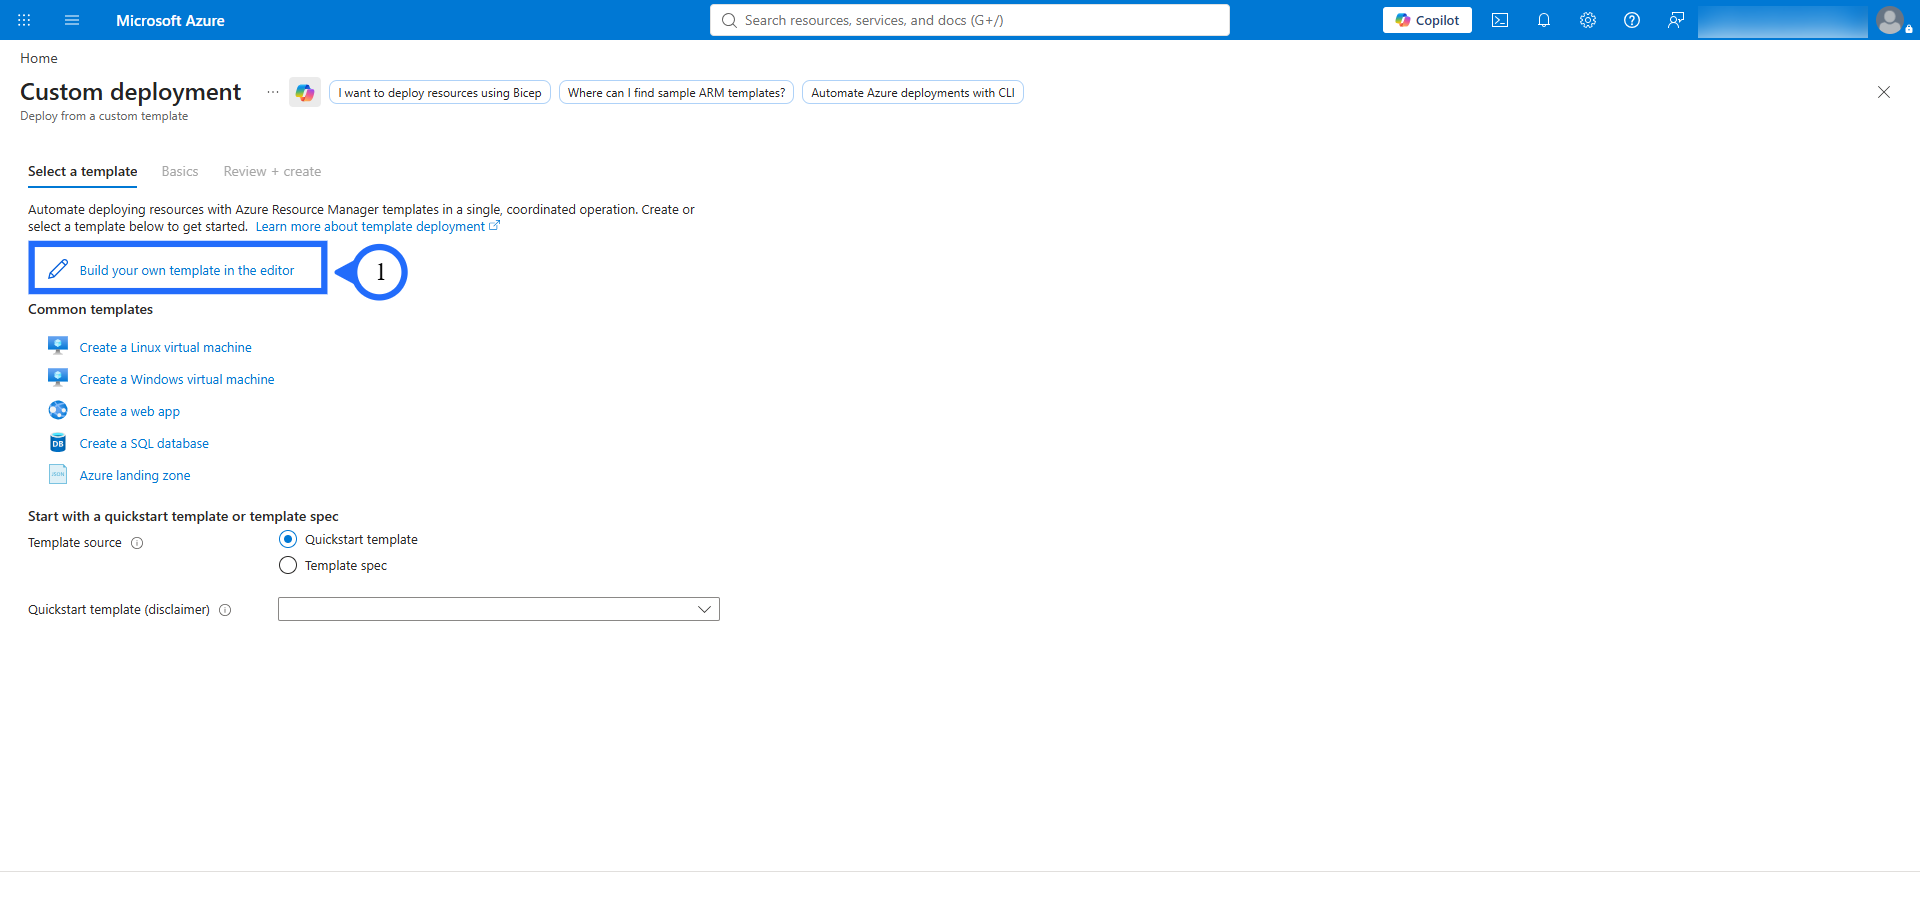
On the Select a template tab, choose Build your own template in the editor.
-
On the Edit template page, either paste in the CloudCADI ARM template JSON directly, or use Load file to upload it from disk, then Save. Verify the key parameters are present:
clientId,tenantId,objectId,managedIdentity,acrUsername,acrPassword.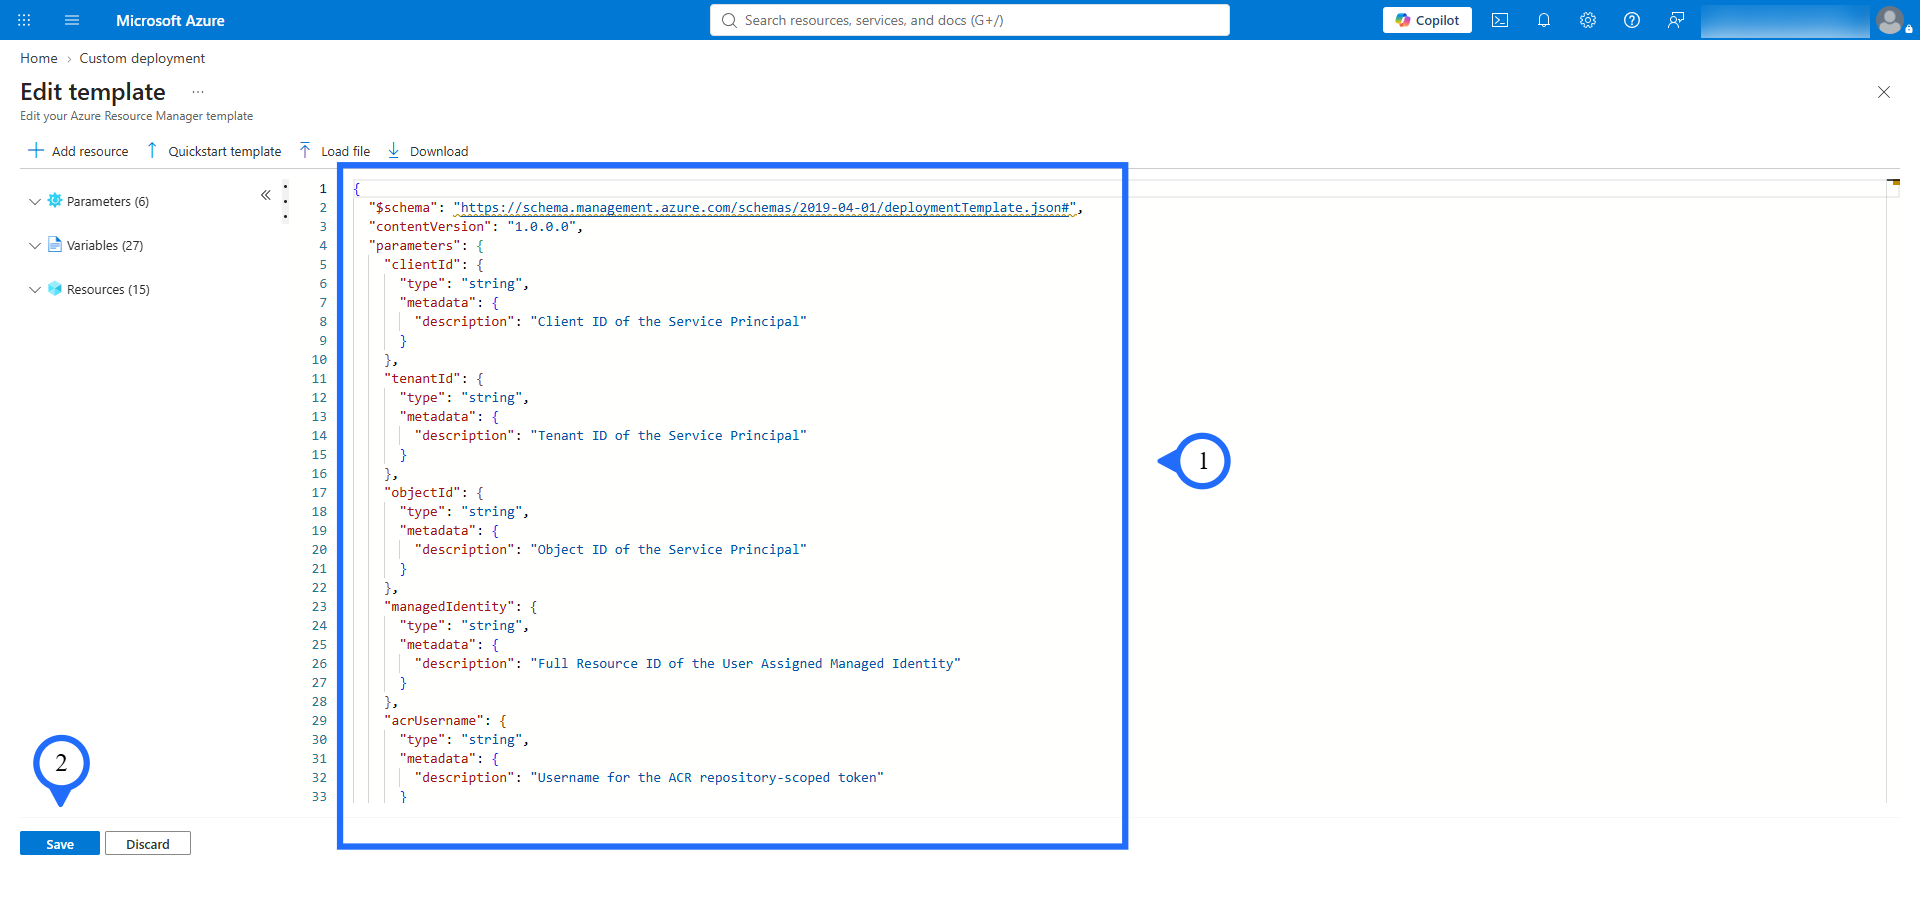
-
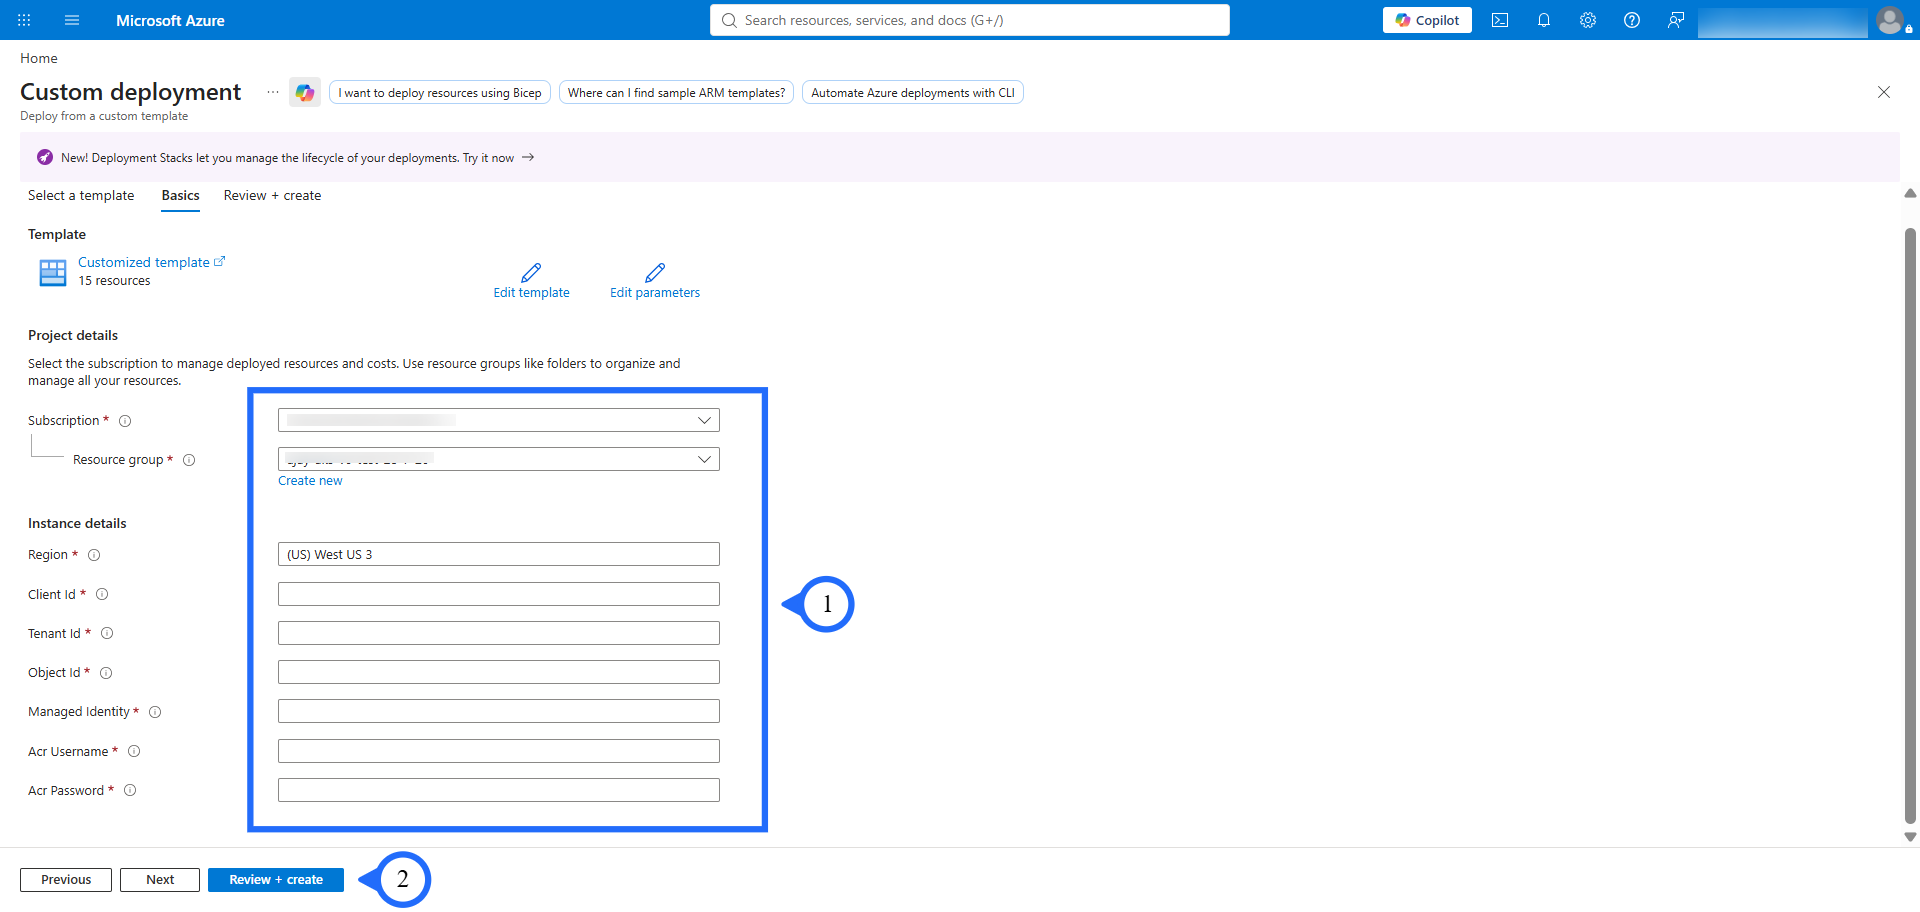
On the Basics tab, fill in:
Field Value Subscription Target subscription Resource group Select existing, or Create new Region Deployment region (e.g. Central India) Client Id Service principal client ID (Step 2) Tenant Id Service principal tenant ID (Step 2) Object Id Service principal object ID (Step 2) Managed Identity Resource ID of the User-Assigned Managed Identity (Step 3) Acr Username ACR repository-scoped token username Acr Password ACR repository-scoped token password -
Next (or straight to Review + create) → Azure validates the template and parameters → Create once validation passes.
-
Once all resources are created successfully, go to Outputs and use the
frontendUrlfield to access the application.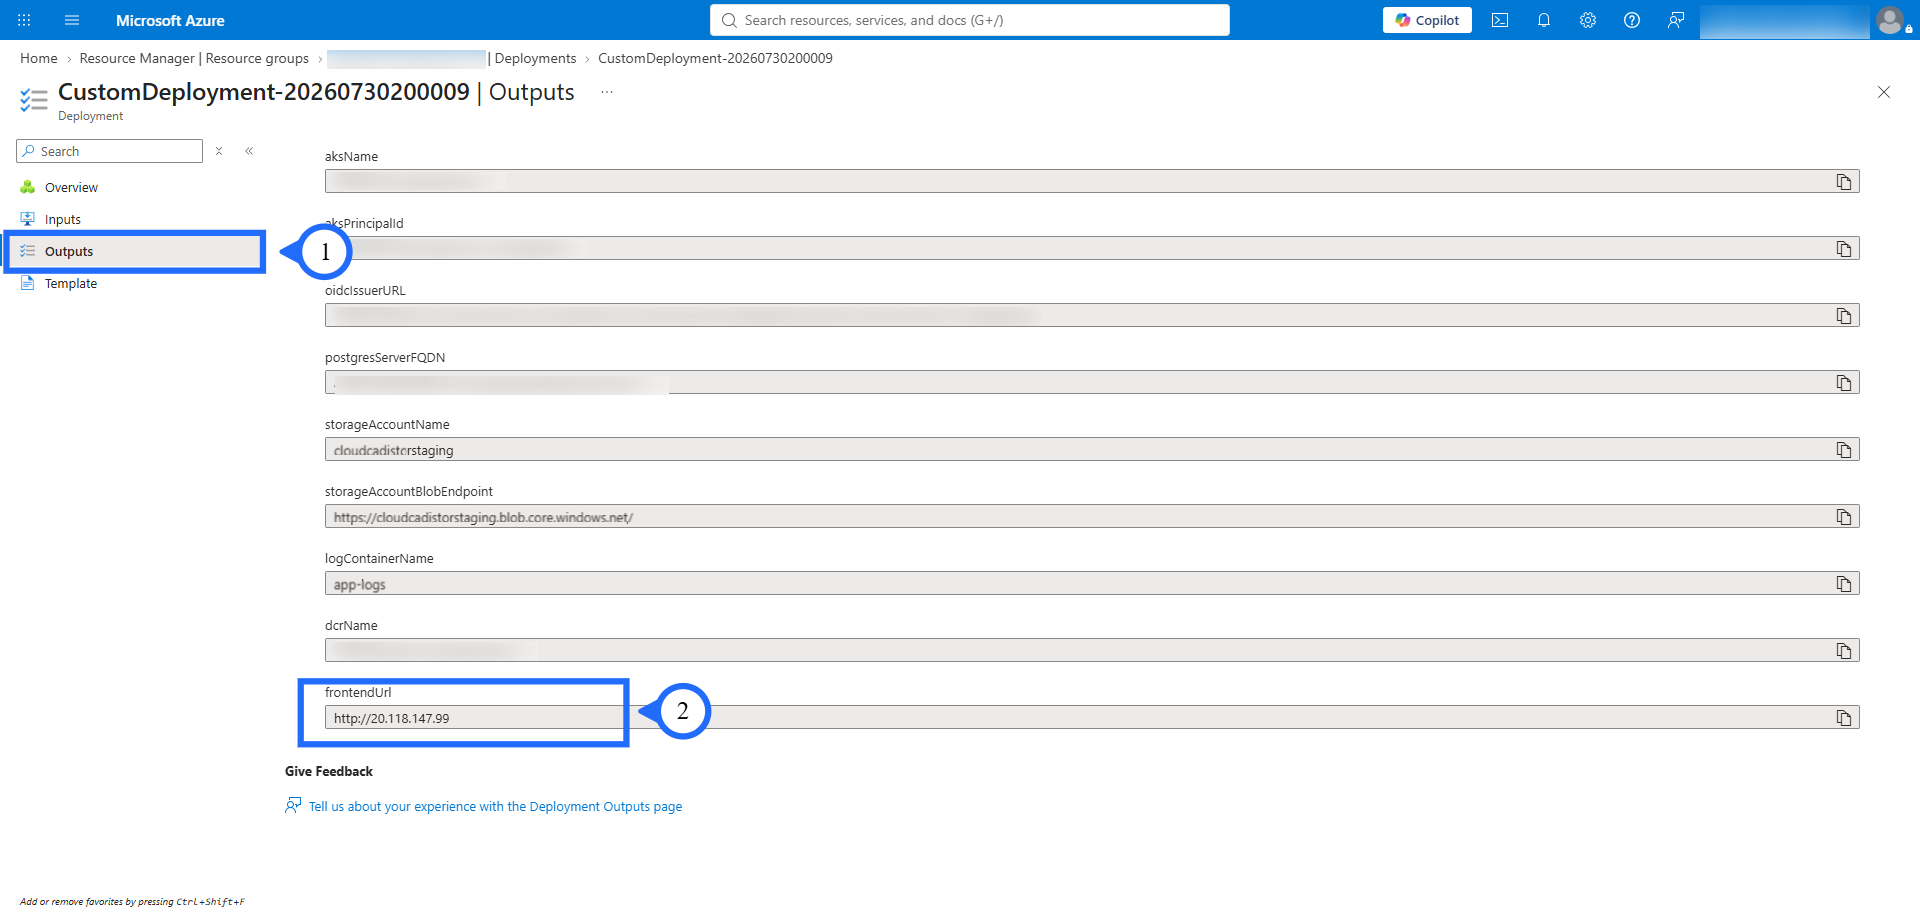
Step 5 - Federated Credential Setup (Azure Portal)
-
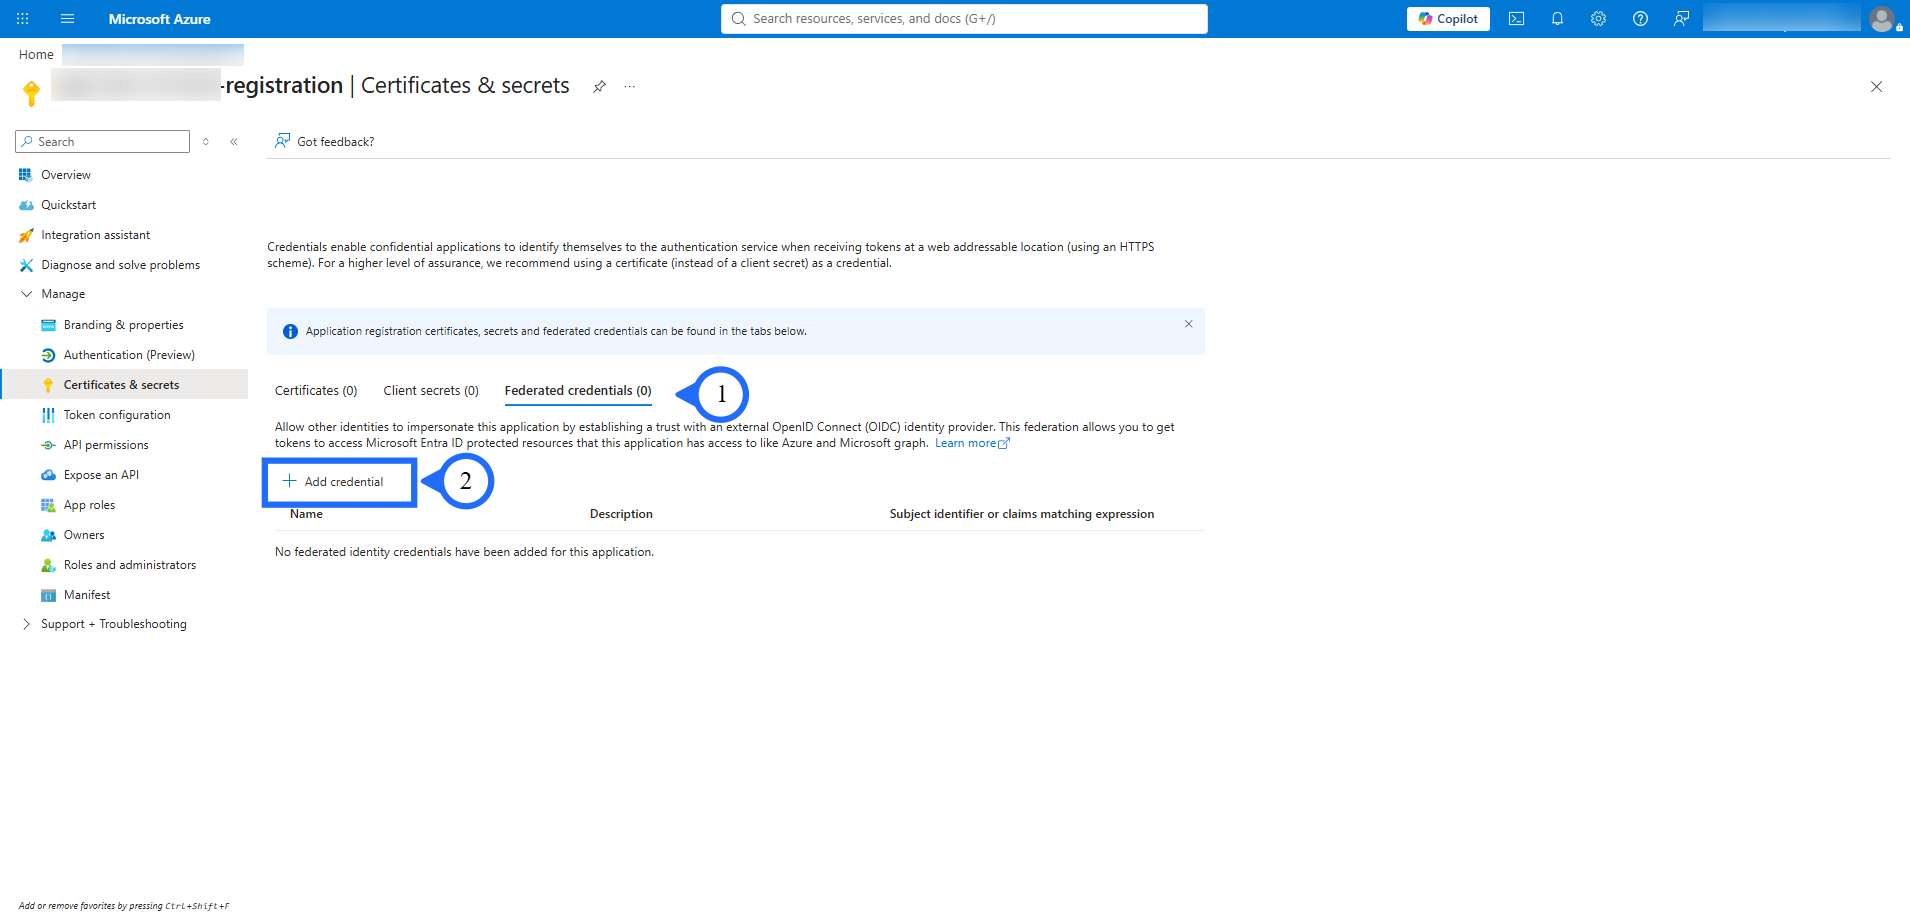
Open the App Registration: Azure Portal → search "App registrations" → select your app (the one matching the
clientIdused in the template). -
Go to Certificates & secrets → Federated credentials tab → + Add credential.
-
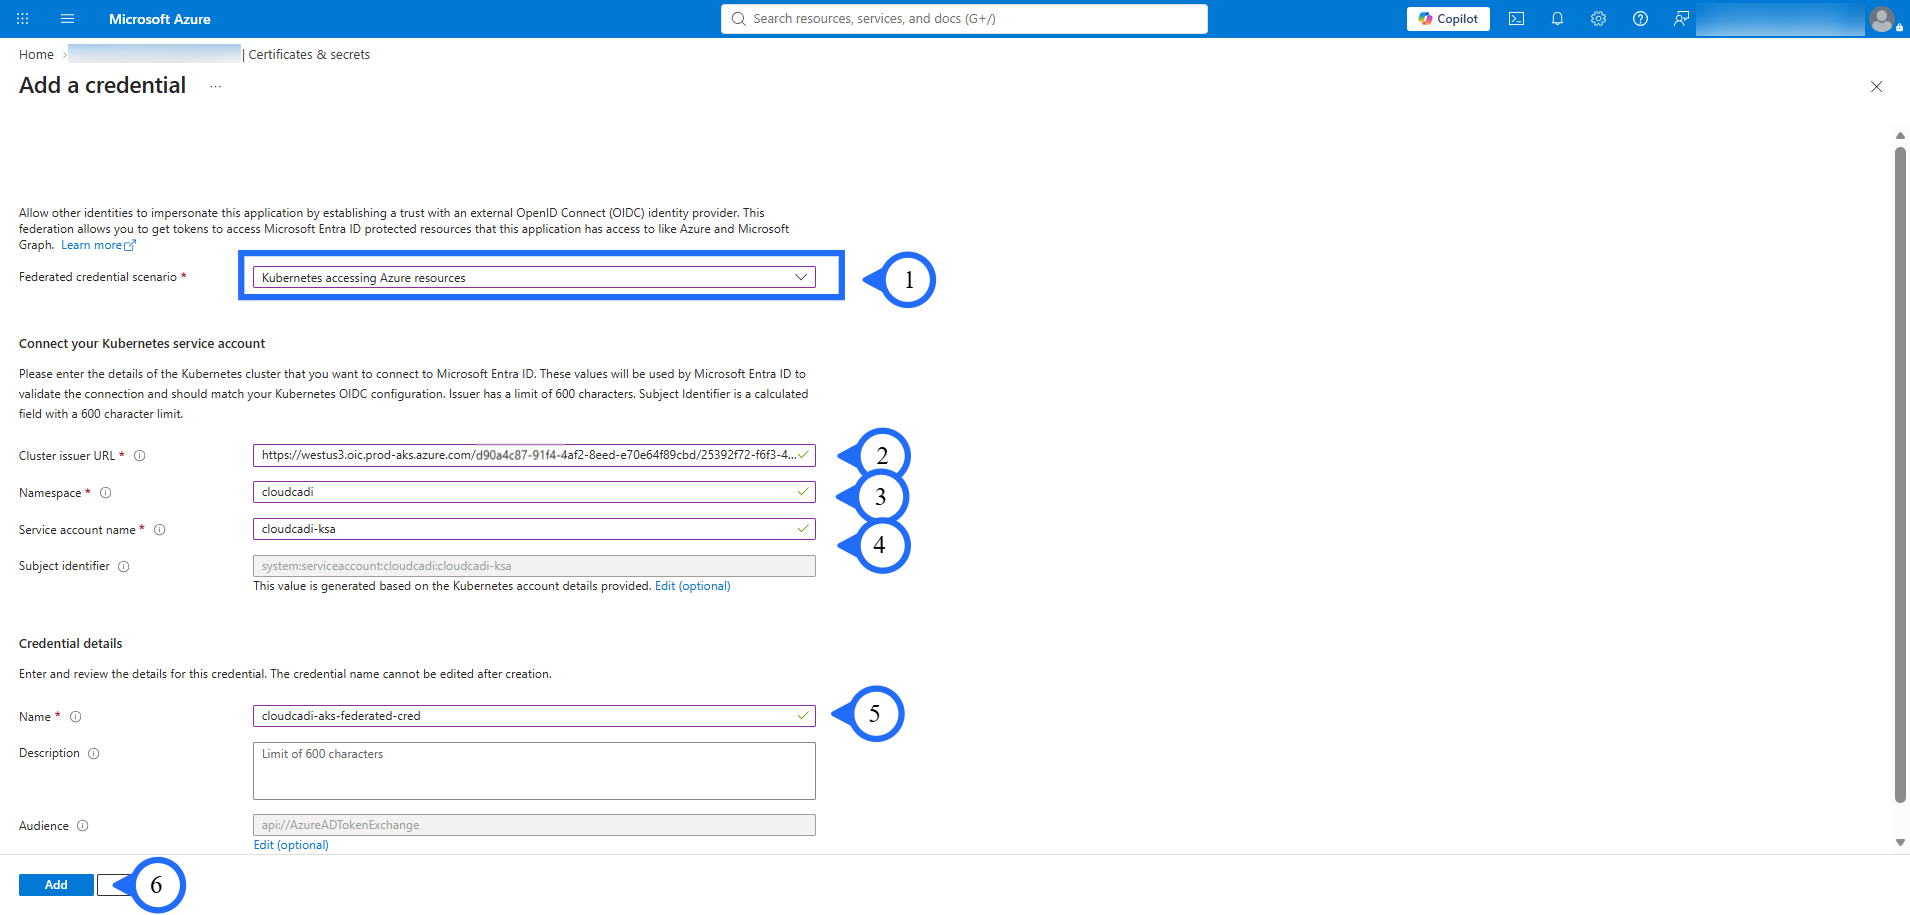
In the Add a credential pane, fill in:
- Federated credential scenario: Kubernetes accessing Azure resources
- Cluster issuer URL -
oidcIssuerURLfrom the deployment output - Namespace:
CloudCADI - Service account name:
CloudCADI-ksa - Name: e.g.
CloudCADI-aks-federated-cred
Then click Add.
Architecture
- AKS Contributor — run az aks command invoke
- Reader — resolve the Load Balancer / Public IP
- Manual — ARM template steps, customer-run
- AKS (Kubernetes)
- PostgreSQL (Flexible Server)
- Azure Container Registry
- OIDC via Microsoft Entra ID