Deploying CloudCADI on GCP
CloudCADI deploys into the user's own Google Cloud project using Google Cloud Infrastructure Manager. The deployment uses a Terraform configuration stored as a ZIP file in a Google Cloud Storage (GCS) bucket.
Infrastructure Manager executes the Terraform configuration, which provisions VPC + GKE + Cloud SQL PostgreSQL + Workload Identity + CloudCADI Helm deployment.
Deployment Flow
- Upload the Terraform configuration ZIP file to a GCS bucket.
- Create a new deployment in Google Cloud Infrastructure Manager.
- Configure the Terraform source using the GCS ZIP file.
- Enter the required Terraform input values.
- Create the Infrastructure Manager deployment.
- Infrastructure Manager executes the Terraform configuration and provisions the required GCP resources.
- Verify the deployment and access the CloudCADI application using the deployment output.
Infrastructure Manager Deployment Walkthrough
This document describes the step-by-step procedure to deploy the CloudCADI application in Google Kubernetes Engine (GKE) using Google Cloud Infrastructure Manager.
Prerequisites
-
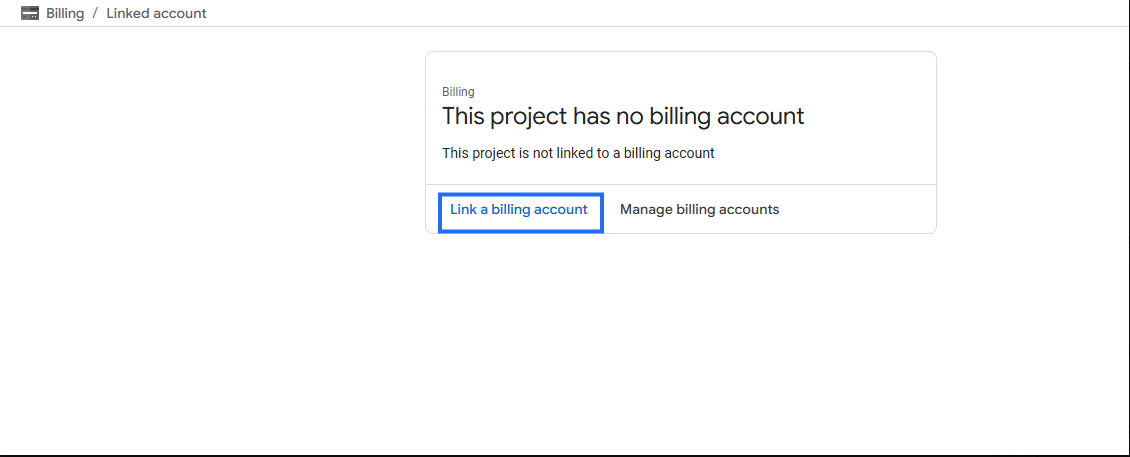
If the project is not linked to any billing account, link it to an existing billing account. If no billing account exists, create one first and then link it.
-
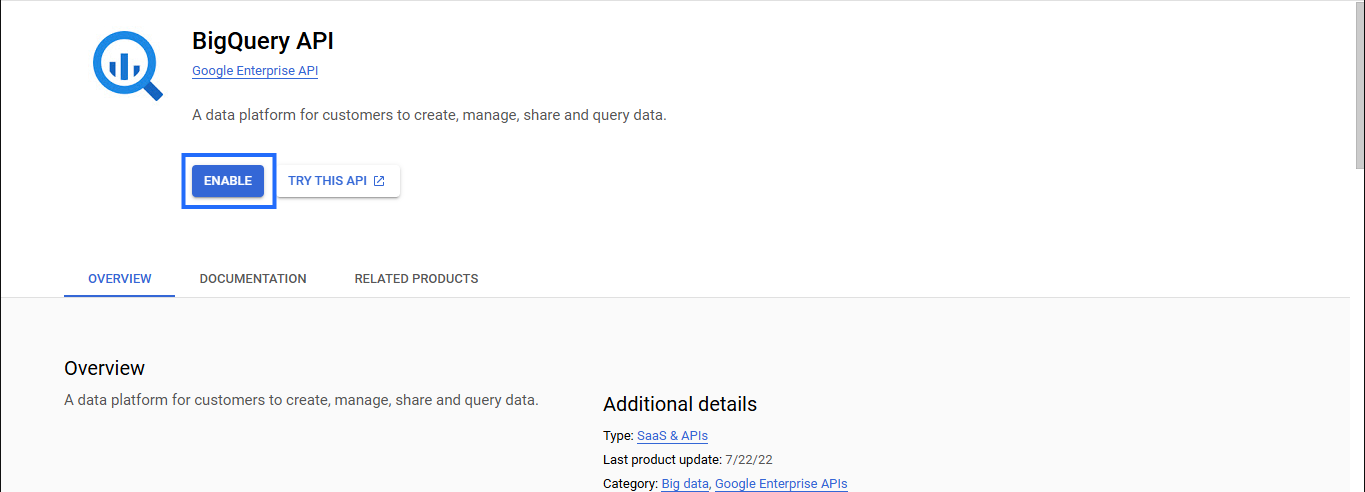
Enable the BigQuery API if it is not already enabled.
-
Cloud Billing and Pricing export to BigQuery lets you export detailed Google Cloud billing data (such as usage, cost estimates, and pricing data) automatically throughout the day to a BigQuery dataset that you specify.
- To enable and configure the export of Cloud Billing usage cost and pricing data to a BigQuery dataset, you need the following permissions:
- Billing Account Administrator role - for the target Cloud Billing account.
- BigQuery User role - for the Google Cloud project that contains the BigQuery dataset that will be used to store the Cloud Billing data.
- To enable and configure the export of Cloud Billing usage cost and pricing data to a BigQuery dataset, you need the following permissions:
-
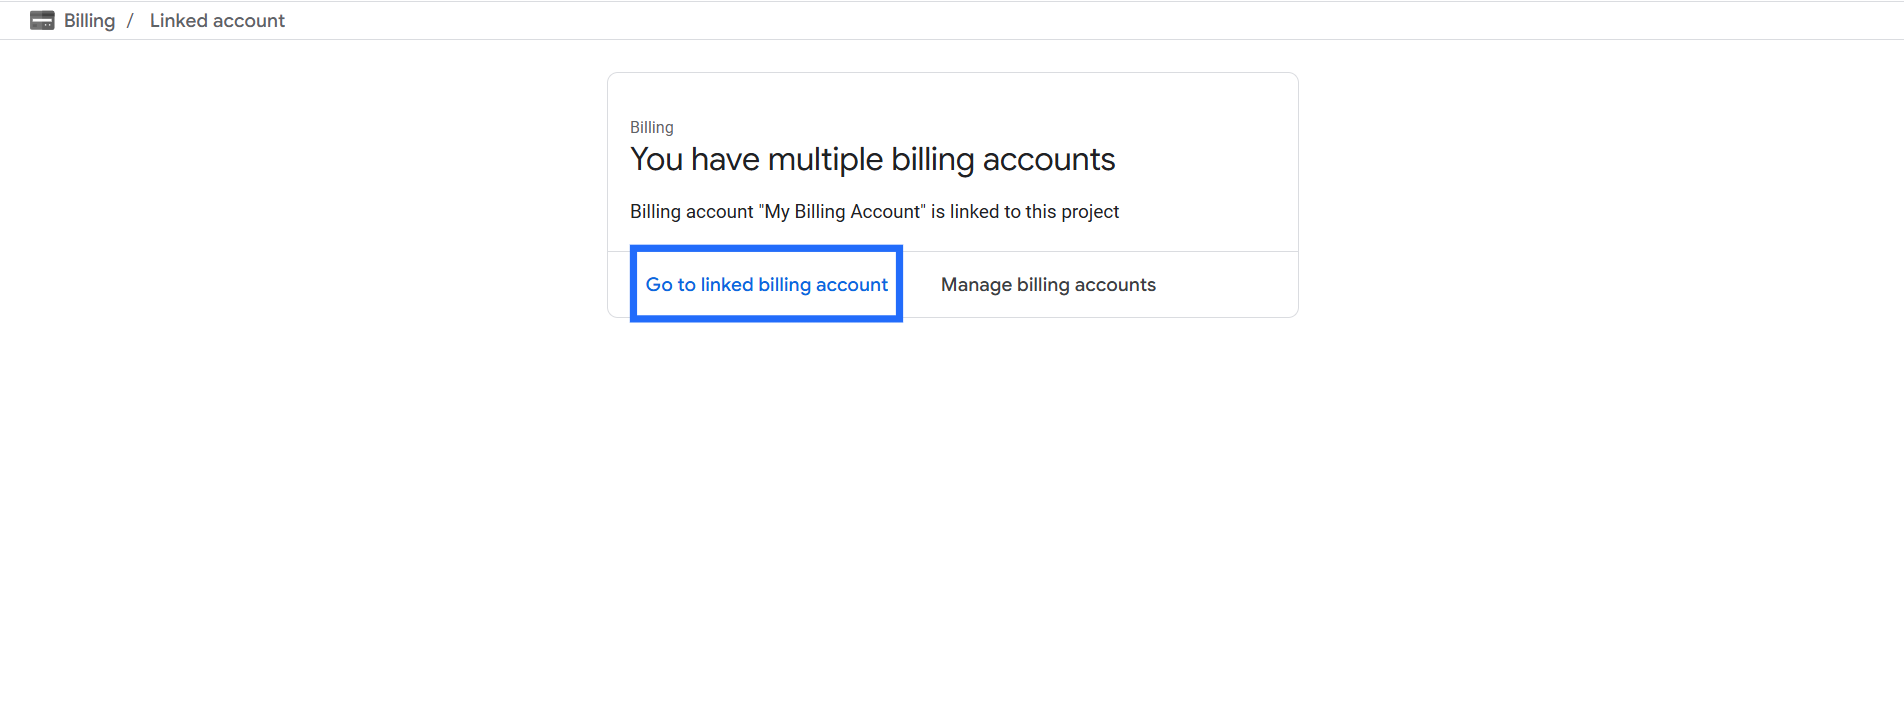
Open the Cloud Billing console for that project. Click Go to Linked Billing Account.
-
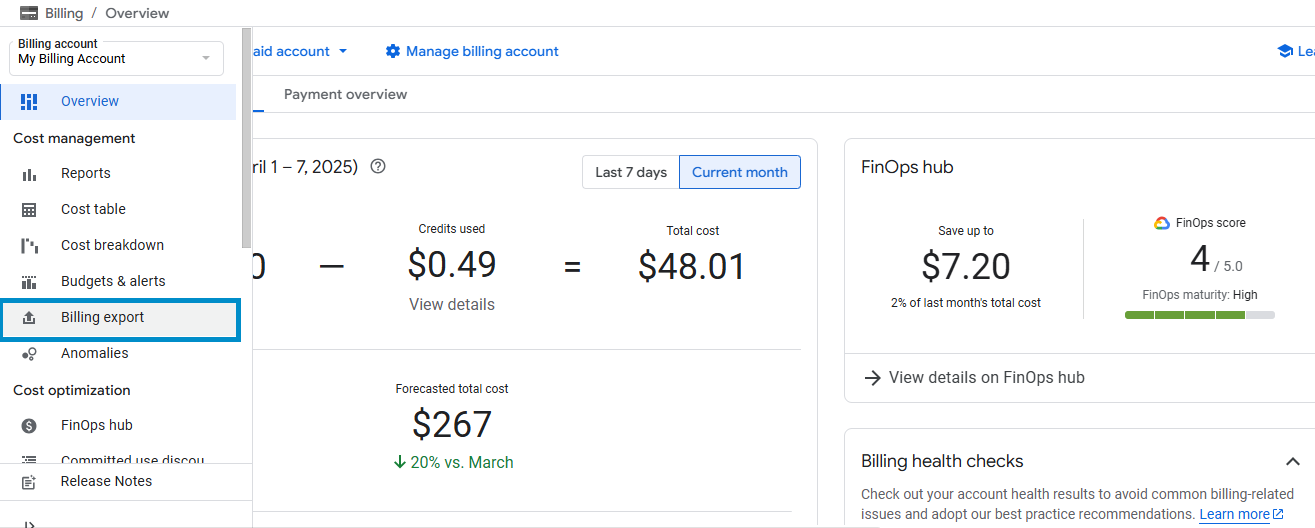
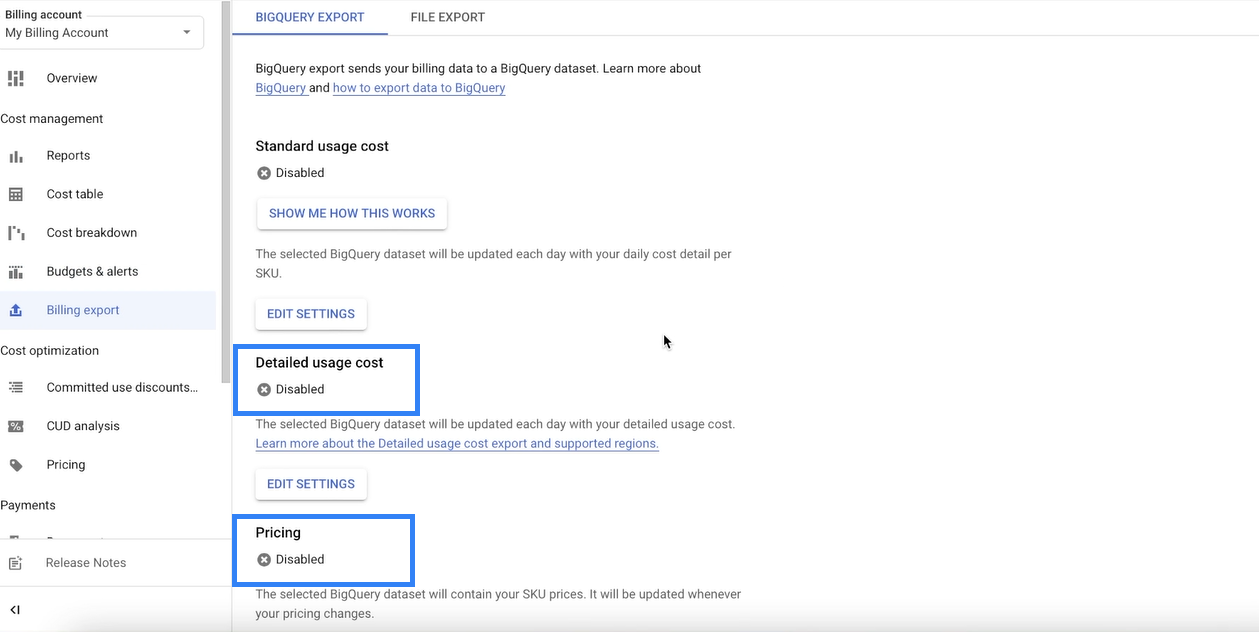
This will take you to the detailed billing account page for your Billing Account. Select Billing export from the Billing navigation menu.
-
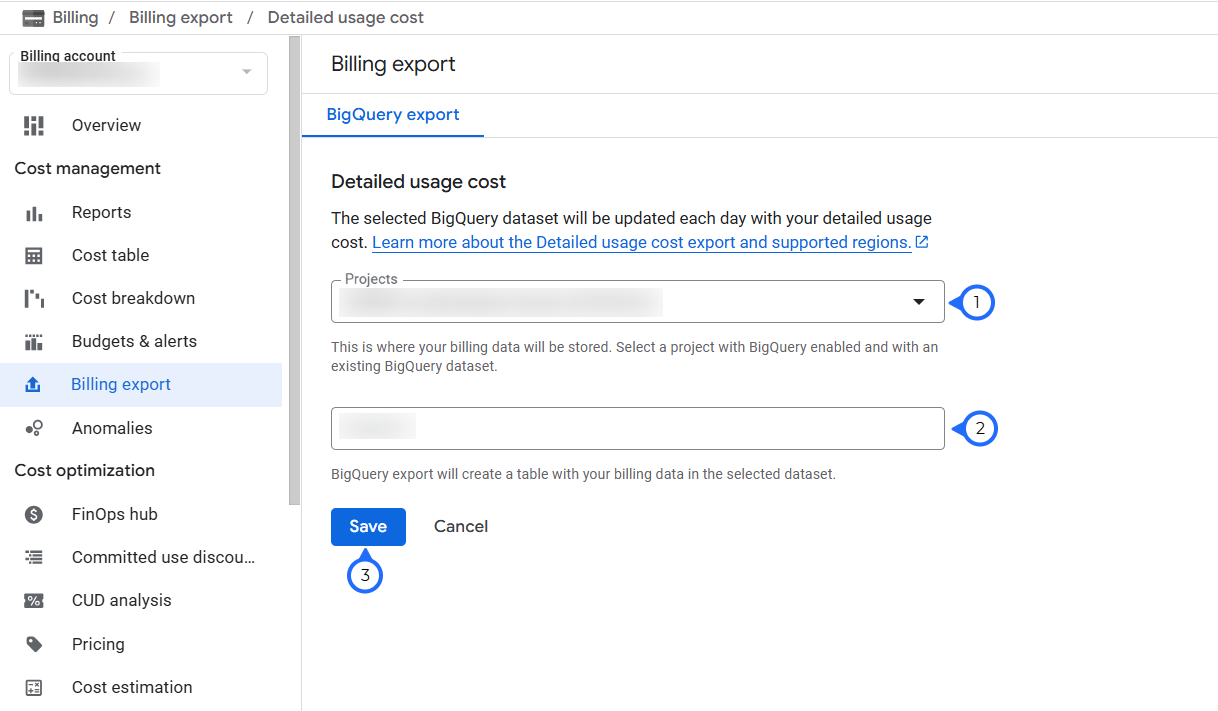
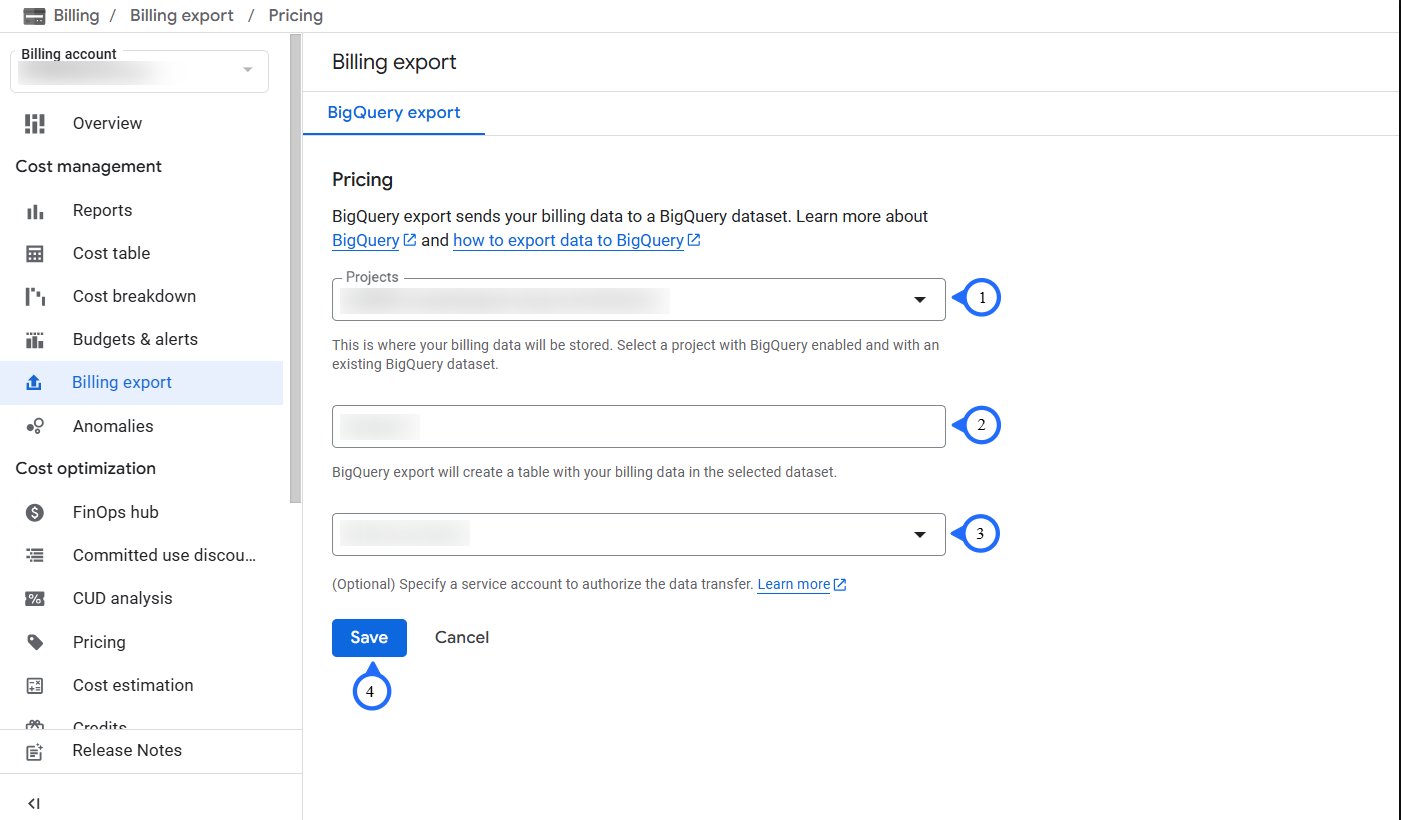
Enable the export for Detailed usage cost and Pricing. Click Edit Settings for both Detailed Usage Cost and Pricing. Select the project and dataset where you want to store the billing and pricing data.
-
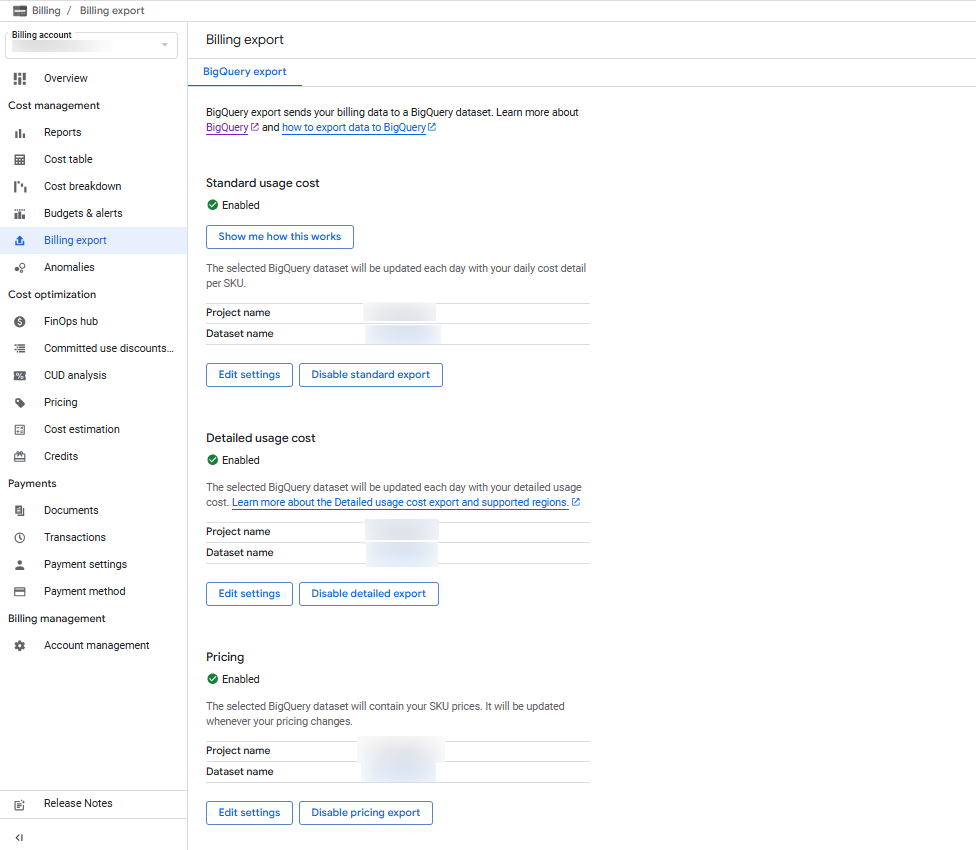
After enabling the export, the page will appear as shown below.
Retrieve BigQuery Export Table Details
You will need the following values while configuring CloudCADI:
- Open the Google Cloud Console.
- Select the project where you configured the billing and pricing exports.
- Navigate to BigQuery.
- In the Explorer panel, expand your project and dataset.
- Locate the tables generated by the Detailed Usage Cost and Pricing exports.
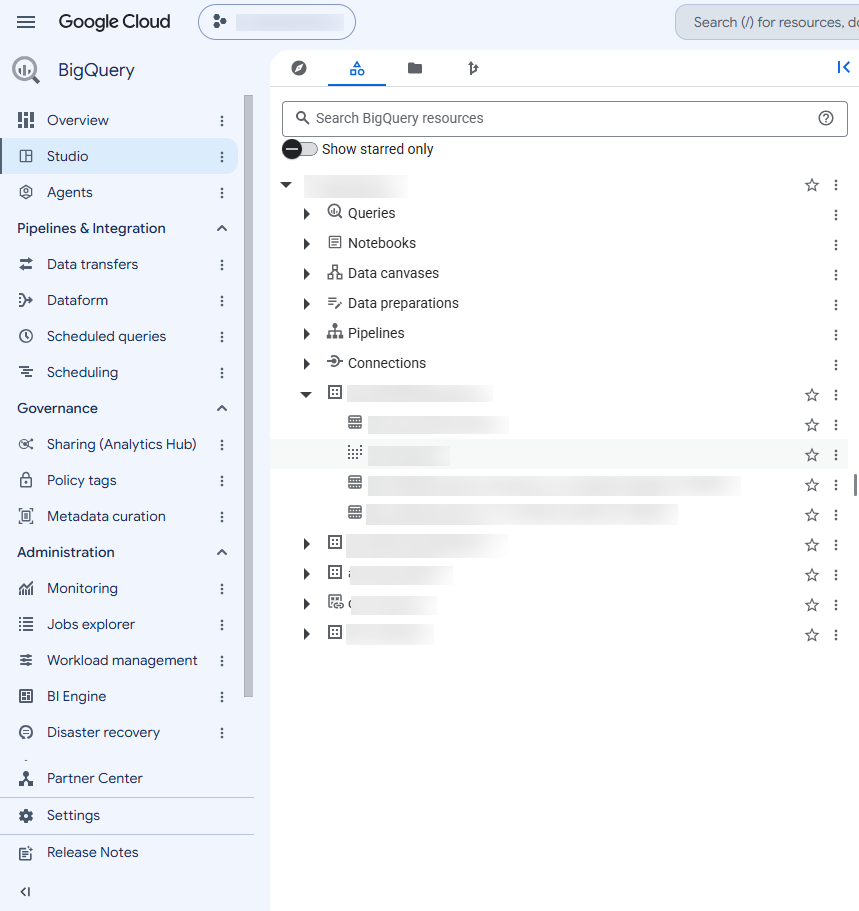
1. Fully Qualified Detailed Billing Report
Provide the following details:
- Project ID → The Google Cloud project where the BigQuery billing export dataset is located.
- Dataset Name → The BigQuery dataset configured for the Detailed Usage Cost export.
- Table Name → The billing export table generated within the dataset.
These values combine to form the fully qualified BigQuery table name in the following format:
project-id.dataset-name.table-name
Example:
my-project.billing_export.gcp_billing_export_resource_v1_xxxxx
Note: The Detailed Usage Cost export table name typically contains
resource_v1as part of the table name.
2. Fully Qualified Pricing Report
Provide the following details:
- Project ID → The Google Cloud project where the BigQuery billing export dataset is located.
- Dataset Name → The BigQuery dataset configured for the Pricing export.
- Table Name → The pricing table generated within the dataset.
These values combine to form the fully qualified BigQuery table name in the following format:
project-id.dataset-name.table-name
Example:
my-project.billing_export.cloud_pricing_export
Note: The Pricing export table name is different from the Detailed Usage Cost export table. The
resource_v1substring applies to the Detailed Usage Cost export table, not the Pricing export table.
Step 1 - Upload the Terraform Configuration to GCS
- Open the Google Cloud Console and navigate to: Cloud Storage → Buckets
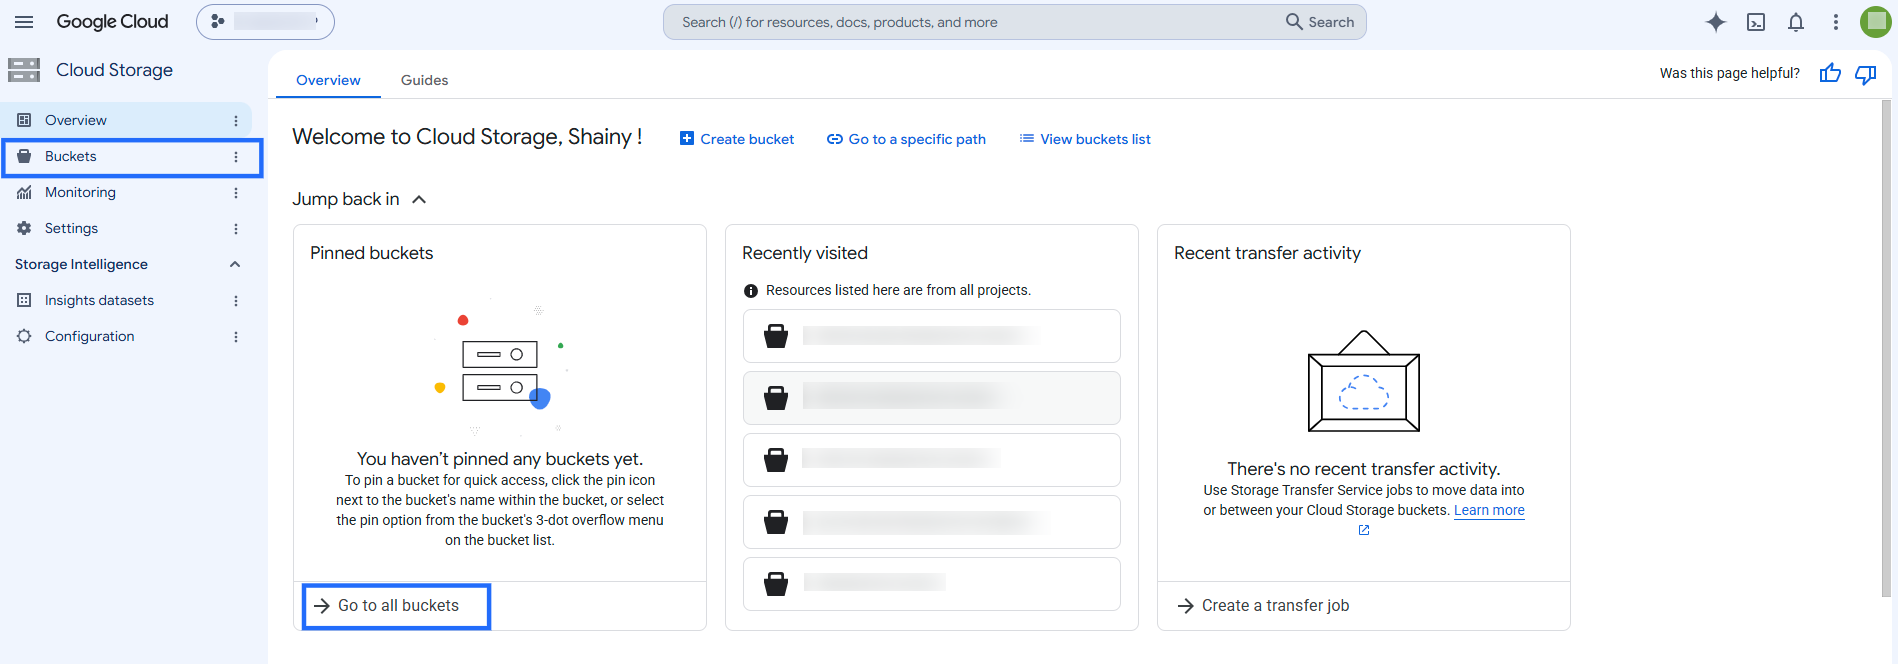
- Select the bucket where the Terraform deployment package should be stored. Upload the Terraform ZIP file and copy the Cloud Storage URI.
Step 2 - Open Infrastructure Manager
- Open Google Cloud Console → Select the target GCP project → Infrastructure Manager.
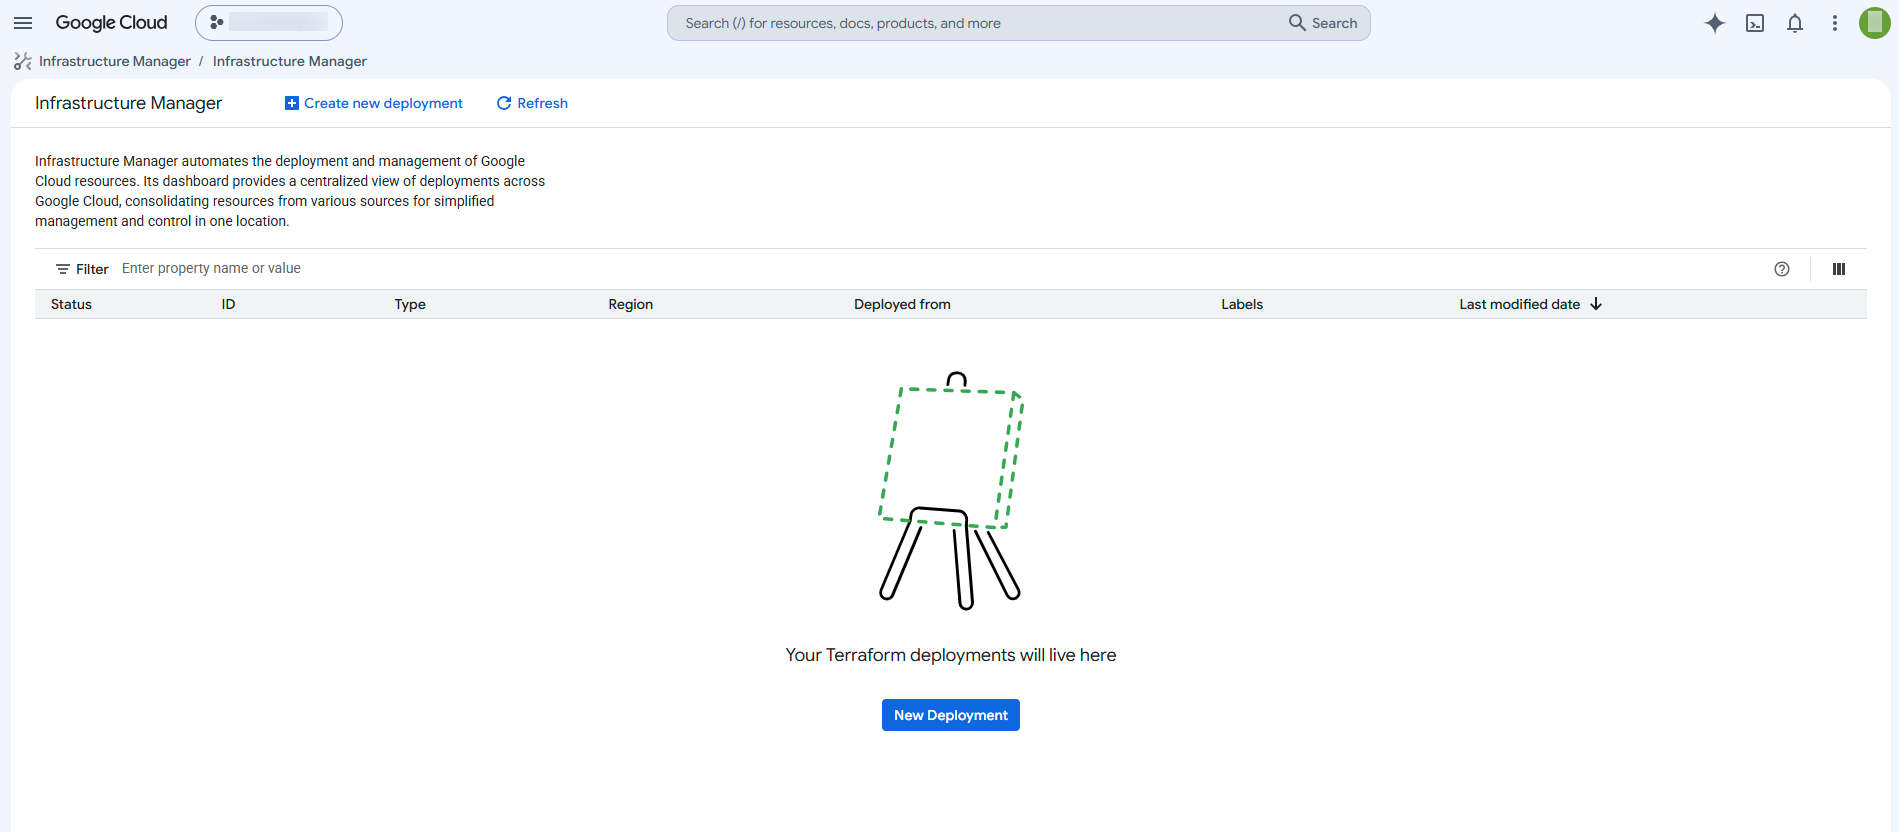
Step 3 - Create a New Deployment
-
To create a new deployment, you can use either of the following options:
- Click Create new deployment at the top of the page.
- Click New Deployment in the center of the page.
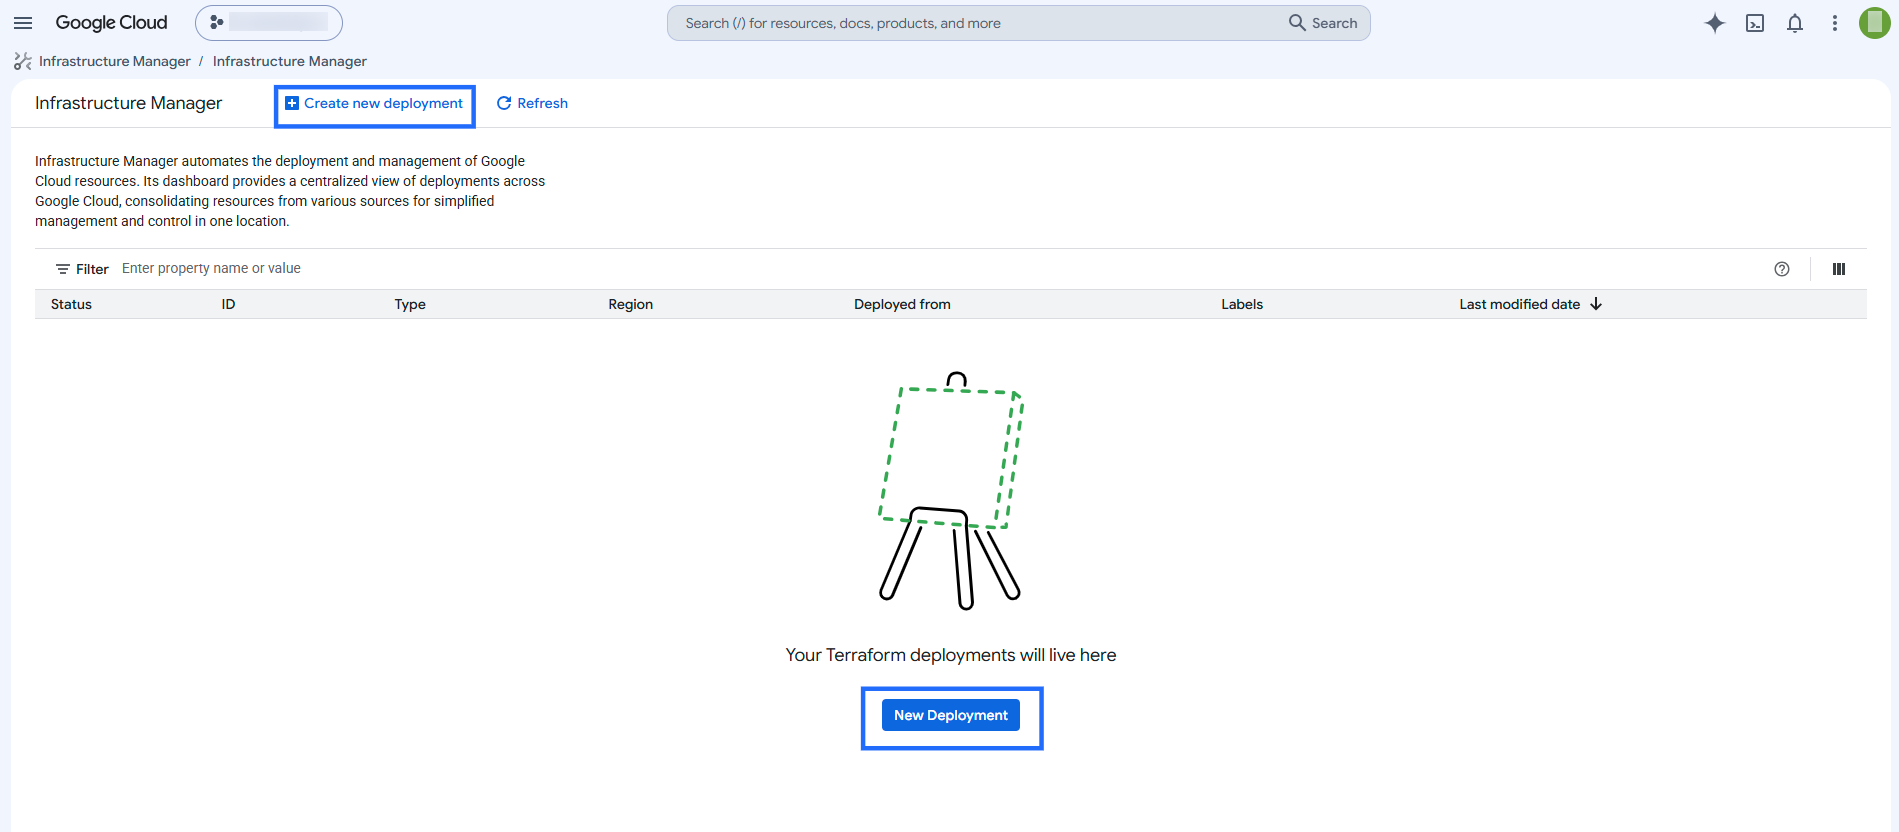
-
The Create new Terraform deployment page will be displayed.
Step 4 - Configure Deployment Details
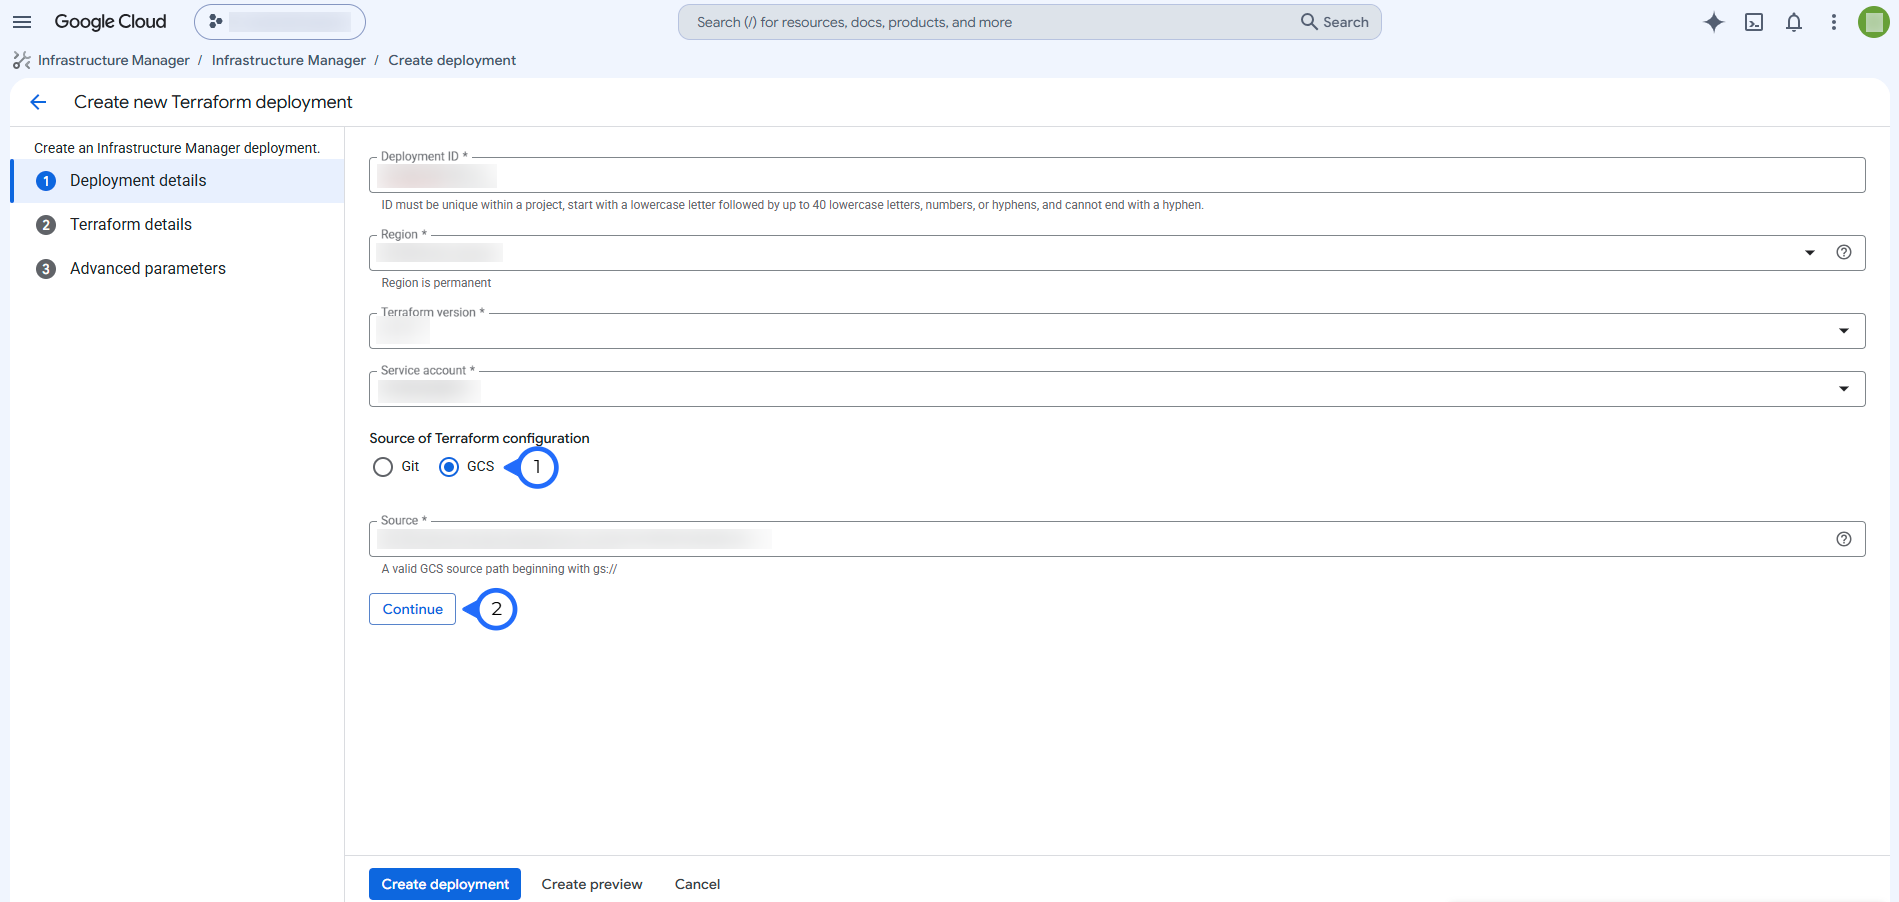
- Enter the Deployment ID, select the Infrastructure Manager region and Terraform version, choose GCS under Source of Terraform configuration, and enter the GCS path of the Terraform ZIP file. Click Continue.
Step 5 - Provide Terraform Inputs
-
After selecting the Terraform source, Infrastructure Manager reads the Terraform configuration and displays the required input variables.
-
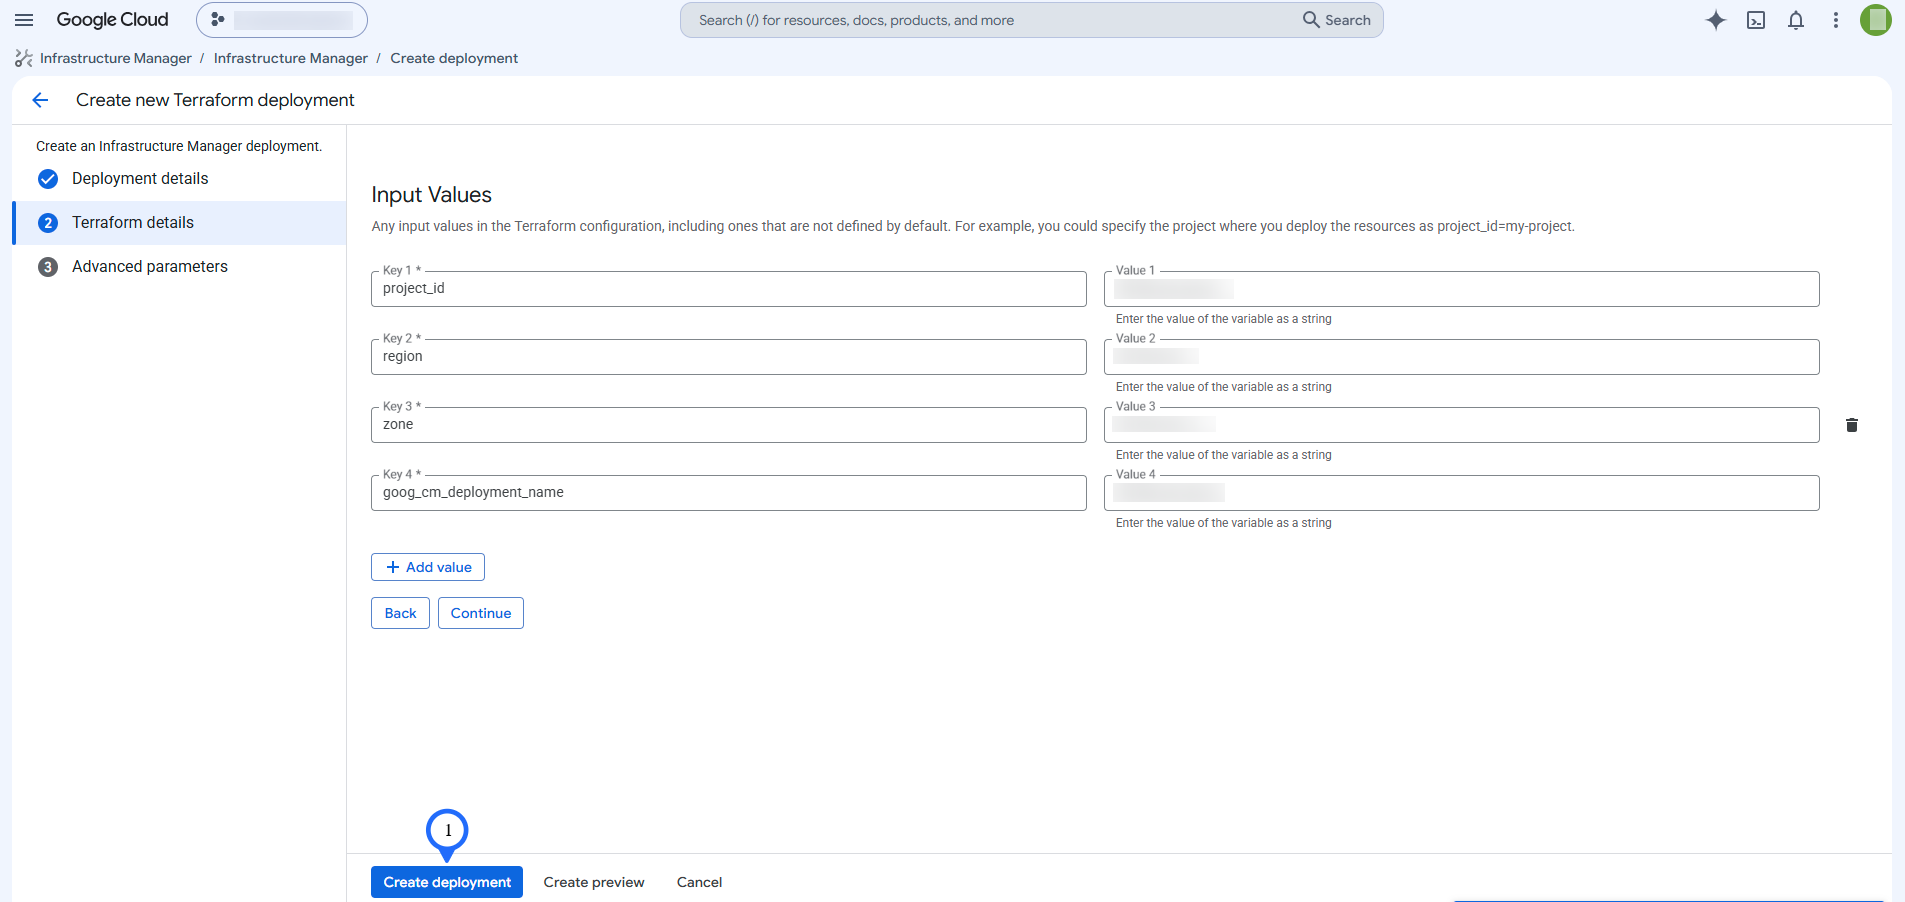
The CloudCADI Terraform configuration contains the following variables:
Input values Description project_id Target GCP project ID GCP project where CloudCADI resources are created region GCP region for regional resources zone GCP zone where the zonal GKE cluster is created goog_cm_deployment_name Unique deployment name used as the resource-name prefix
Step 6 - Create the Deployment
-
Fill in all the required Terraform input values click Create deployment.
-
After clicking Create deployment, Infrastructure Manager executes the Terraform configuration.
Step 7 - Verify and Access the Application
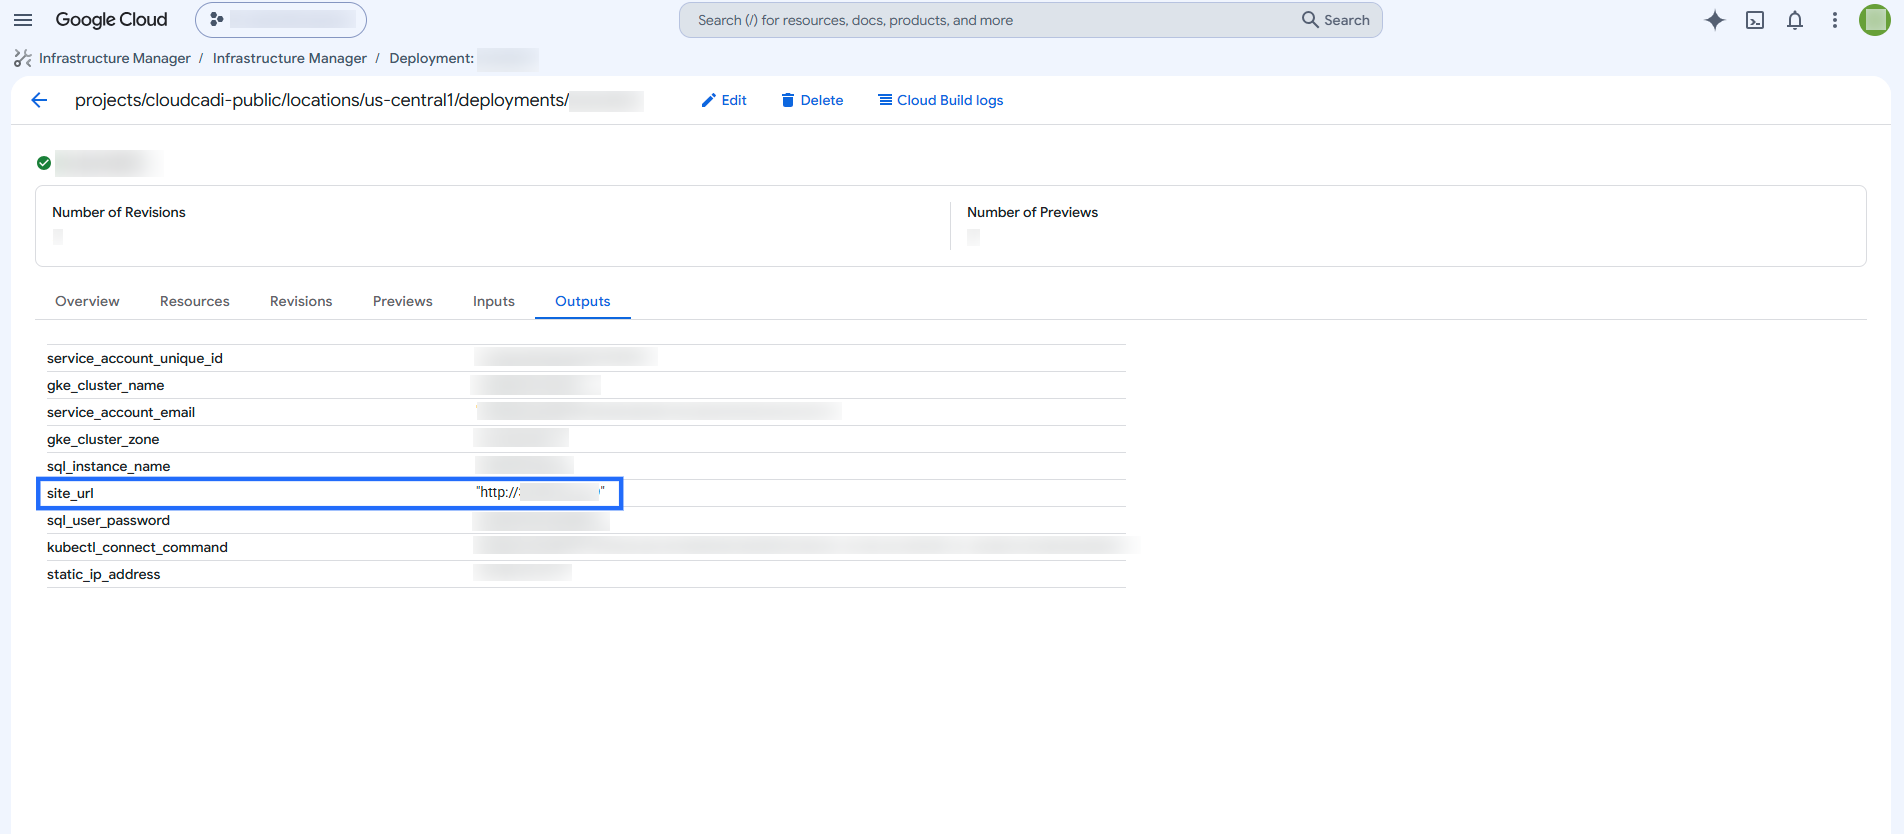
- Once all resources are created successfully, go to Outputs and use the site_url field to access the application.
Architecture
- Deployment ID — unique Infrastructure Manager deployment name
- Region — Infrastructure Manager deployment region
- Terraform Version — version used to execute the Terraform configuration
- Service Account — service account used for Terraform execution
- Source — GCS path containing the Terraform ZIP
- project_id — target GCP project
- region — GCP deployment region
- zone — GKE deployment zone
- goog_cm_deployment_name — Infrastructure Manager deployment name
- VPC / Subnet — network connectivity for the deployment
- IAM Service Account — required permissions for deployment and runtime
- GKE — Kubernetes cluster and node pool for CloudCADI
- Cloud SQL — PostgreSQL database
- Artifact Registry — CloudCADI container images and Helm artifacts
- Manual — operator uploads the Terraform ZIP to GCS and creates the Infrastructure Manager deployment
- Infrastructure Manager — executes Terraform and provisions the GCP infrastructure
- Helm — deploys CloudCADI workloads into GKE