Databricks
Databricks Prerequisites
CloudCADI authenticates to Databricks via OIDC-based workload identity federation instead of a static client secret.
Note down the OIDC values for CloudCADI's hosting environment - Issuer, Subject, and Audience - from the table below. You'll use these when creating the federation policy in Databricks.
| Hosted on | Issuer | Subject | Audience |
|---|---|---|---|
| AWS (EKS) | AWS Outbound Identity Federation issuer: https://<uuid>.tokens.sts.global.api.aws | IAM Role ARN deployed on EKS: arn:aws:iam::<account-id>:role/<role-name> | databricks |
| Azure (AKS) | https://sts.windows.net/<tenant-id>/ | App Registration Object ID | https://management.azure.com/ |
| GCP (GKE) | https://accounts.google.com | Service Account Unique ID | databricks |
Databricks Federation Setup Walkthrough
This document describes the step-by-step procedure to federate a Databricks account with CloudCADI and connect its workspaces.
Step 1 - Create a service principal in Databricks
- In the Databricks account console, go to User management → Service principals, then click Add service principal.
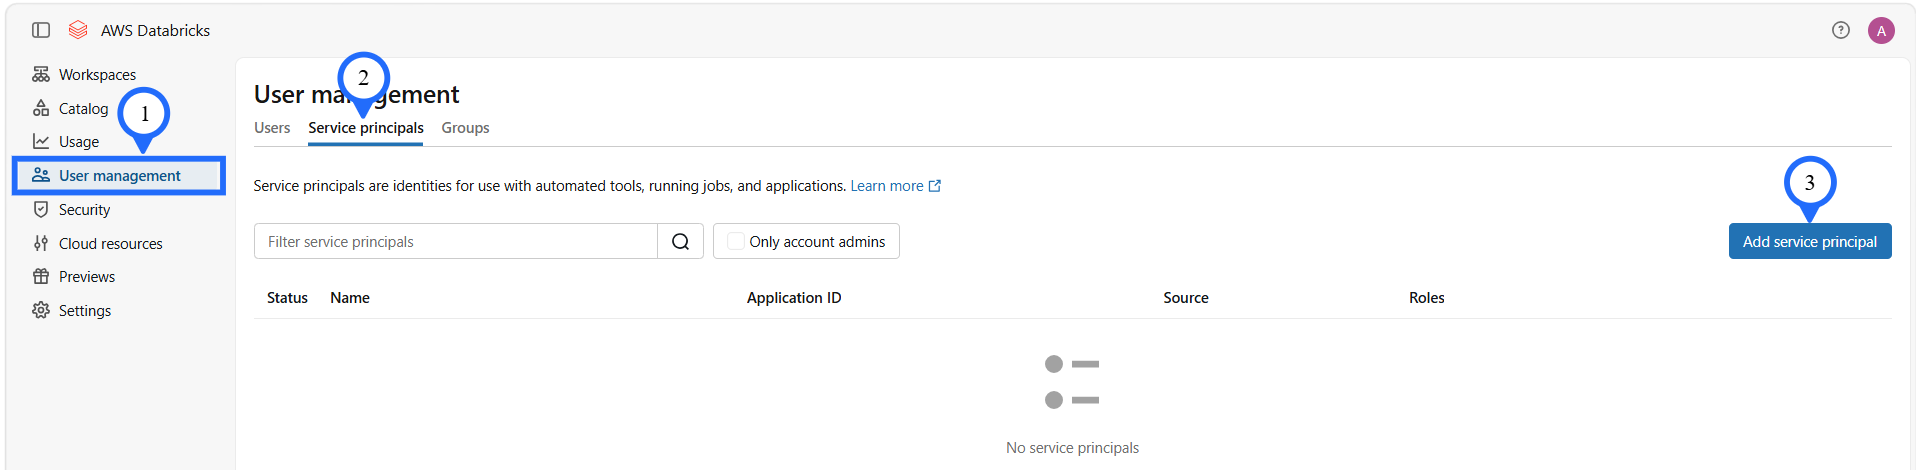
- To create a new service principal, enter a service principal name (e.g.
CloudCADI-service-principal) and click on Add service principal.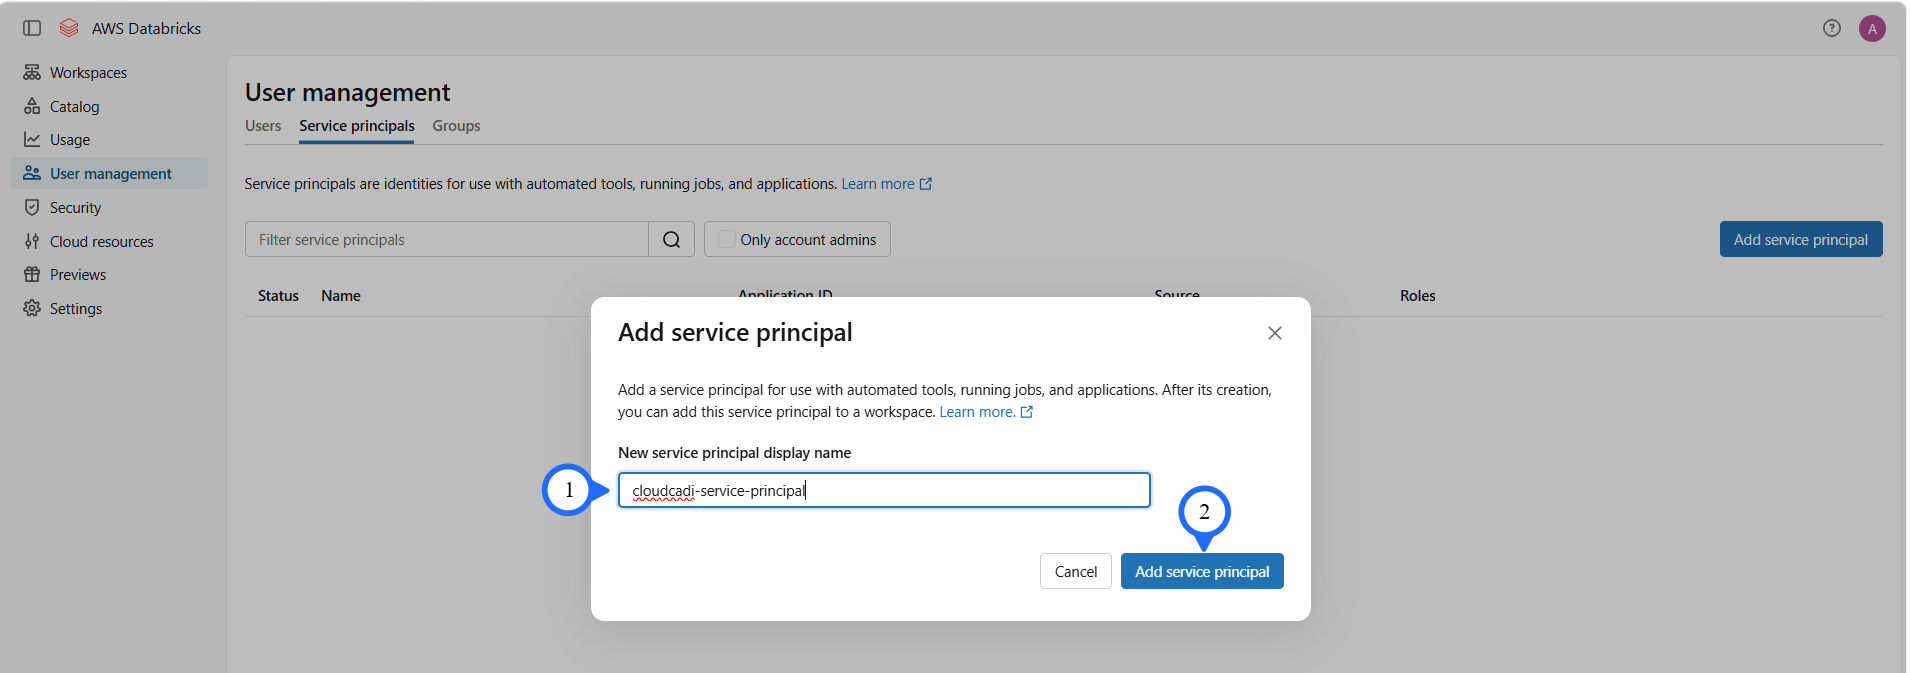
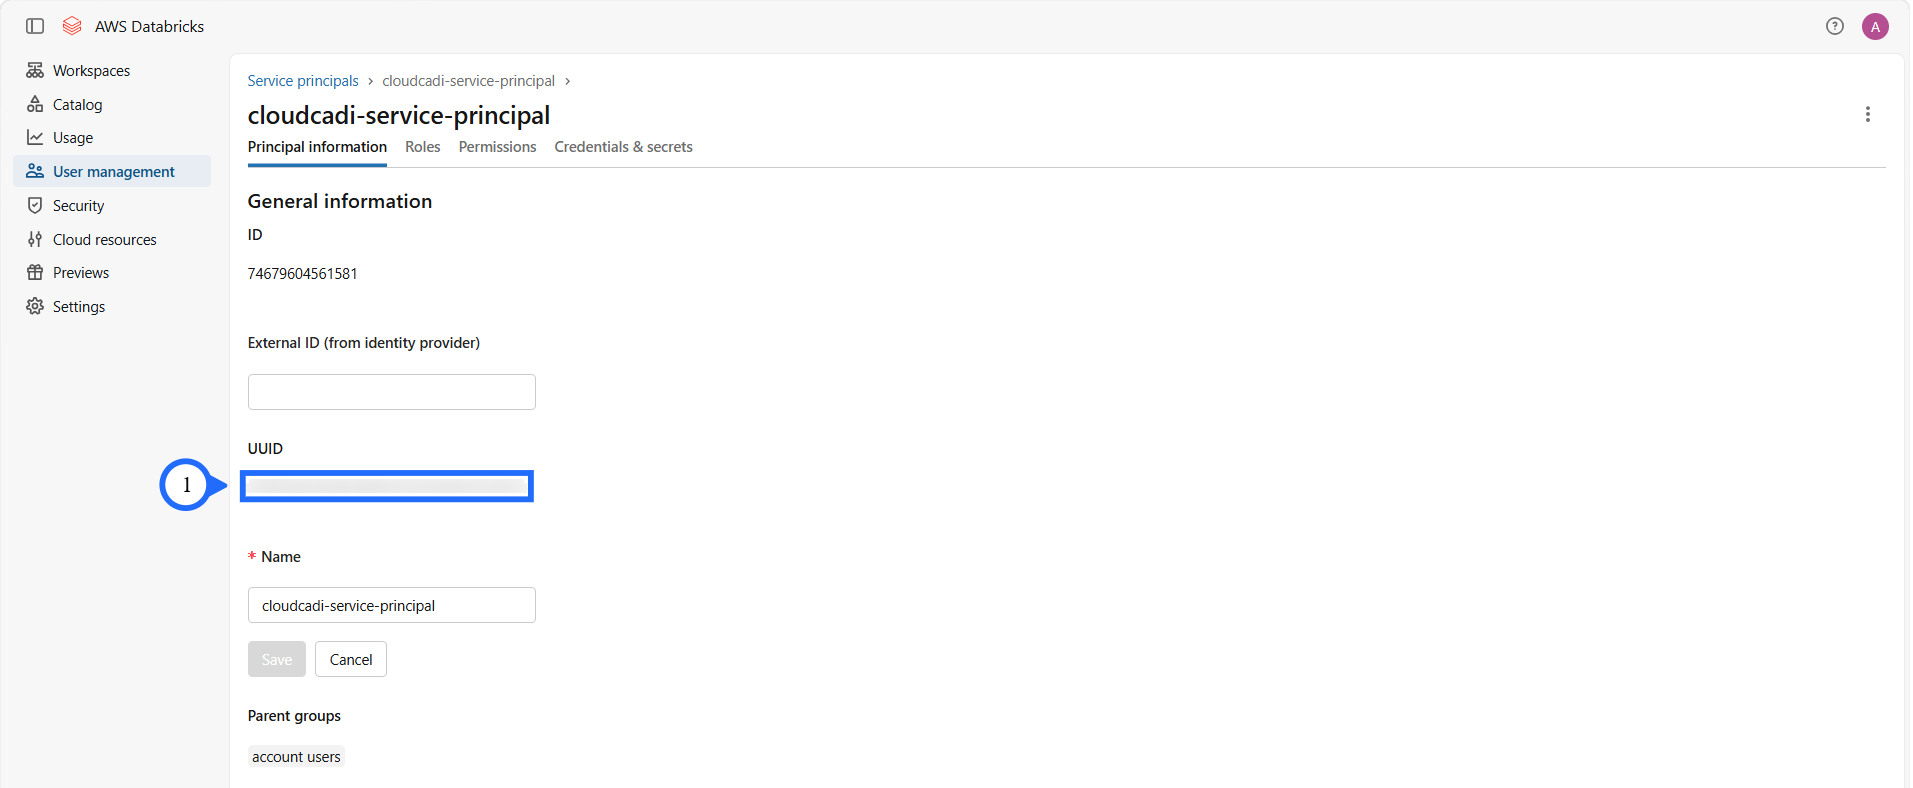
- Open the new principal's Principal information tab and note its UUID, which will be used as the Client ID in CloudCADI.
- Go to the Roles tab and enable Account admin for the service principal.

Step 2 - Create a federation policy
- On the service principal's Credentials & secrets tab, under Federation policies, click Create policy.
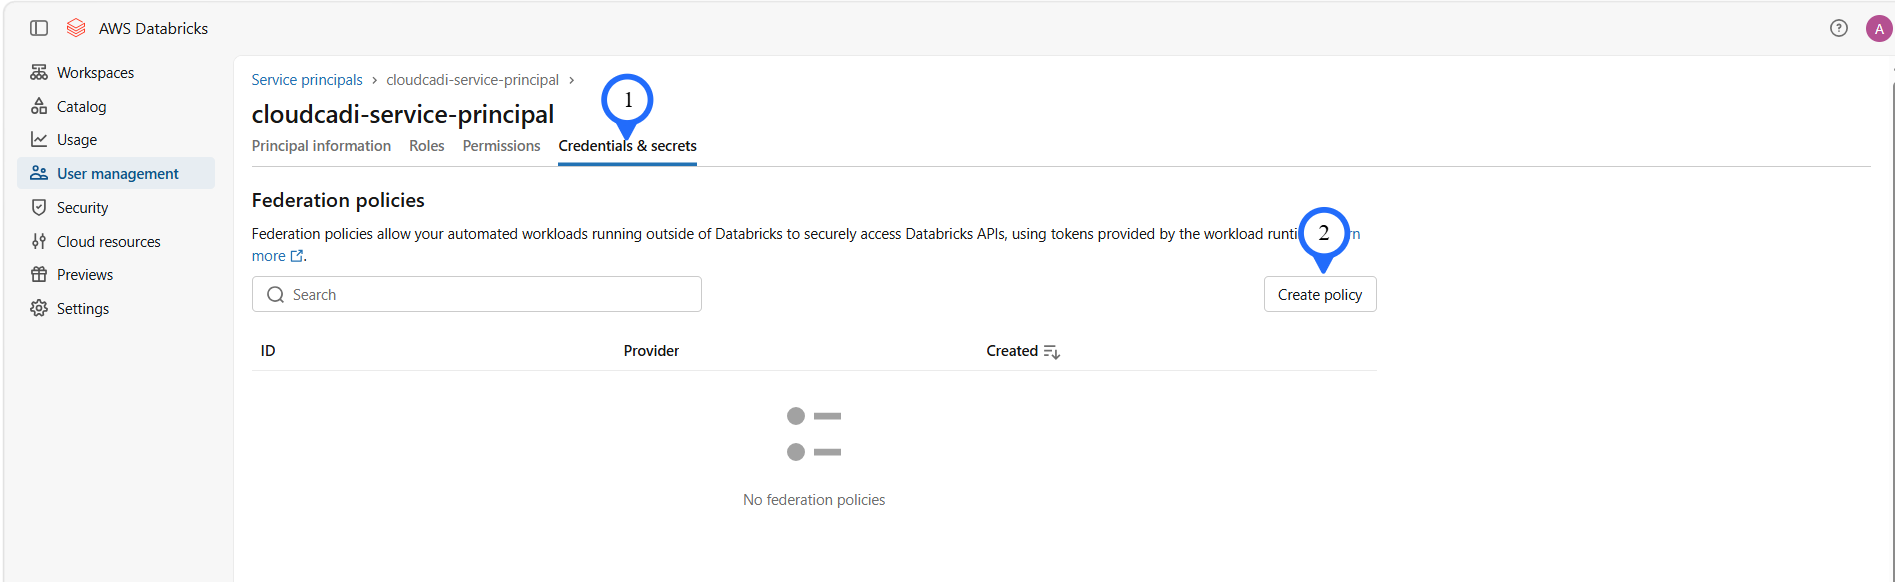
- Set Federated credential provider to Custom.
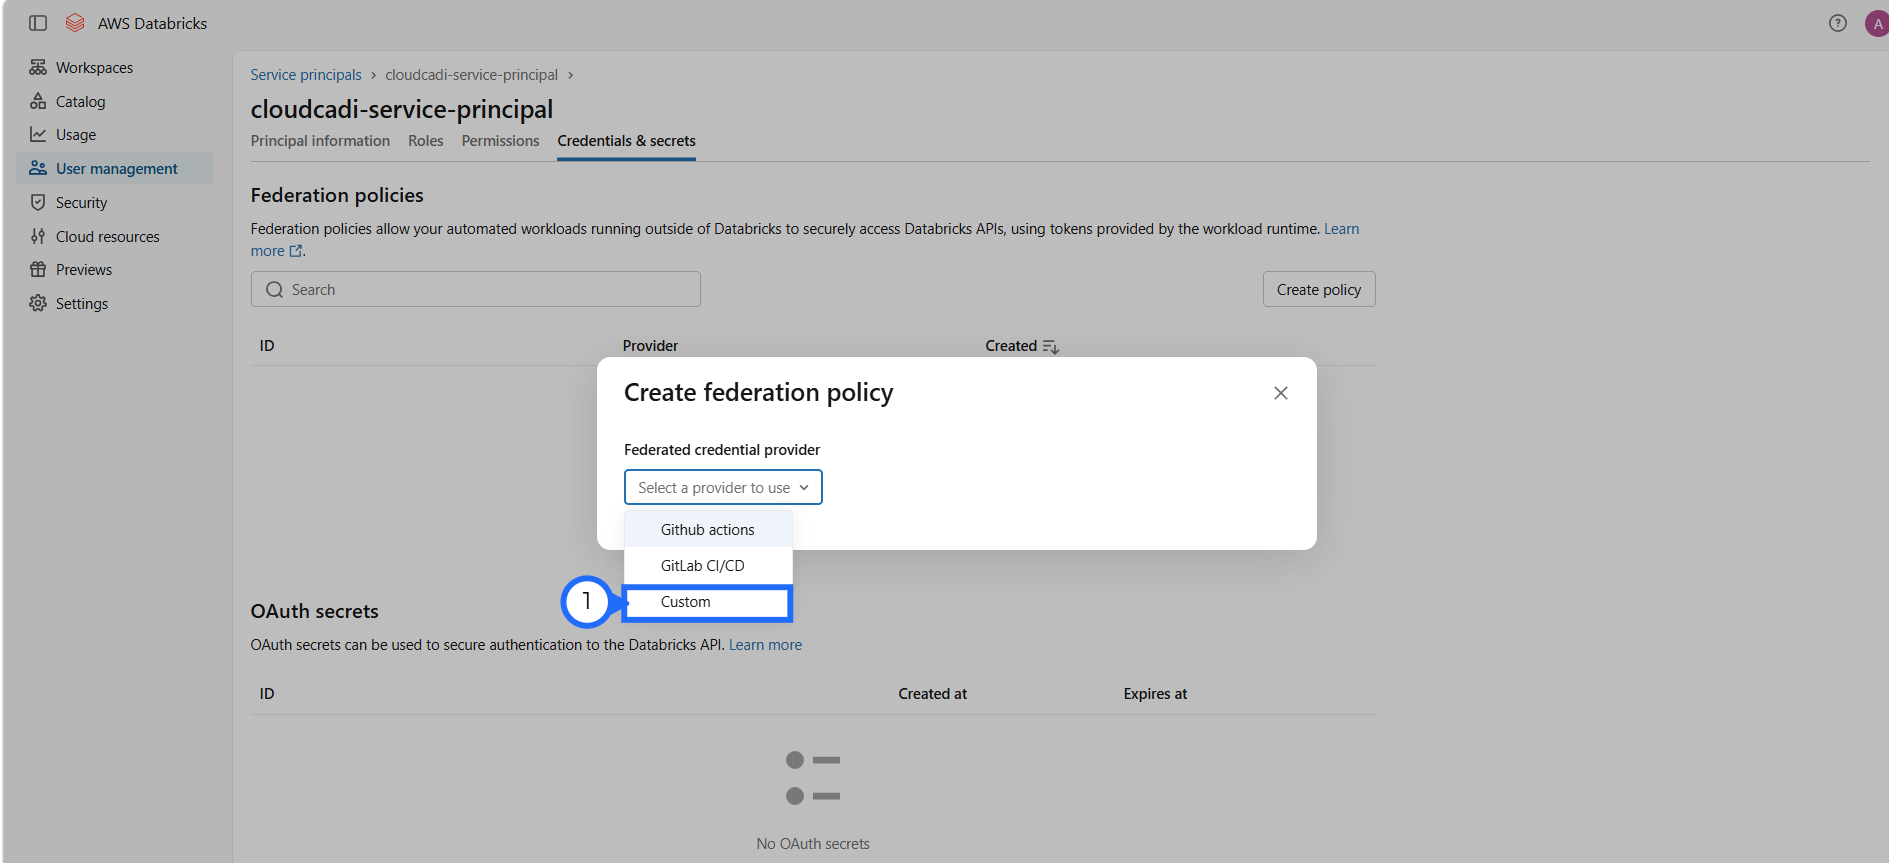
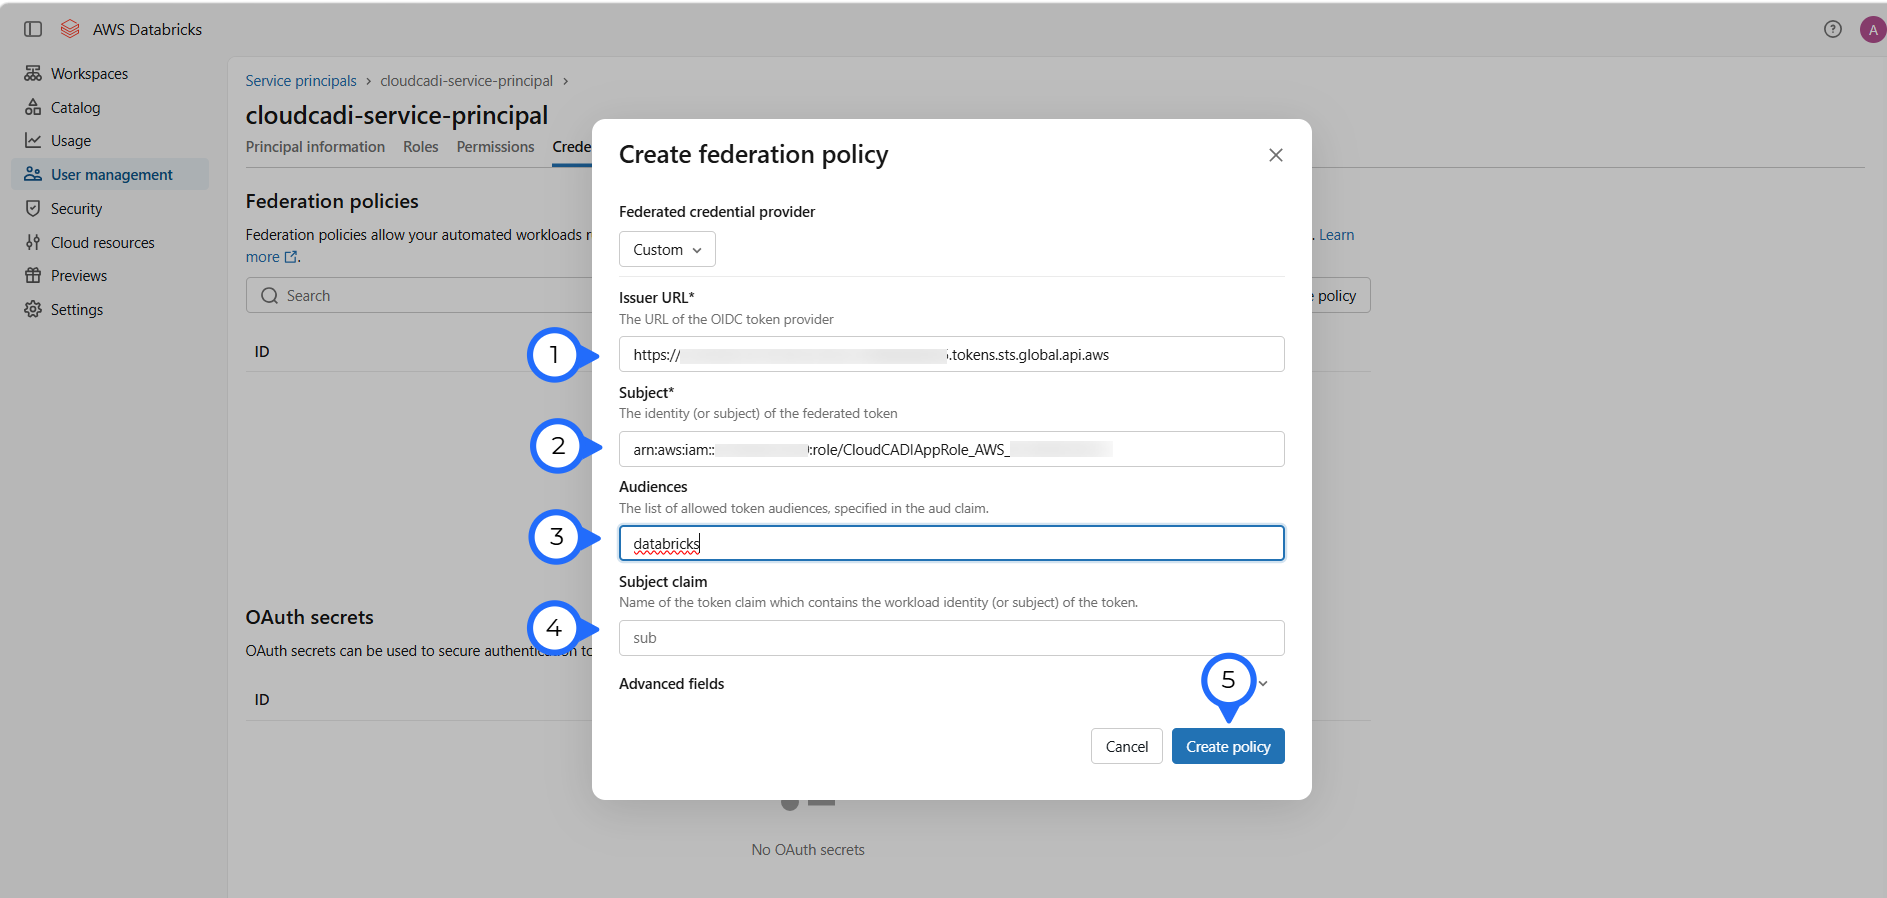
- Fill in the OIDC values for CloudCADI's hosting environment (see Databricks Prerequisites), then click Create policy:
- Issuer URL
- Subject
- Audiences
- Subject claim
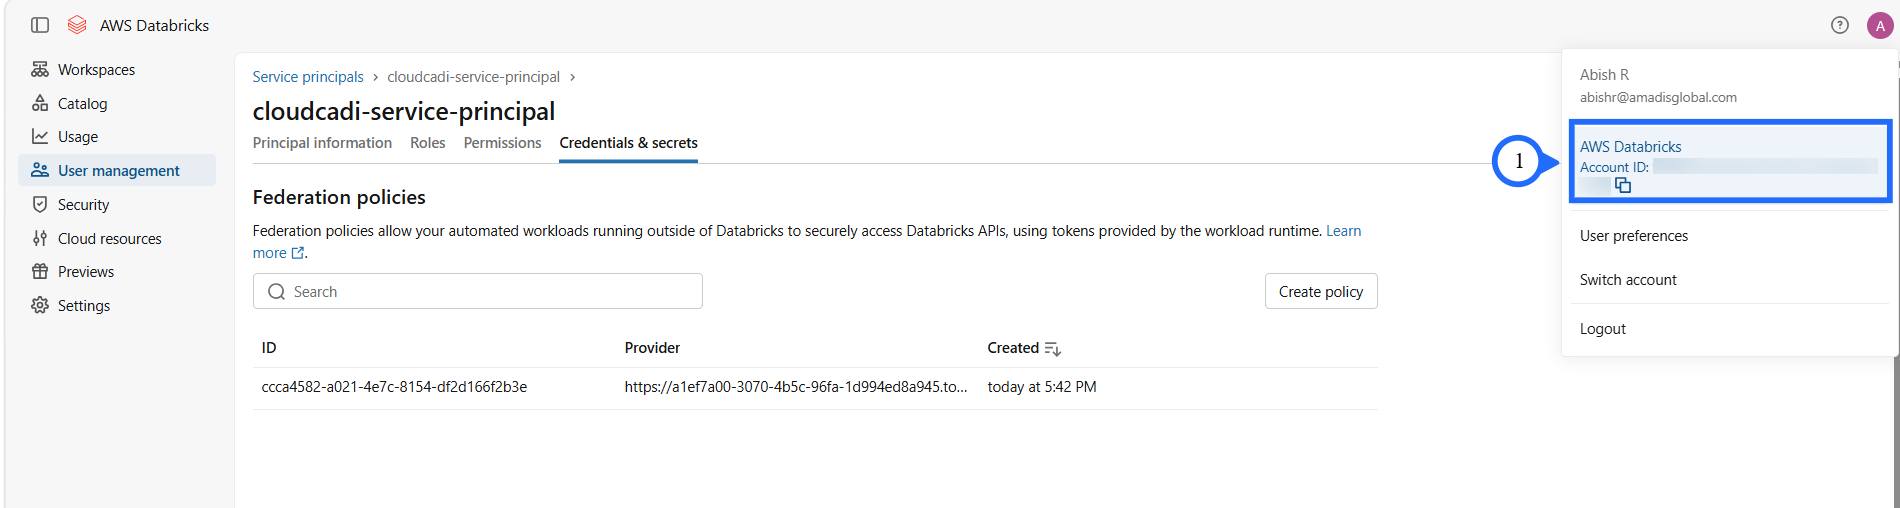
- From the account menu (top-right), copy the Account ID - it is needed on the CloudCADI side.
Step 3 - Connect the account in CloudCADI
-
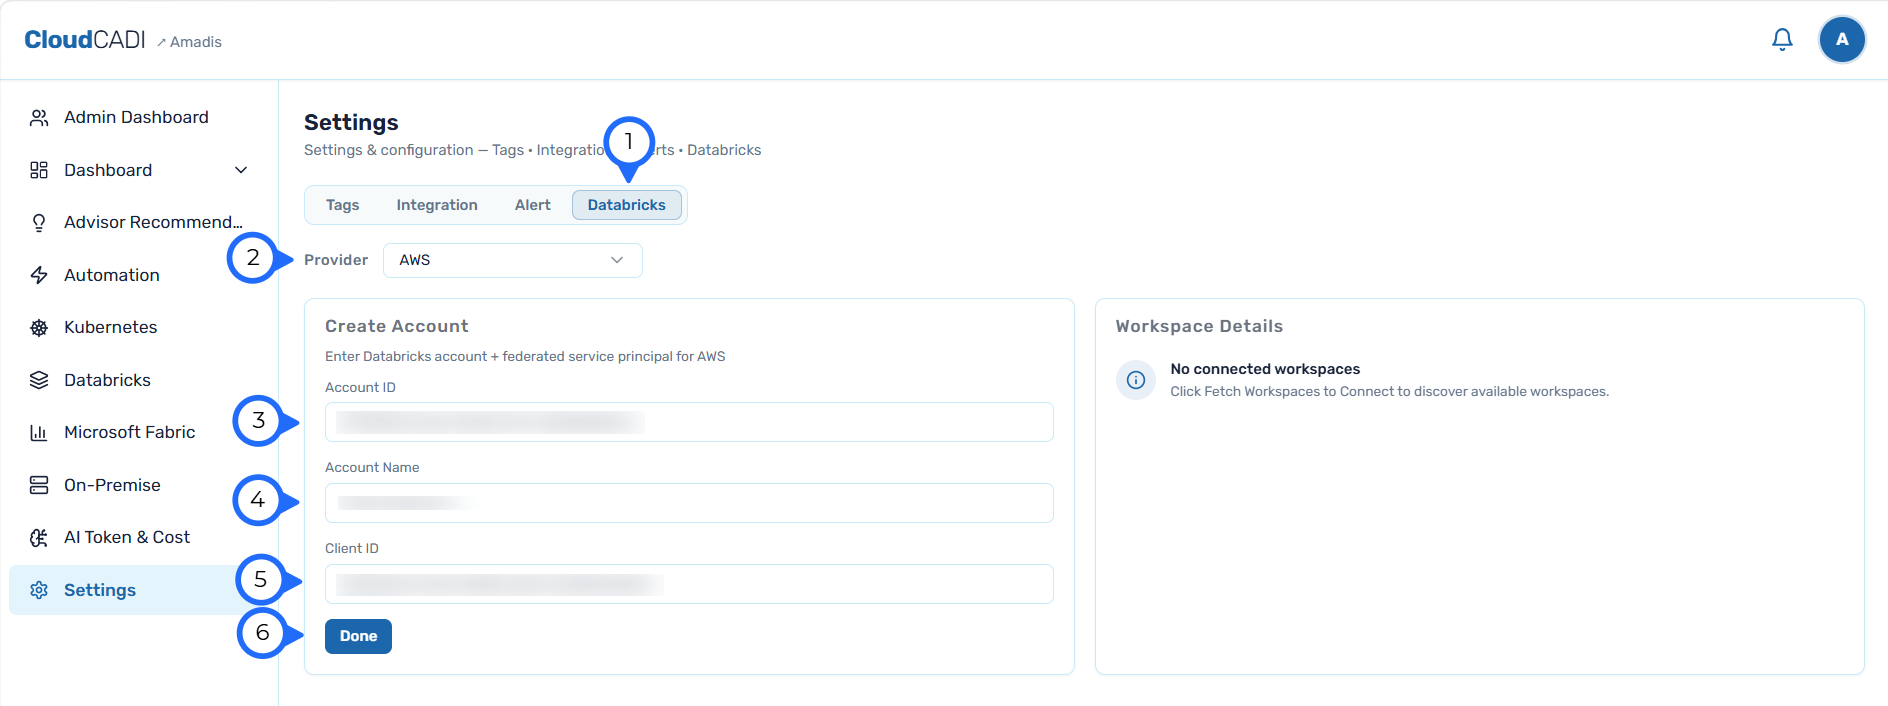
In CloudCADI, go to Settings → Databricks and select the Provider - AWS, GCP, or Azure. Every provider requires the same three fields, populated with that provider's identity details:
- Account ID - paste the Account ID copied
- Account Name - the Databricks account name
- Client ID - paste the ID copied
Click Done.
-
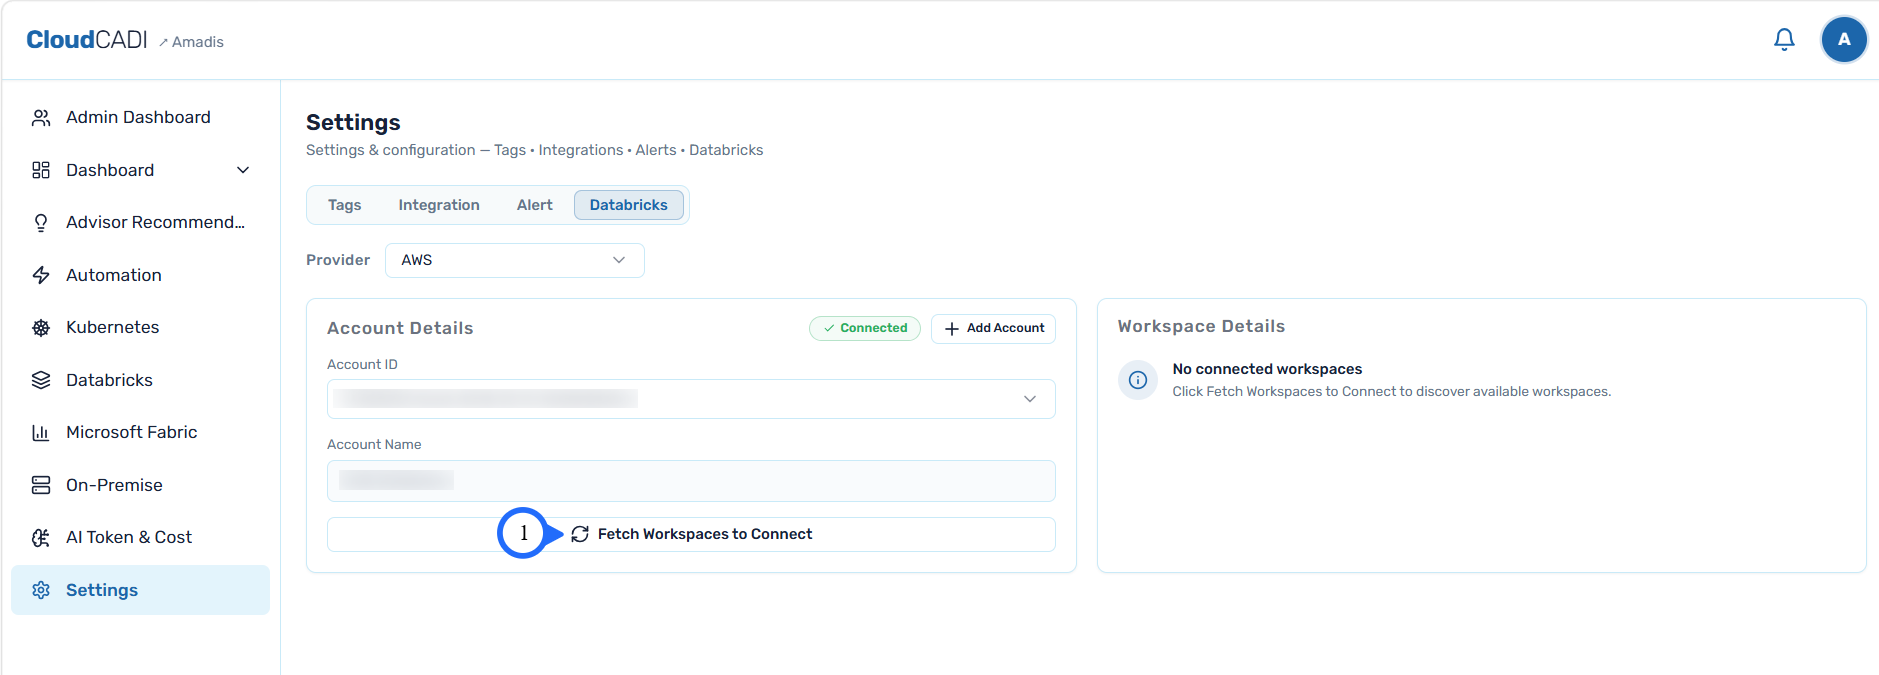
Once the account shows as Connected, click Fetch Workspaces to Connect.
-
After workspaces sync, click Connect on the workspace to link.
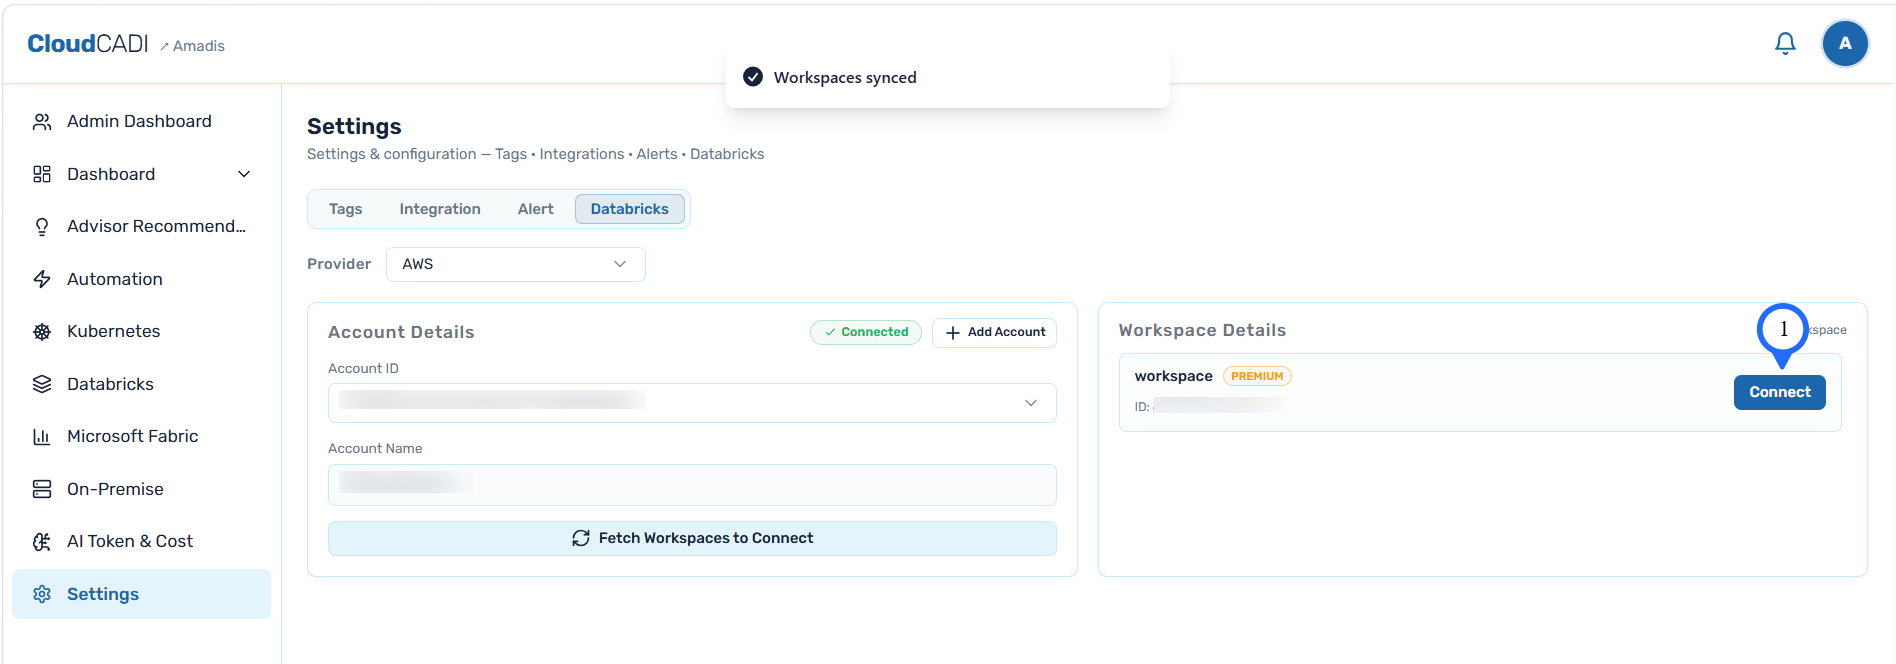
A metastore can be shared across multiple workspaces. For each metastore, CloudCADI creates a SQL warehouse to query system table data.
Step 4 - Grant catalog permissions to the service principal
- From the Databricks account console Workspaces list, click Open to launch the workspace.

- In the workspace, go to Catalog → system → Permissions, then click Grant.
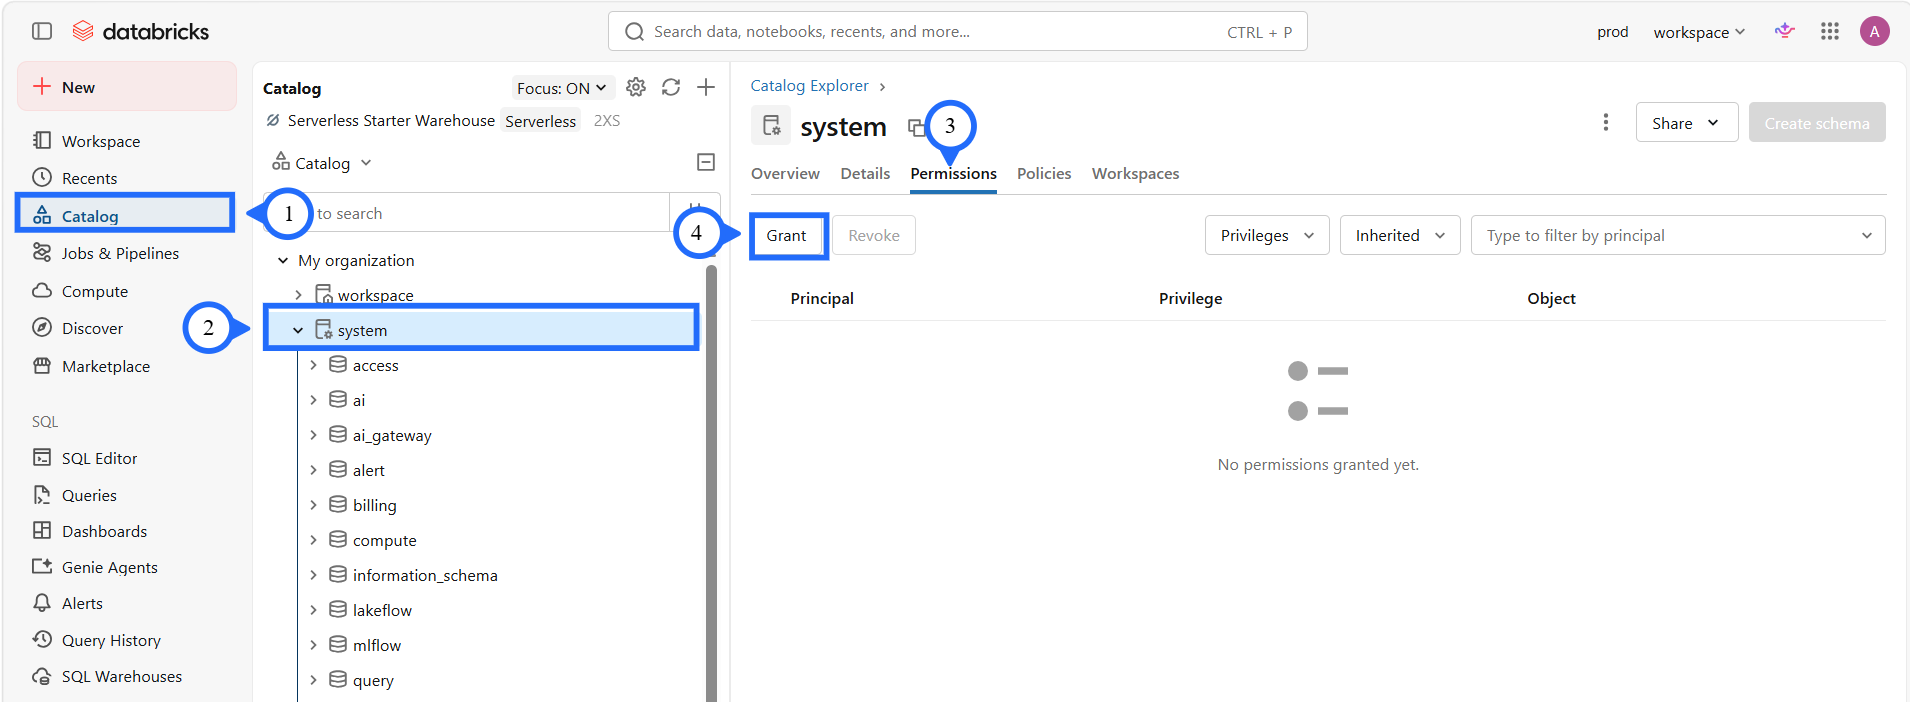
- Add the service principal as a Principal, check USE CATALOG, USE SCHEMA, and SELECT, then click Confirm.
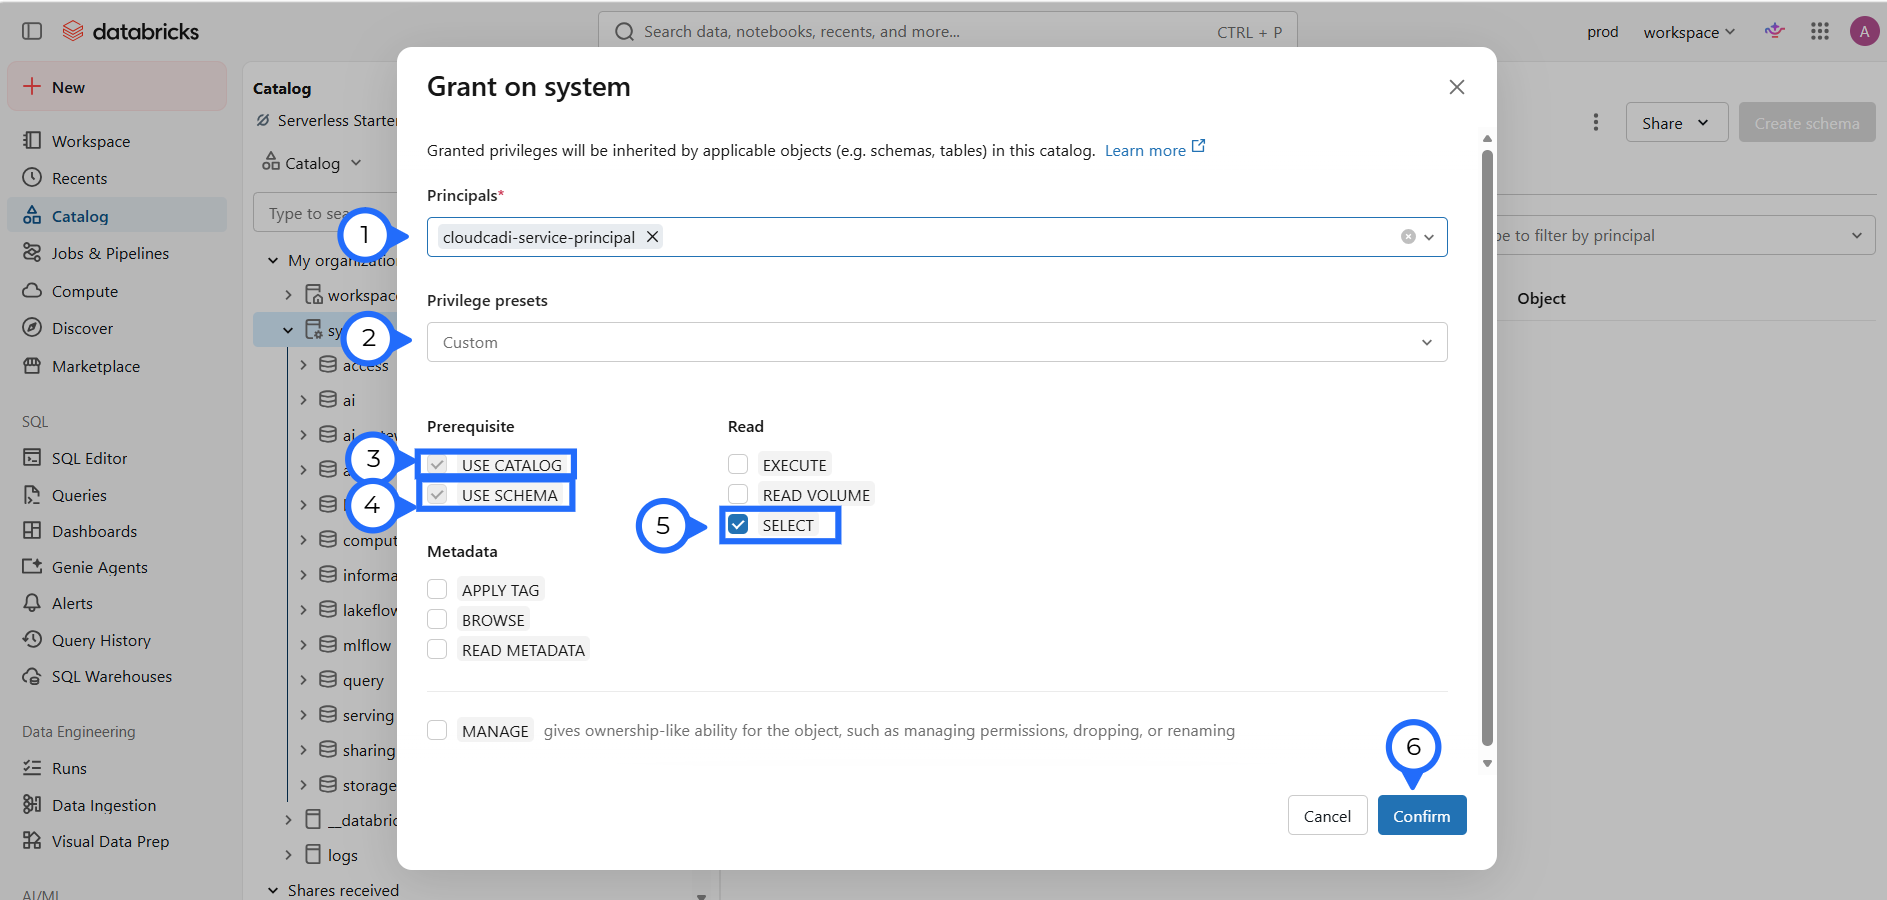
The service principal needs at least USE CATALOG, USE SCHEMA, and SELECT on the system catalog for CloudCADI to read Databricks usage and billing data.