Connect an AWS Account (CloudCADI hosted on AWS)
CloudCADI supports two methods for onboarding AWS Accounts:
Auto Setup and Manual Onboarding
- Auto Setup – Used to onboard the entire AWS Organization (Recommended approach).
- Manual Setup – Used to manually onboard individual AWS member accounts.
Step 1 - Navigate to Onboarding Section
-
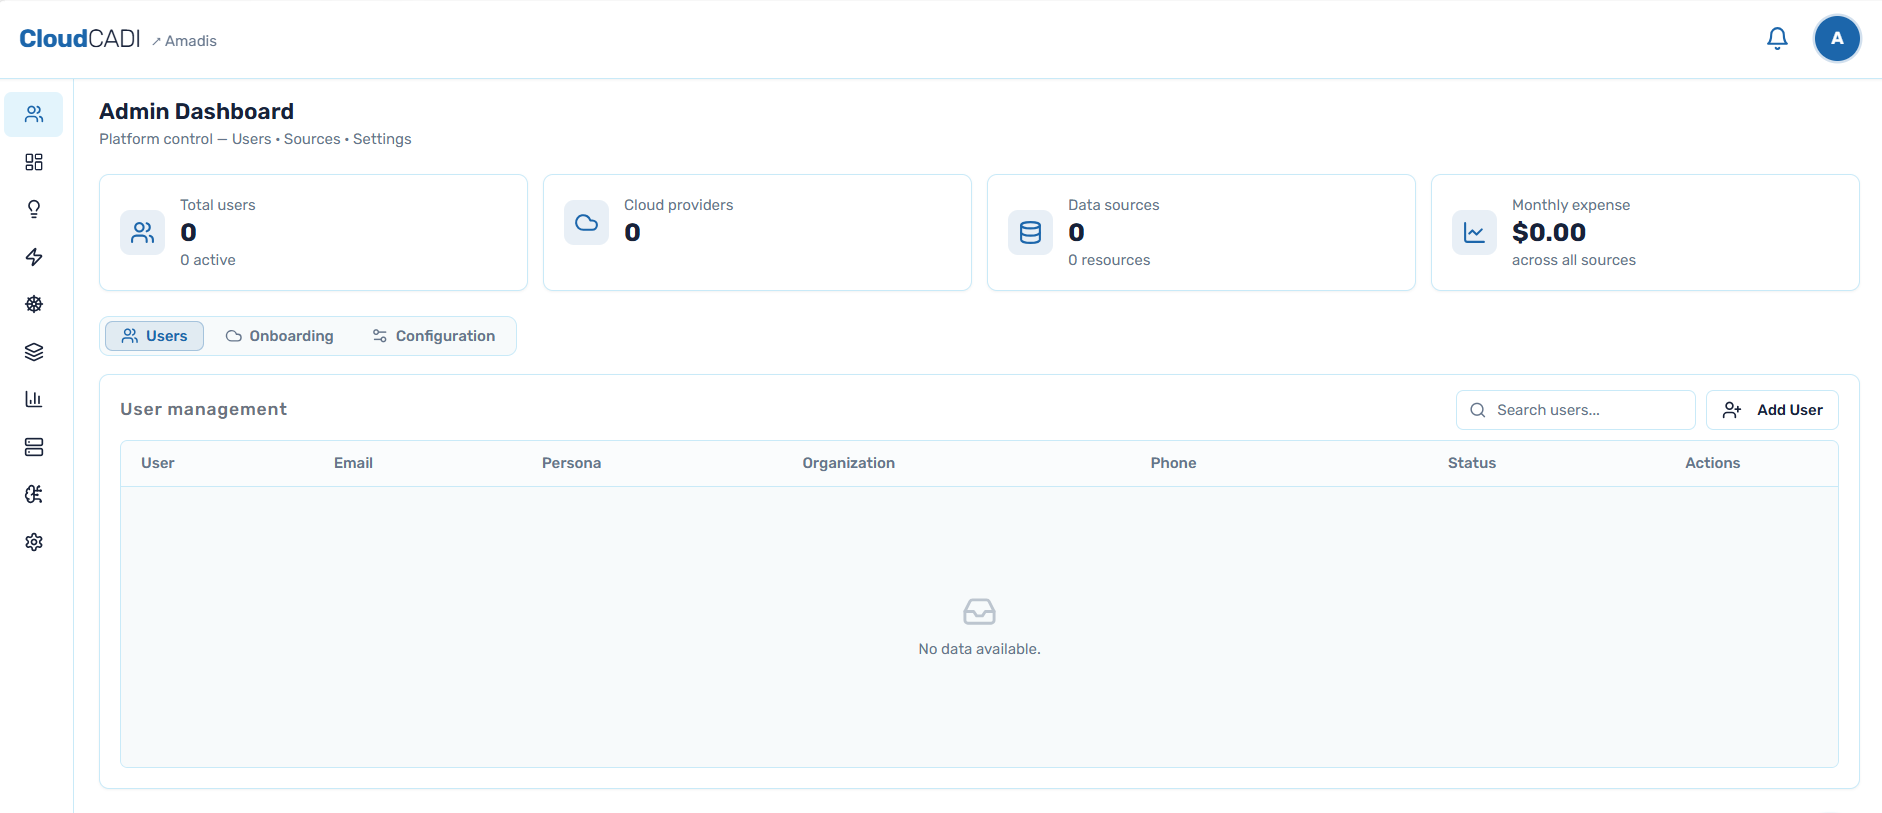
Log in to CloudCADI using an Admin account.
-
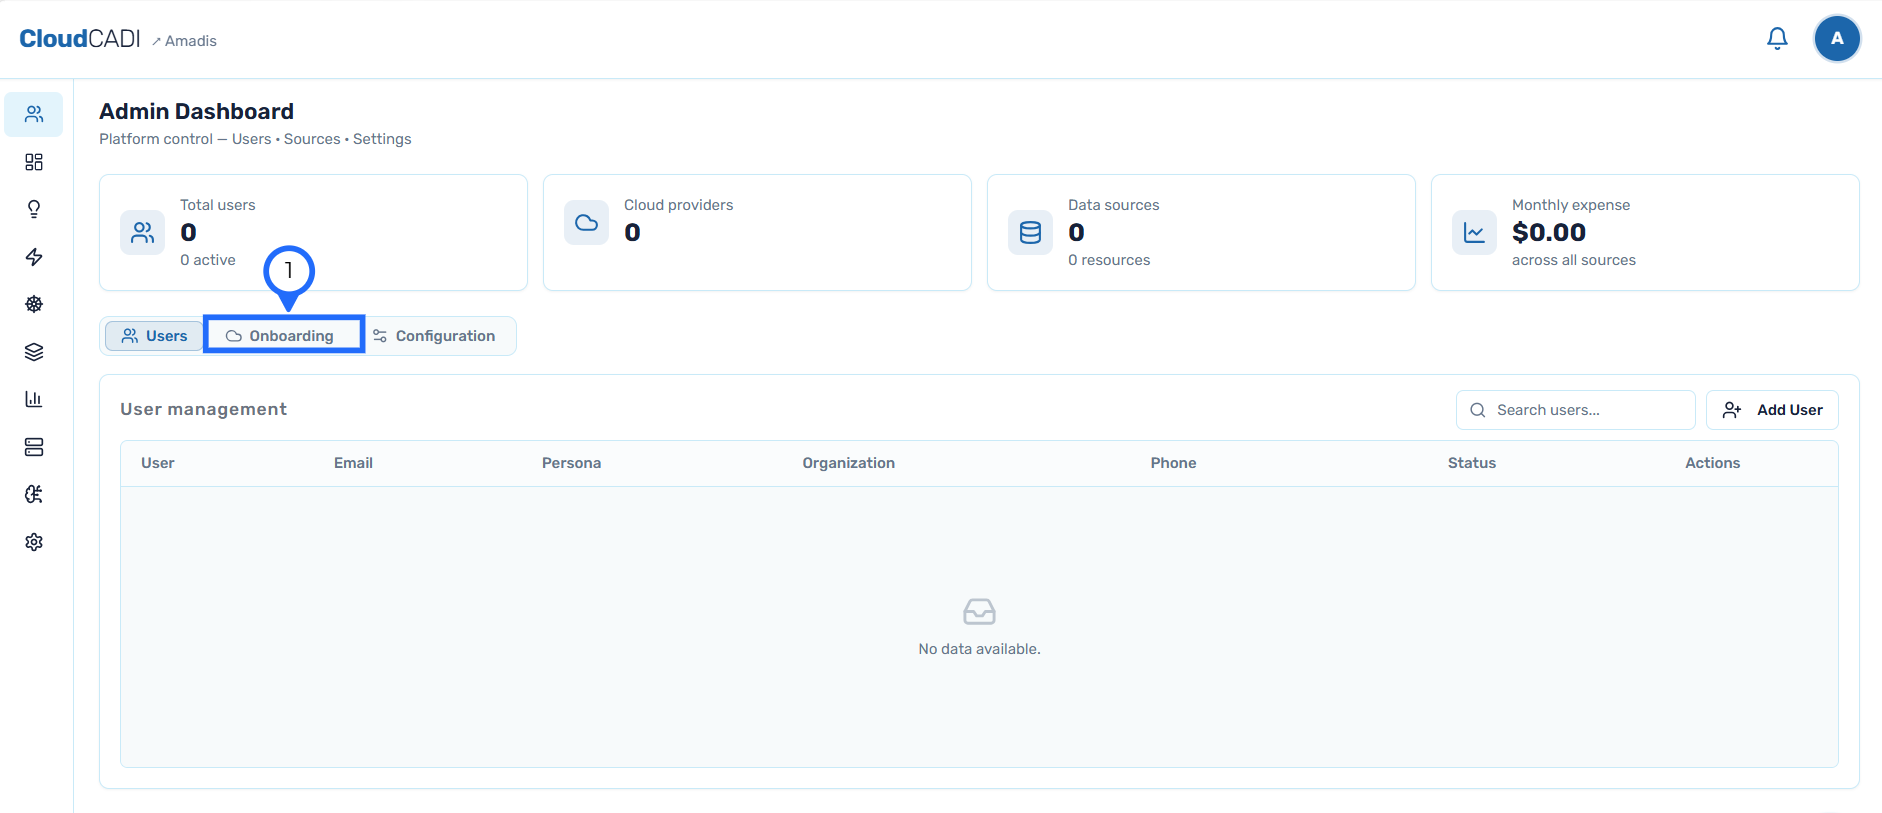
Click Onboarding (next to the Users tab) to begin onboarding a new cloud provider or data source.
-
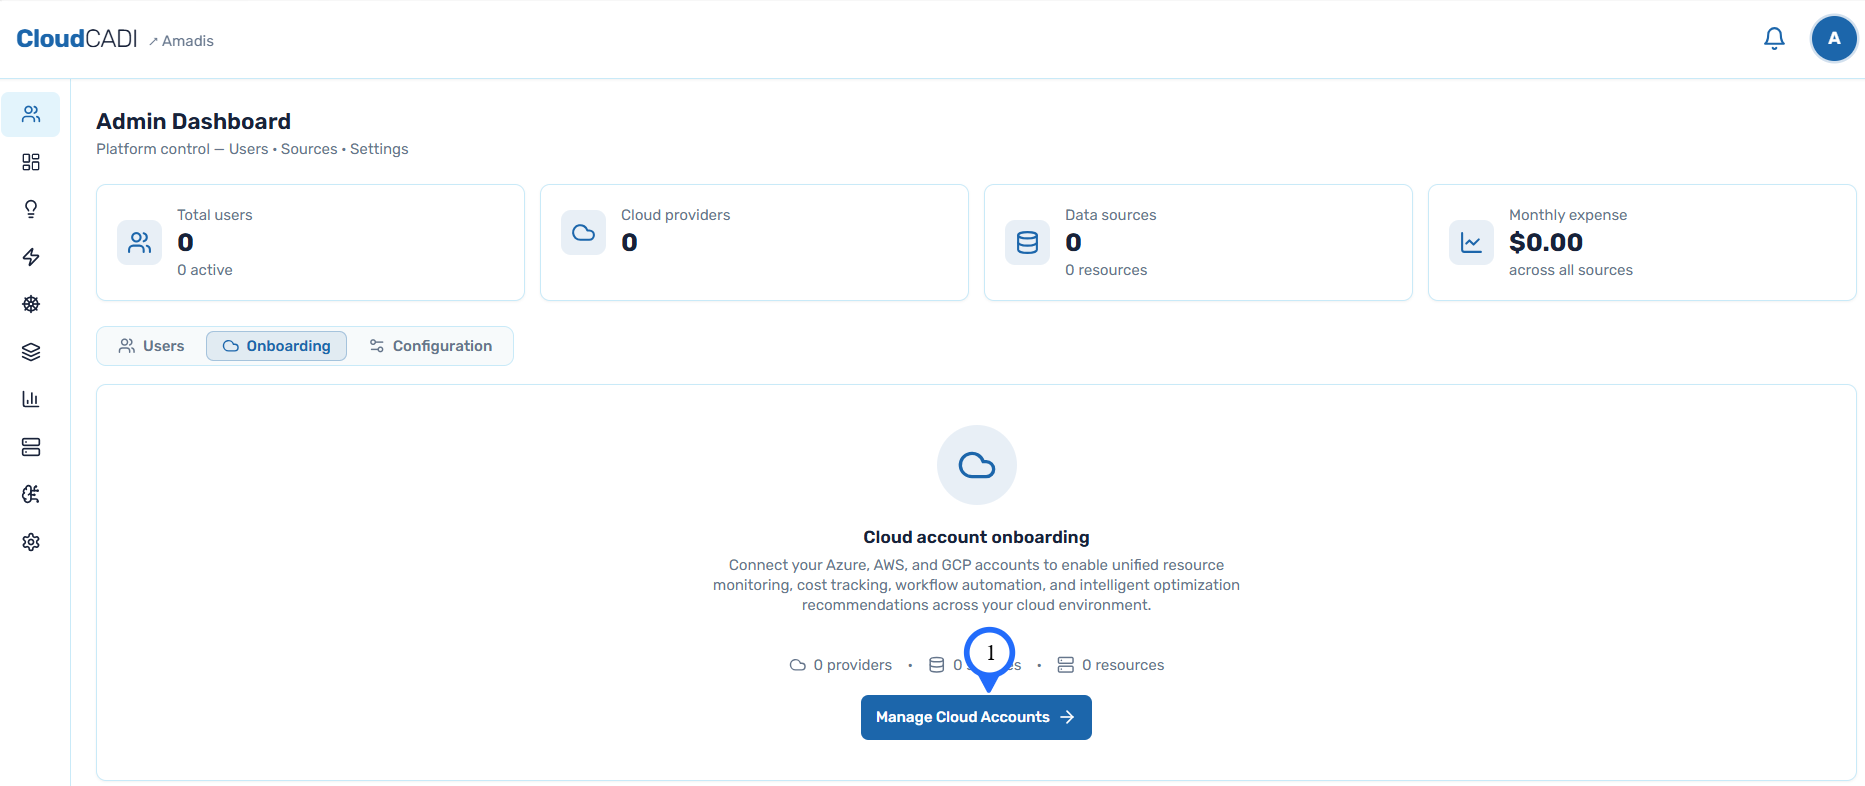
On the Cloud account onboarding screen, click Manage Cloud Accounts to connect your AWS accounts.
Step 2 - Add a New Data Source
-
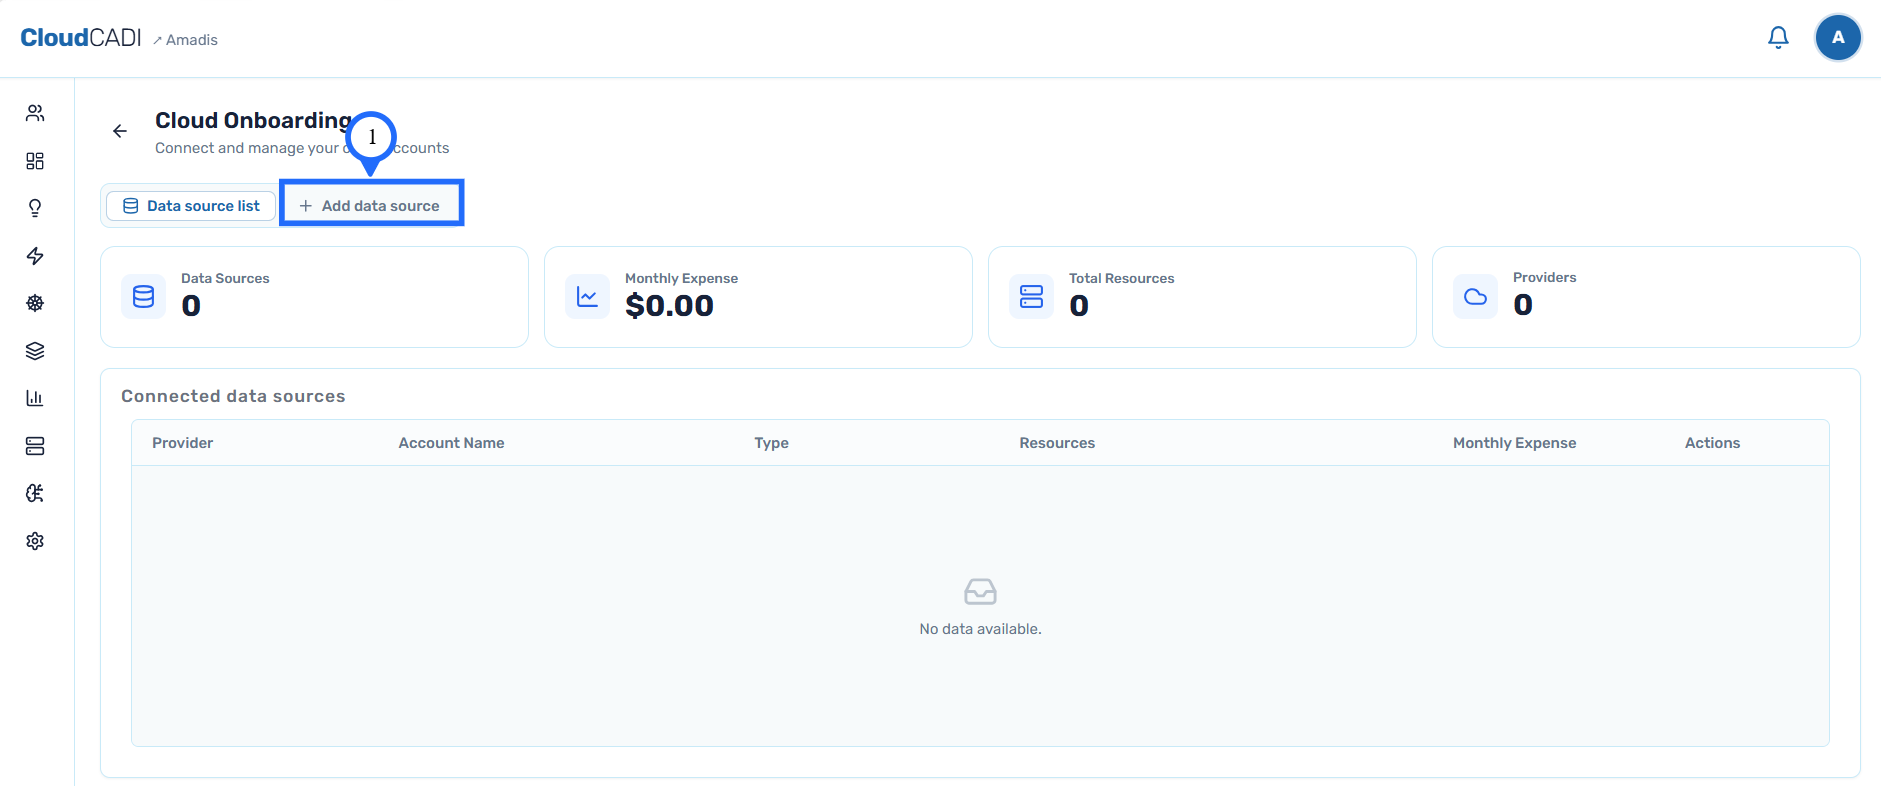
Click on the Add Data Source button at the top of the page.
 Auto Setup Requirement
Auto Setup is supported only if the CloudCADI deployed account is:
- The AWS management account, or
- A member account configured as a delegated administrator.
Auto Setup
This section explains how an Admin can onboard AWS accounts into CloudCADI using the Auto Setup flow.
Step 1 - Grant Permissions and Define Cost Export Path
-
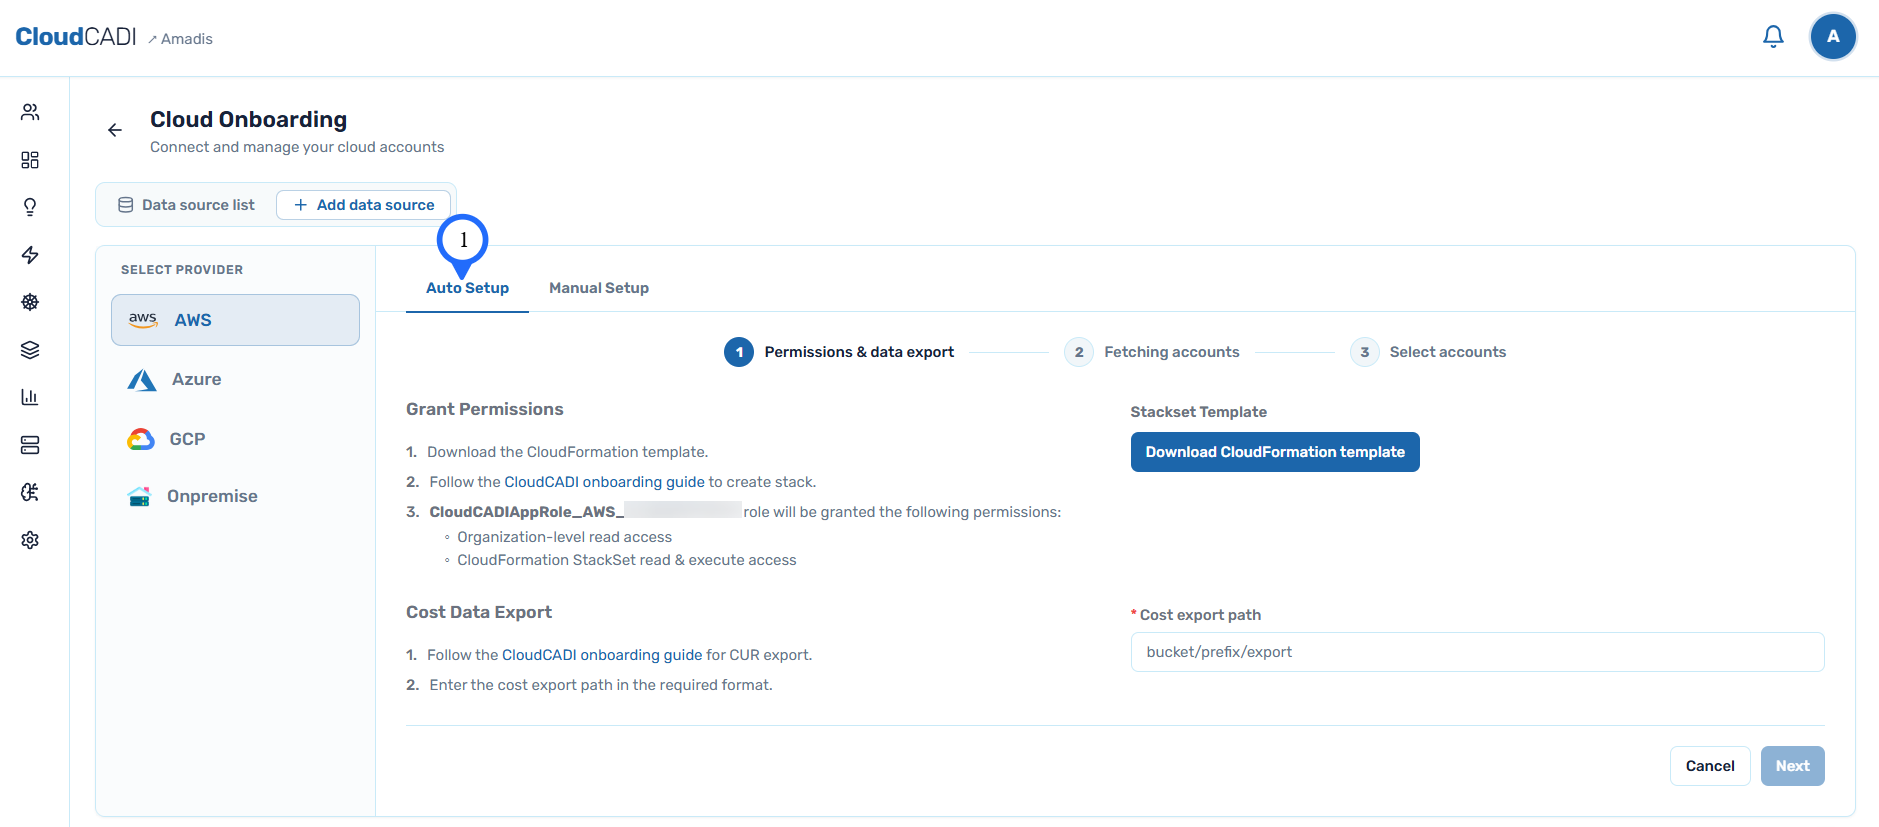
Click Auto Setup and from the list of cloud providers, select AWS.
-
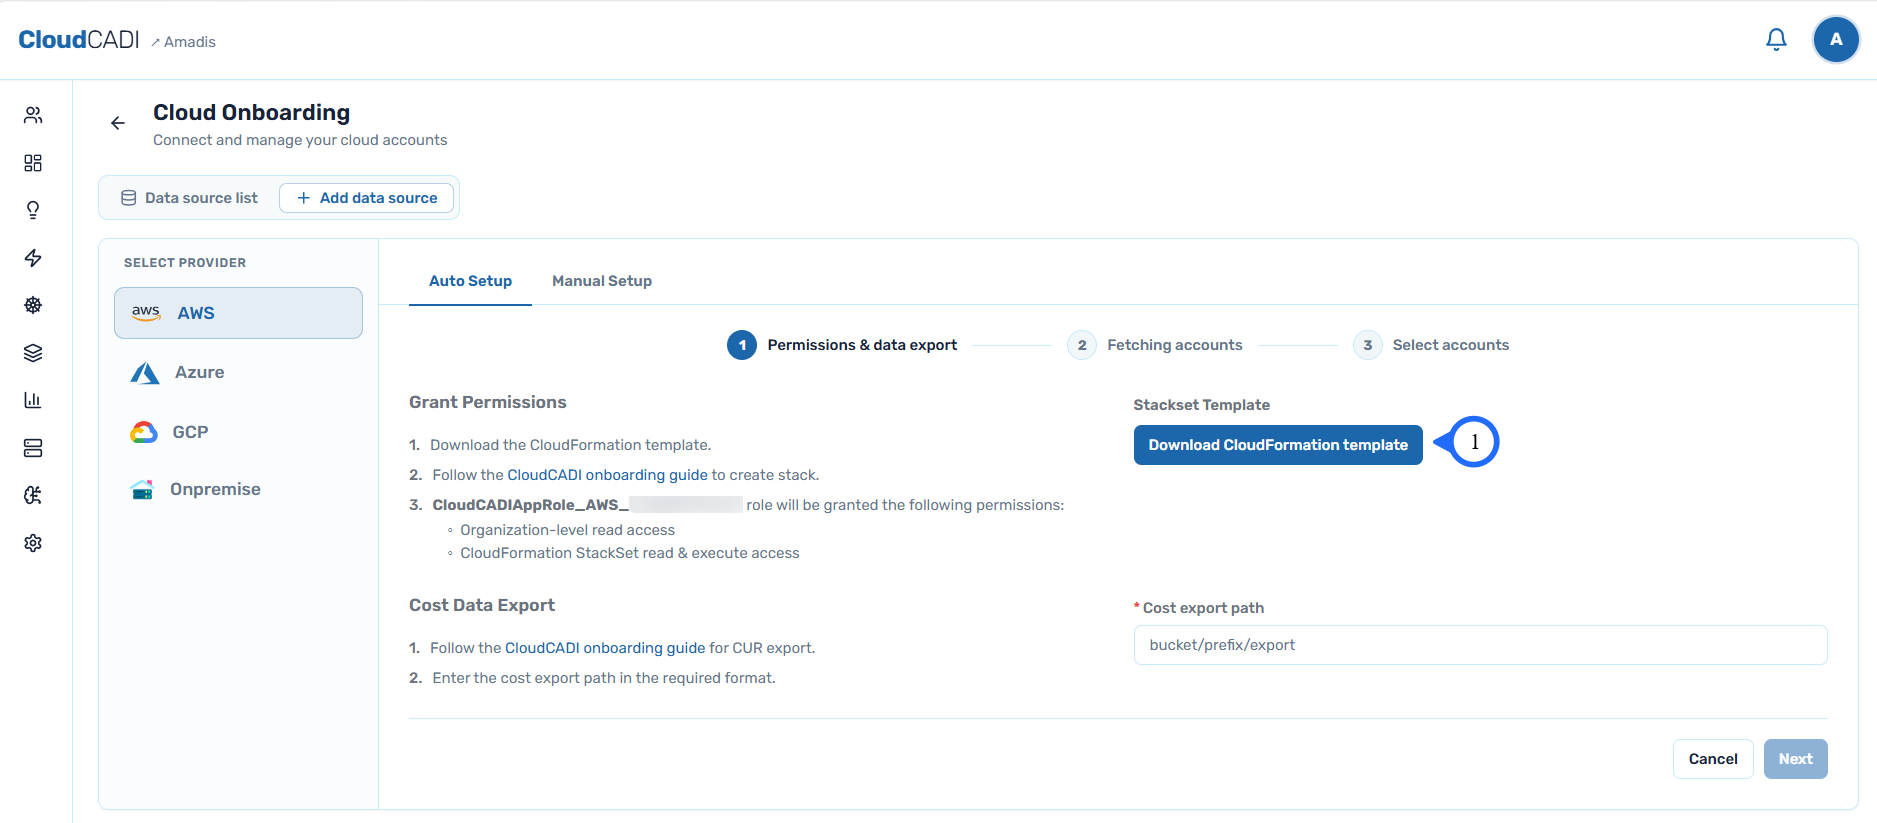
Download the CloudFormation stack template.
-
Deploy the stack by following the onboarding guide. This will create a role with the required permissions, including:
- Organization-level read access
- CloudFormation StackSet read and execute access
Deployment RequirementEnsure the CloudFormation stack is created:
- In the same AWS account where CloudCADI is deployed.
- In the same region as the CloudCADI deployment.
-
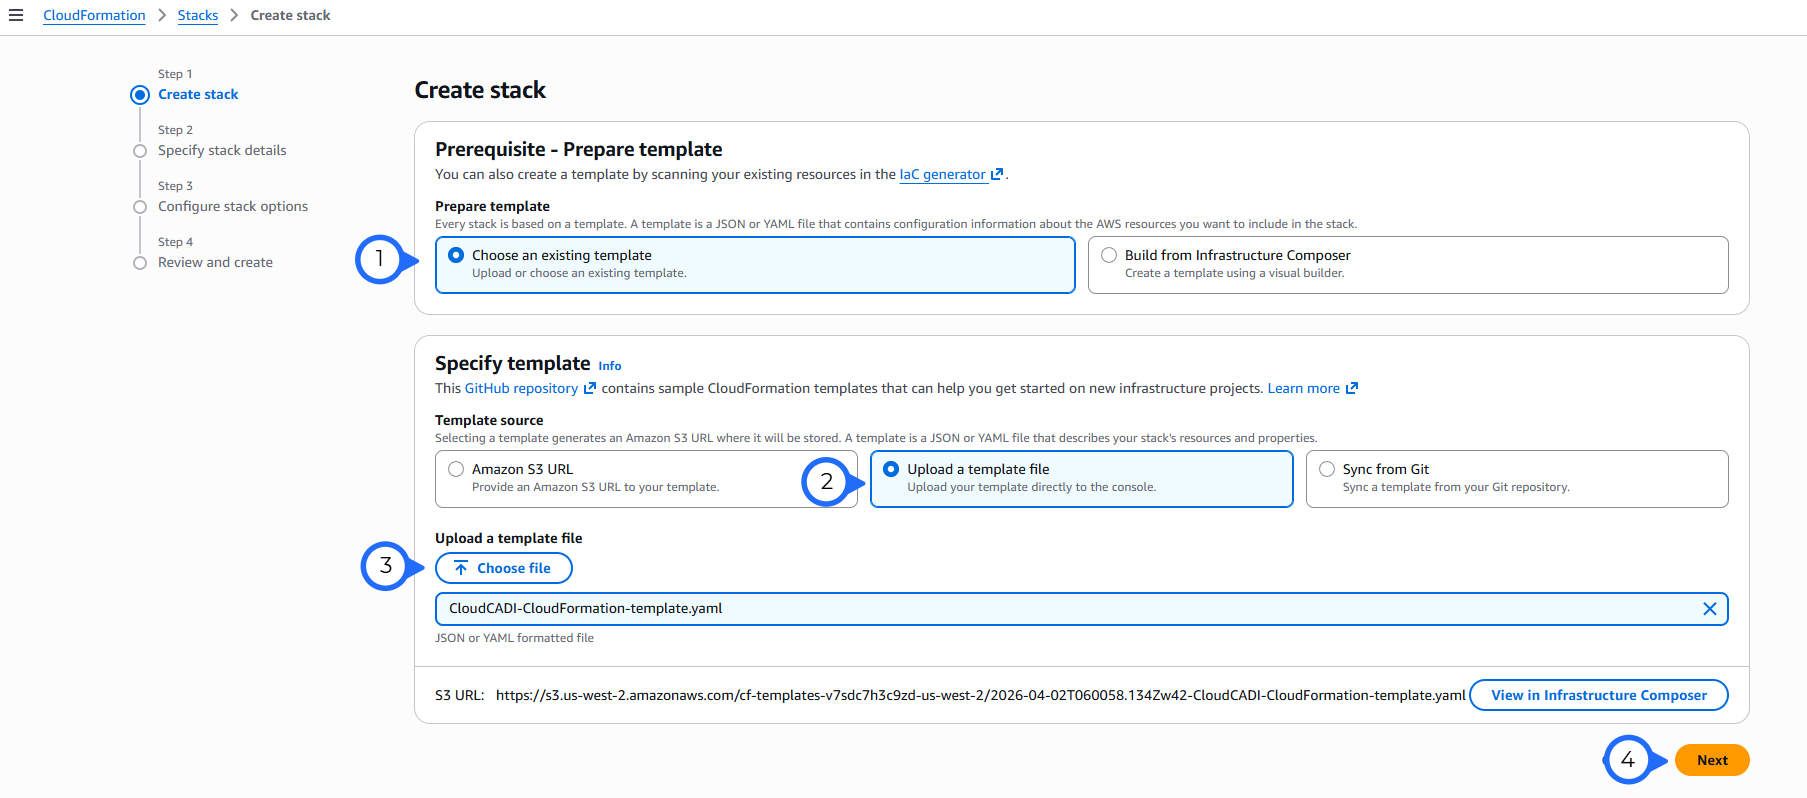
Open the AWS CloudFormation Console.
-
Under Prepare template, select Choose an existing template.
-
Under Template source, select Upload a template file.
-
Upload the downloaded CloudFormation template file and click next.
-
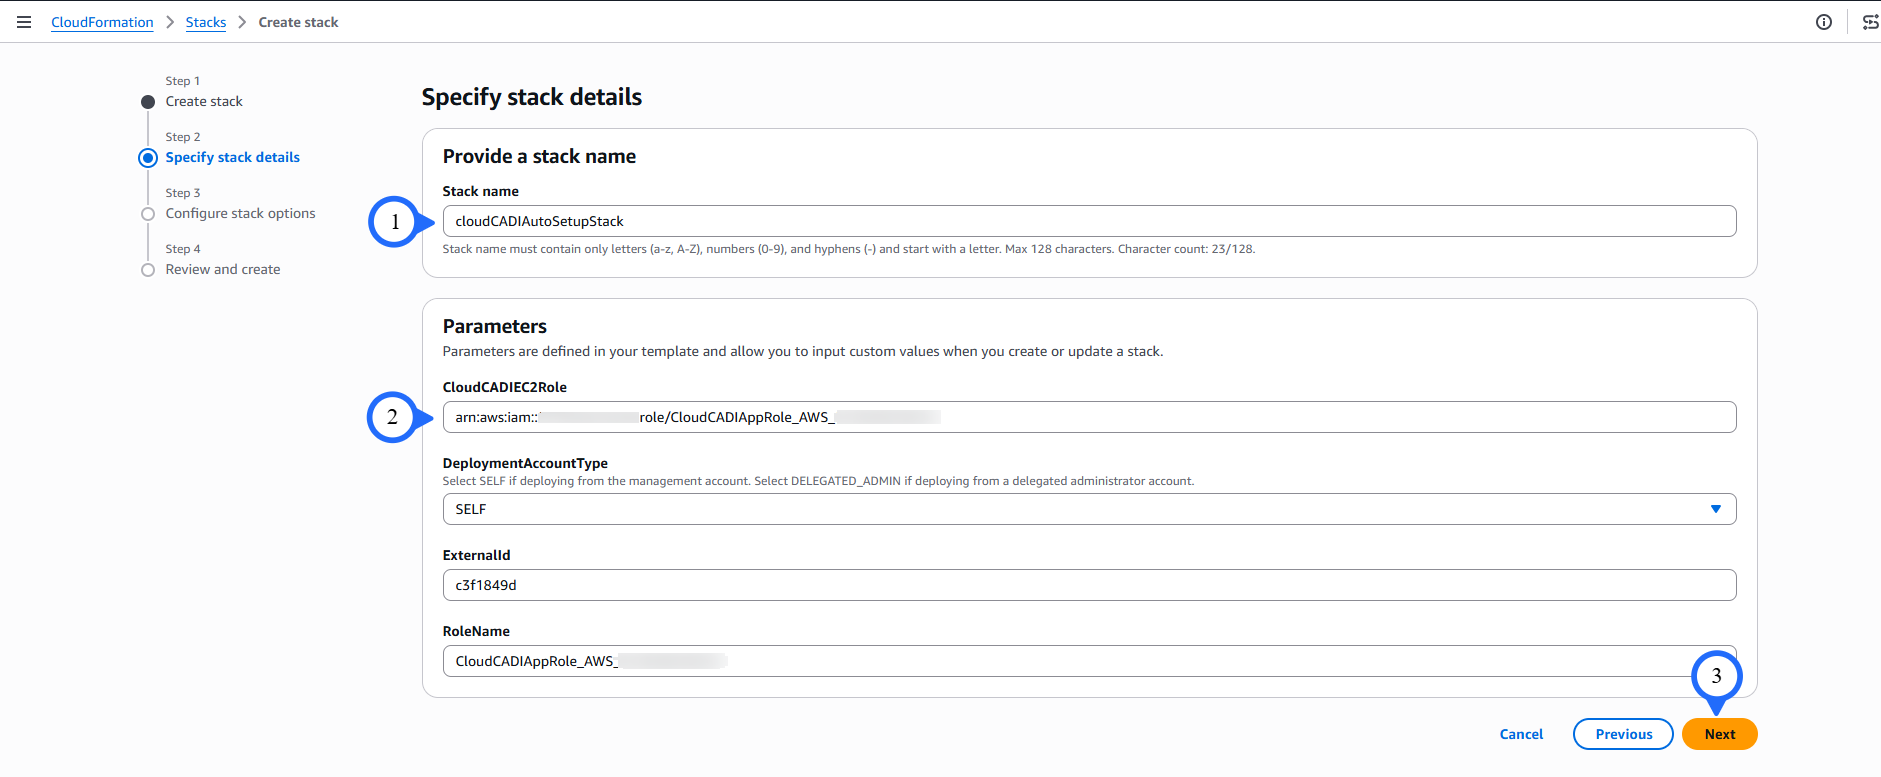
Under specify stack details. Enter stack name.
-
For DeployedAccountType, select SELF if the CloudCADI deployed account is the AWS Organizations management account. Select DELEGATED_ADMIN if it is a member account configured as a delegated administrator.
Enable Delegated Administrator
Follow these steps to enable a delegated administrator in AWS Organizations:
-
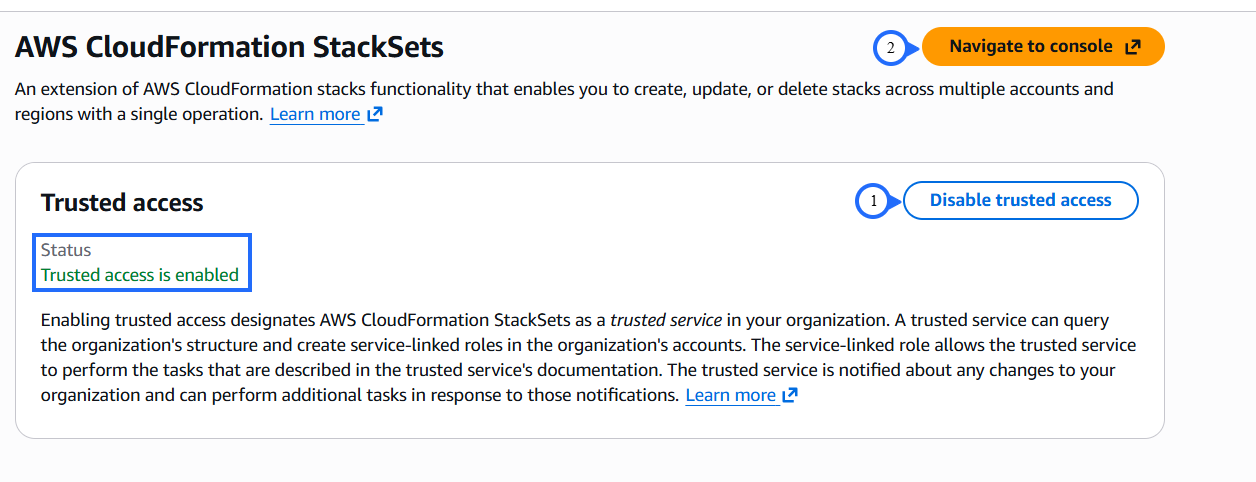
Sign in to the AWS Management Account and open AWS Organizations → Services.
-
Find AWS CloudFormation StackSets and click Enable trusted access.
-
Click Navigate to Console.
-
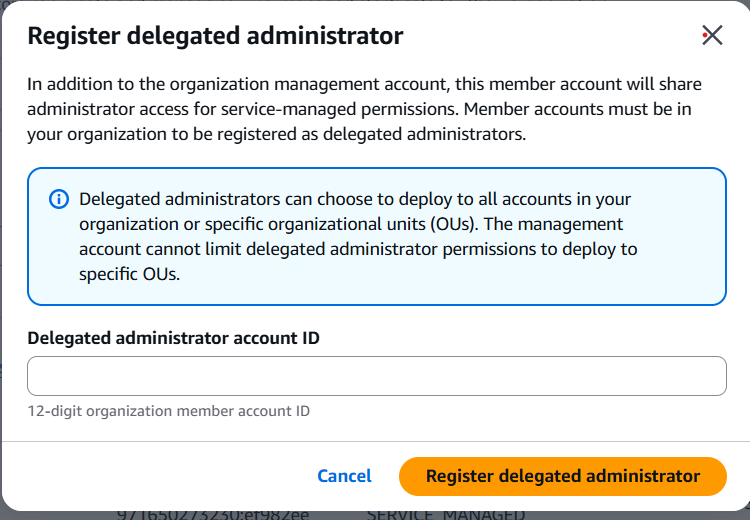
Under Delegated Administrators, click Register delegated administrator.

-
A popup will appear. Enter the Delegated Administrator Account ID and click Register Delegated Administrator.
-
The member account can now perform the required actions.
-
-
Click Next.
-
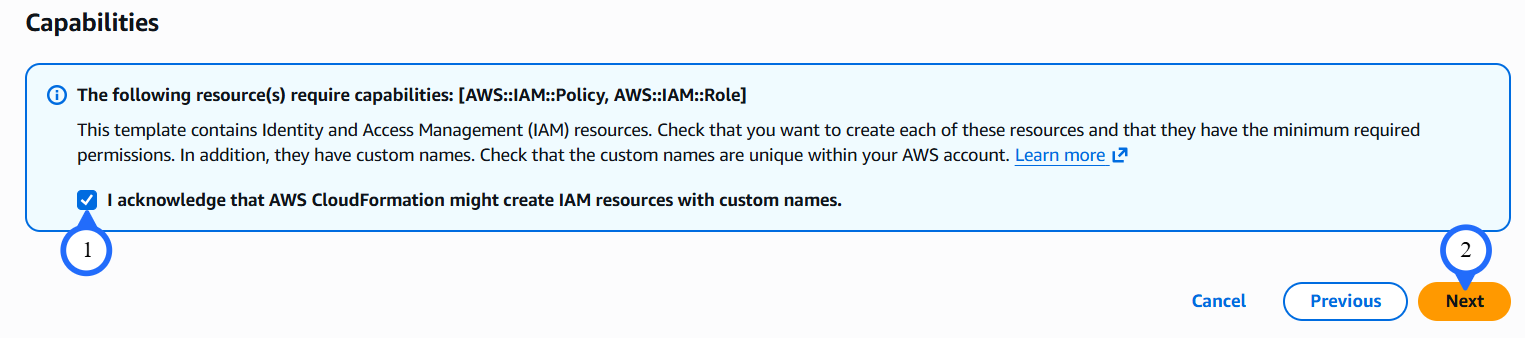
Under Configure stack options, scroll to the bottom, acknowledge the required capabilities by selecting the checkbox, and click Next.

-
Under Review and create, scroll down, verify all configuration details, and click Create stack.
One-Time Setup- This CloudFormation stack deployment is a one-time setup.
- CloudCADI automatically creates the required cross-account roles using StackSets when you select accounts from the UI.
-
Enter the management account cost export path in the required format:
<bucket-name>/<prefix>/<export-name>
- The provided bucket must belong to the Management Account. If not, cost data will not be available for other accounts.
- If you are using a cross-account bucket (for example, when the deployed account is a member account), ensure that the appropriate bucket policy is configured to allow access.
-
Refer to the AWS Cost & Usage Data Export (FOCUS) documentation for detailed steps.
-
Click Next. The cost export path and required permissions are validated, and the accounts are fetched and displayed in the UI.
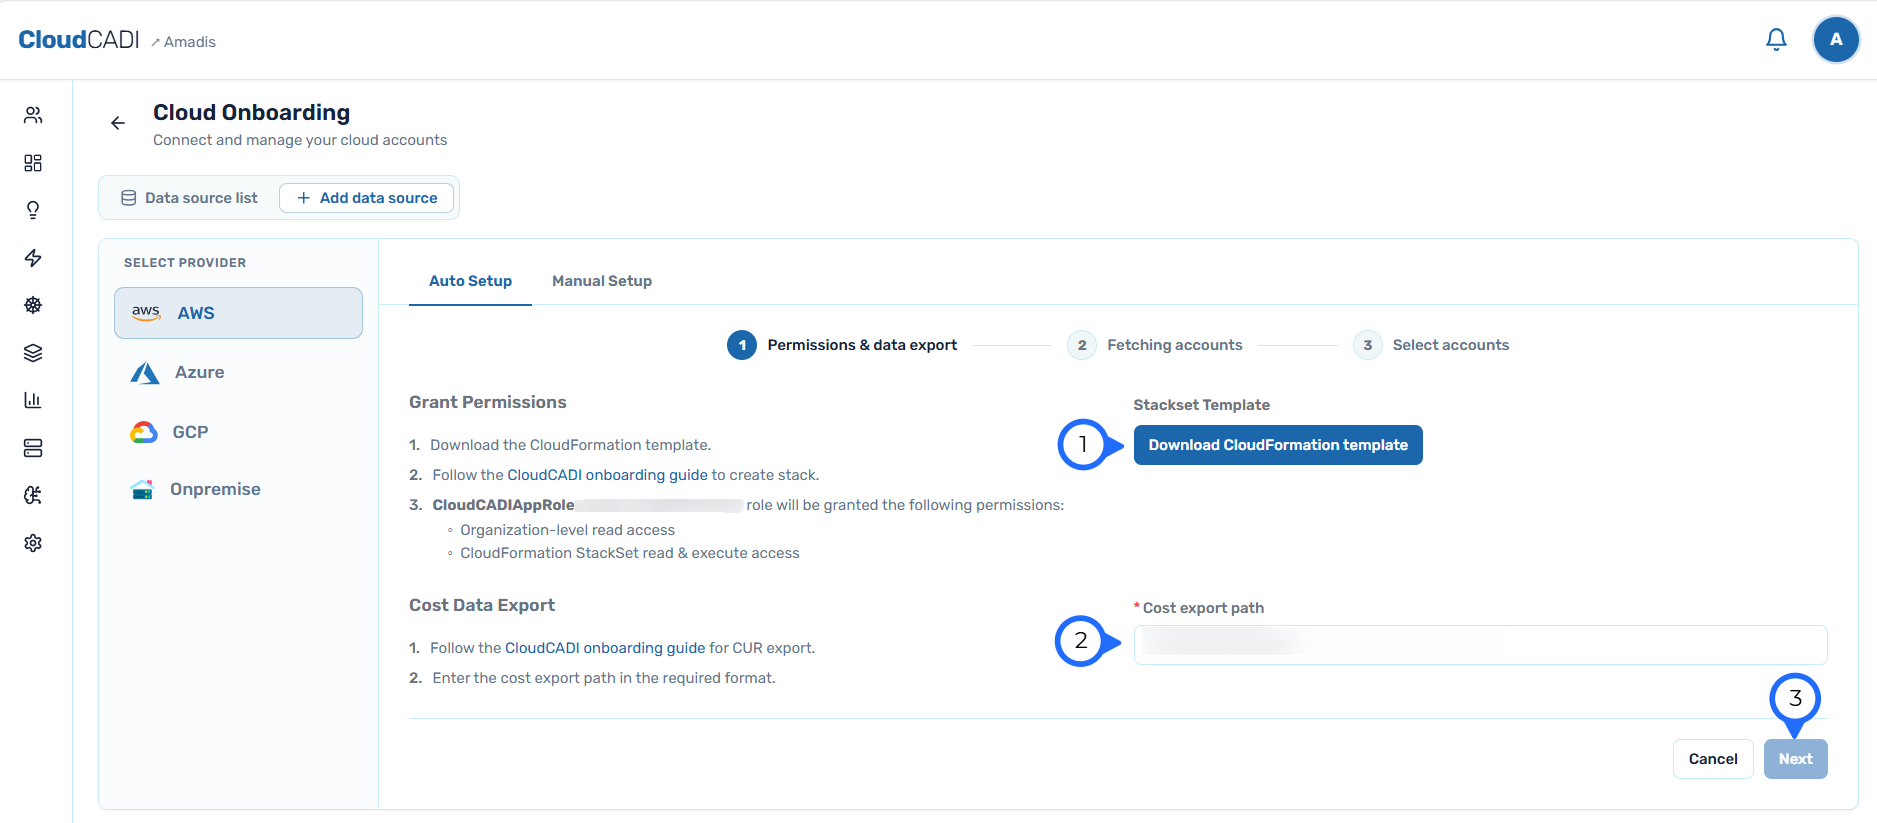
Entering the cost export path is required only the first time. For subsequent onboarding, accounts are fetched directly and you can select and onboard them without re-entering the cost export path.
Step 2 - Fetch and Select Accounts
-
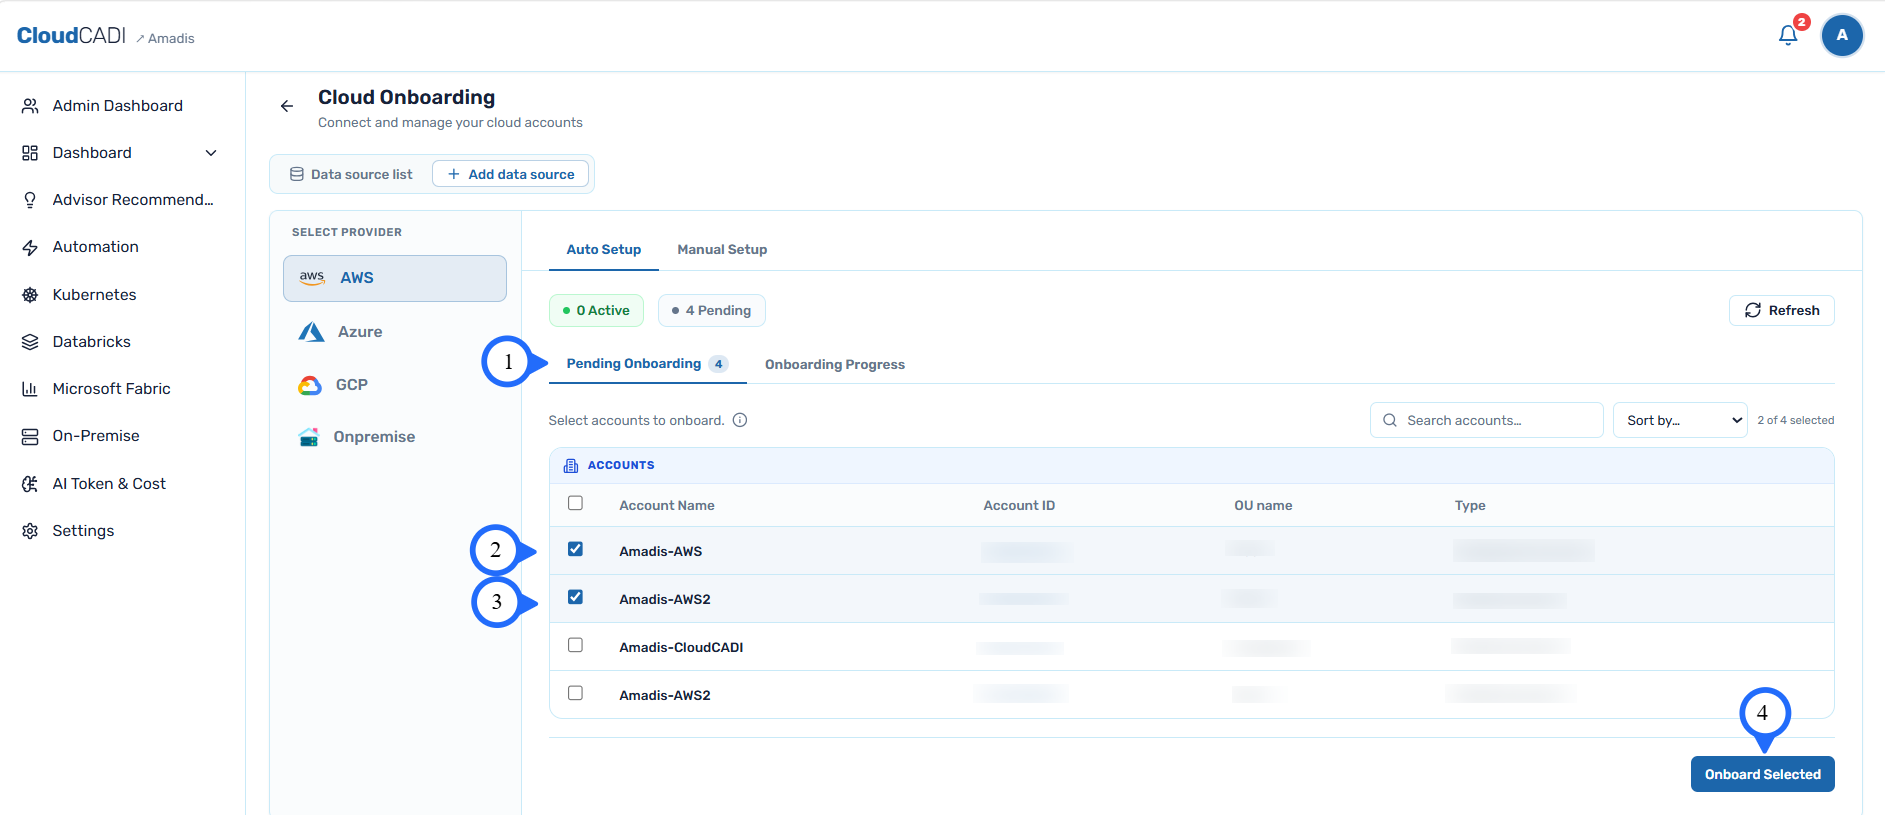
Once validation succeeds, all accounts in the same AWS Organization are fetched automatically. Select the accounts to onboard and click Onboard Selected.
Step 3 - Track Onboarding Progress
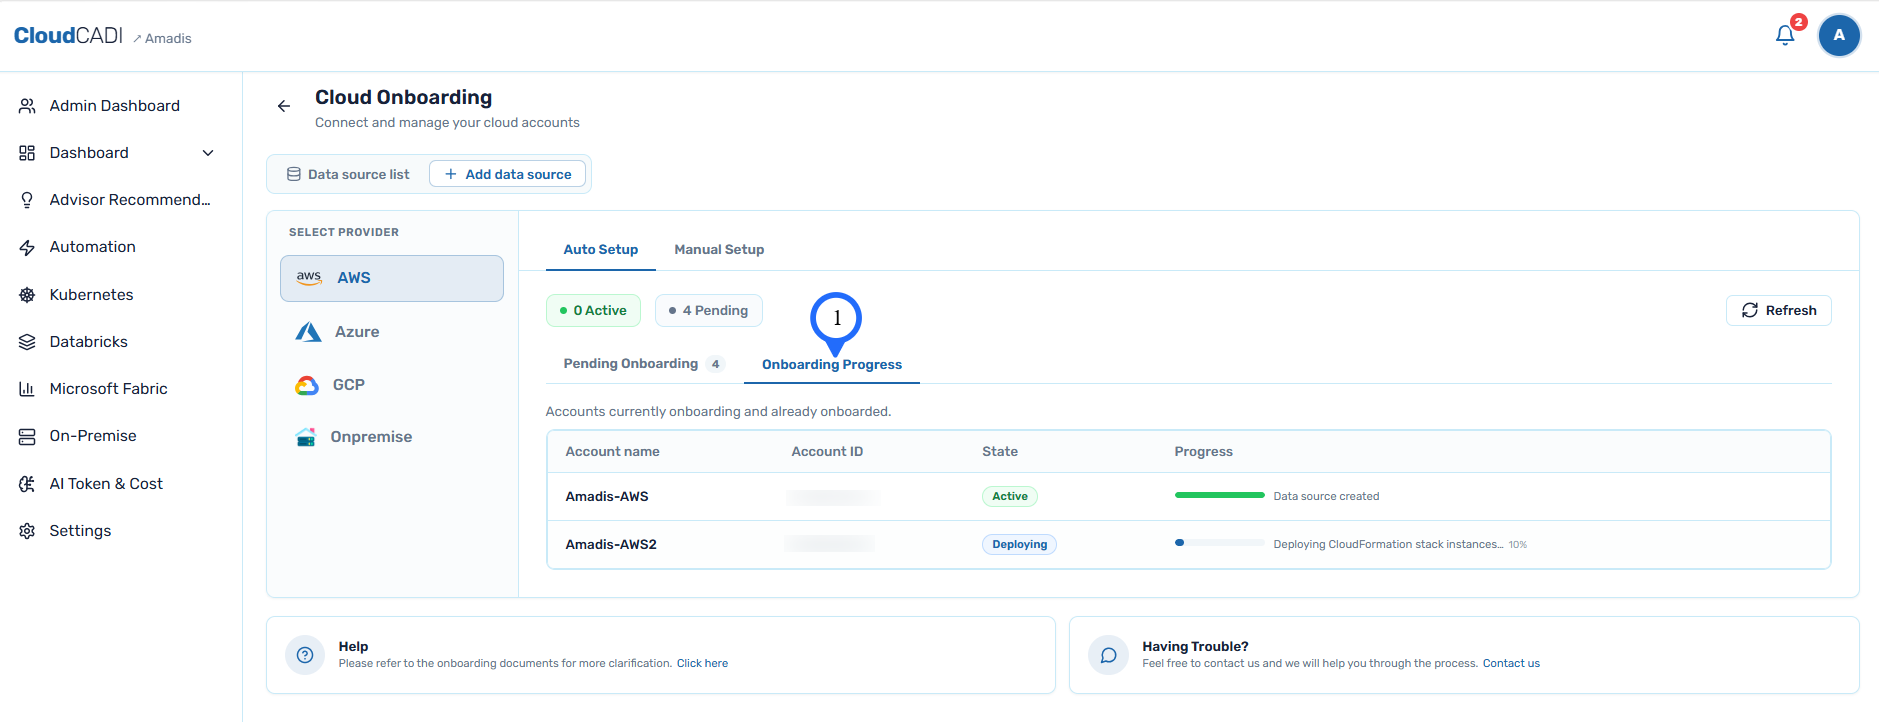
- Go to the Onboarding Progress tab to view the onboarding status of each selected account.
-
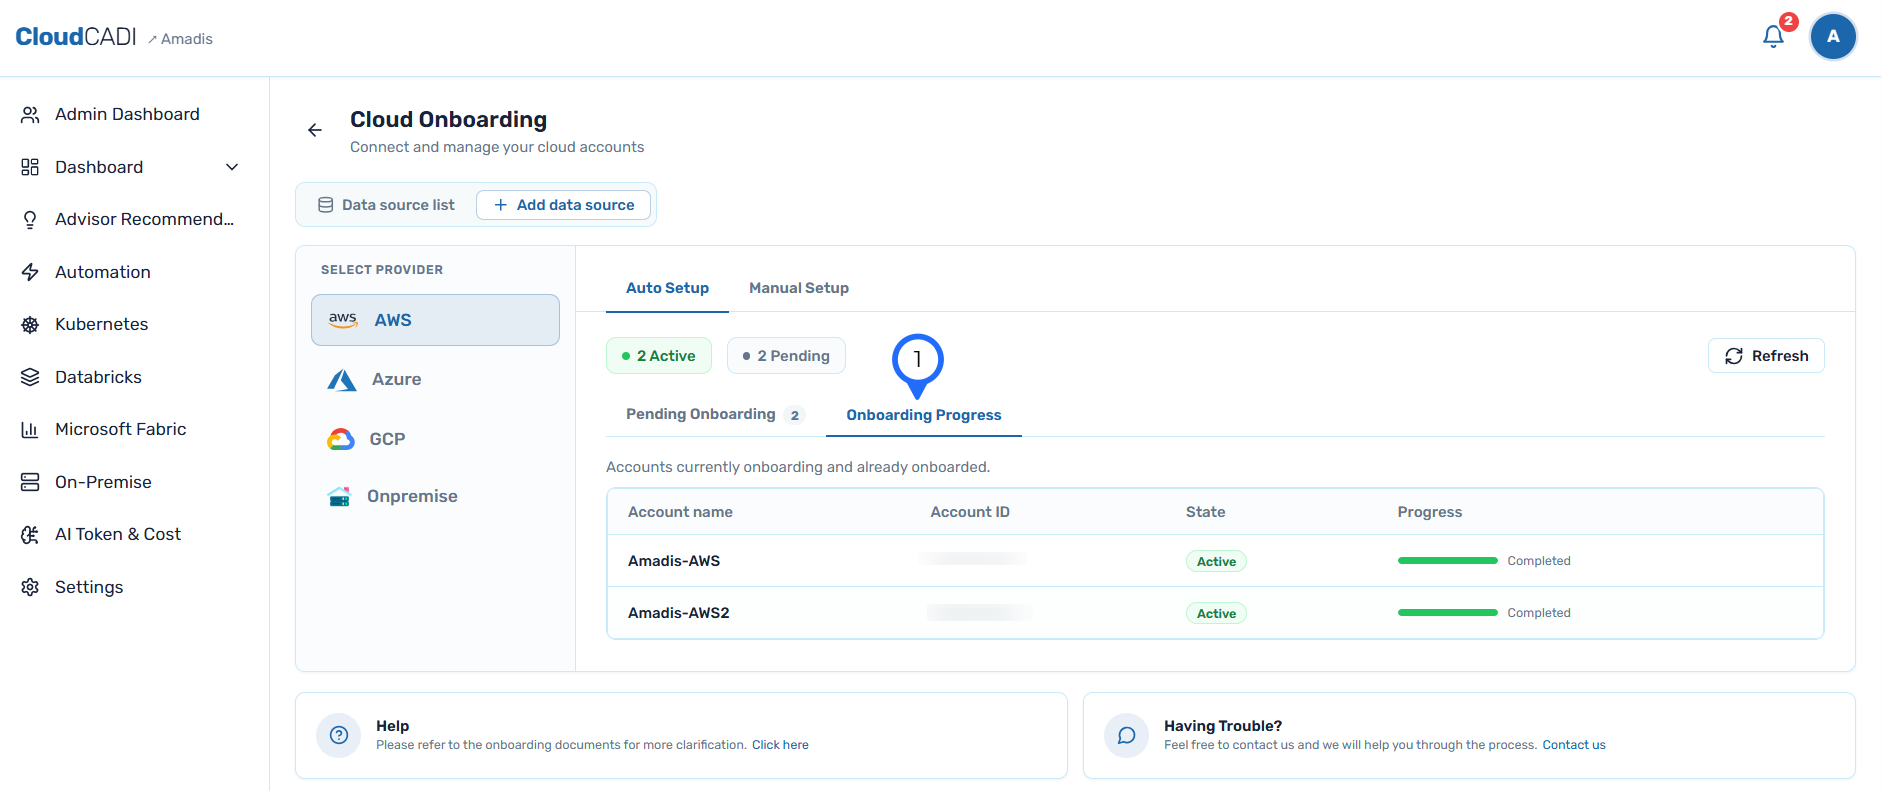
Once an account's state changes to Active and progress shows Completed, onboarding is complete and the account's cost and usage data will begin syncing into CloudCADI.
Step 4 - Verify Data Source Creation
-
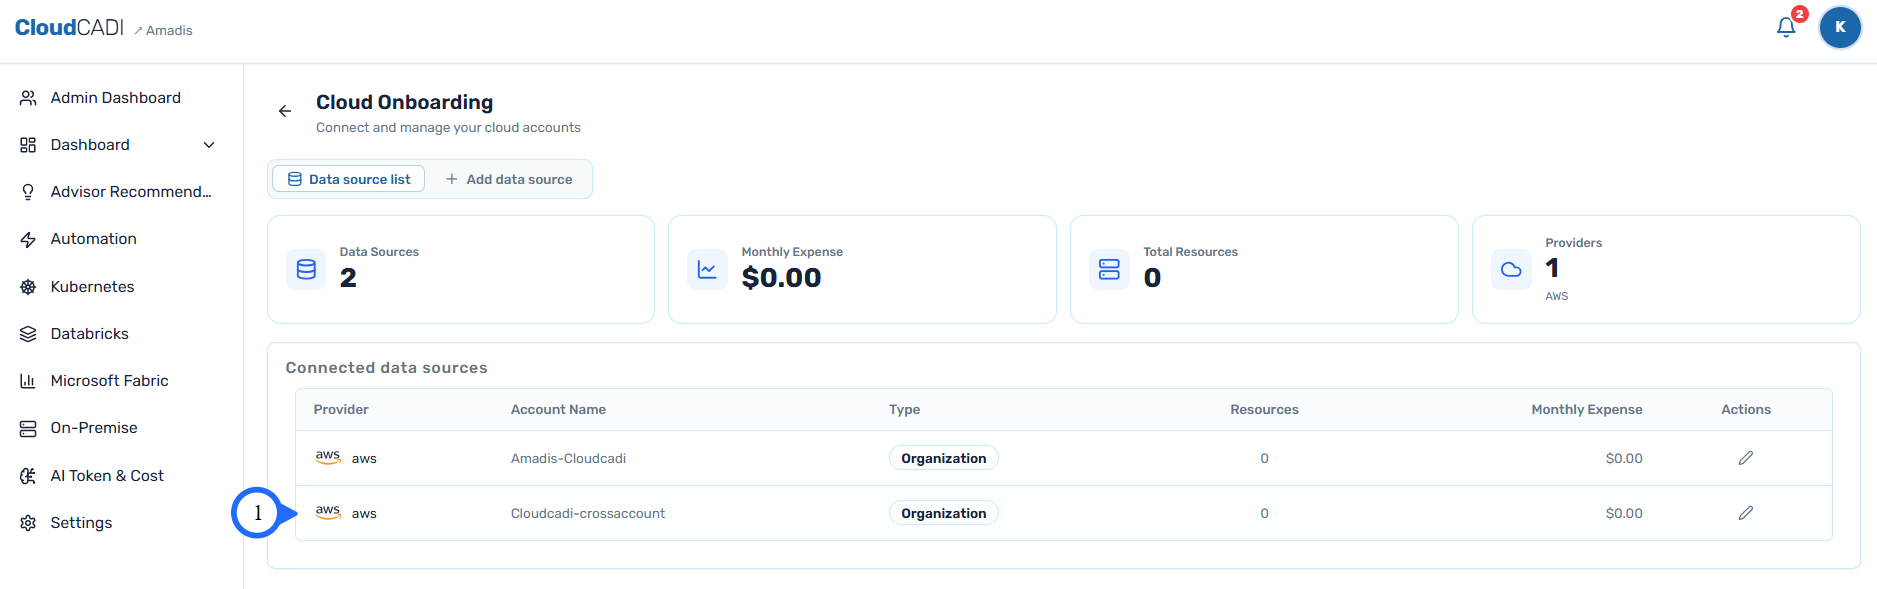
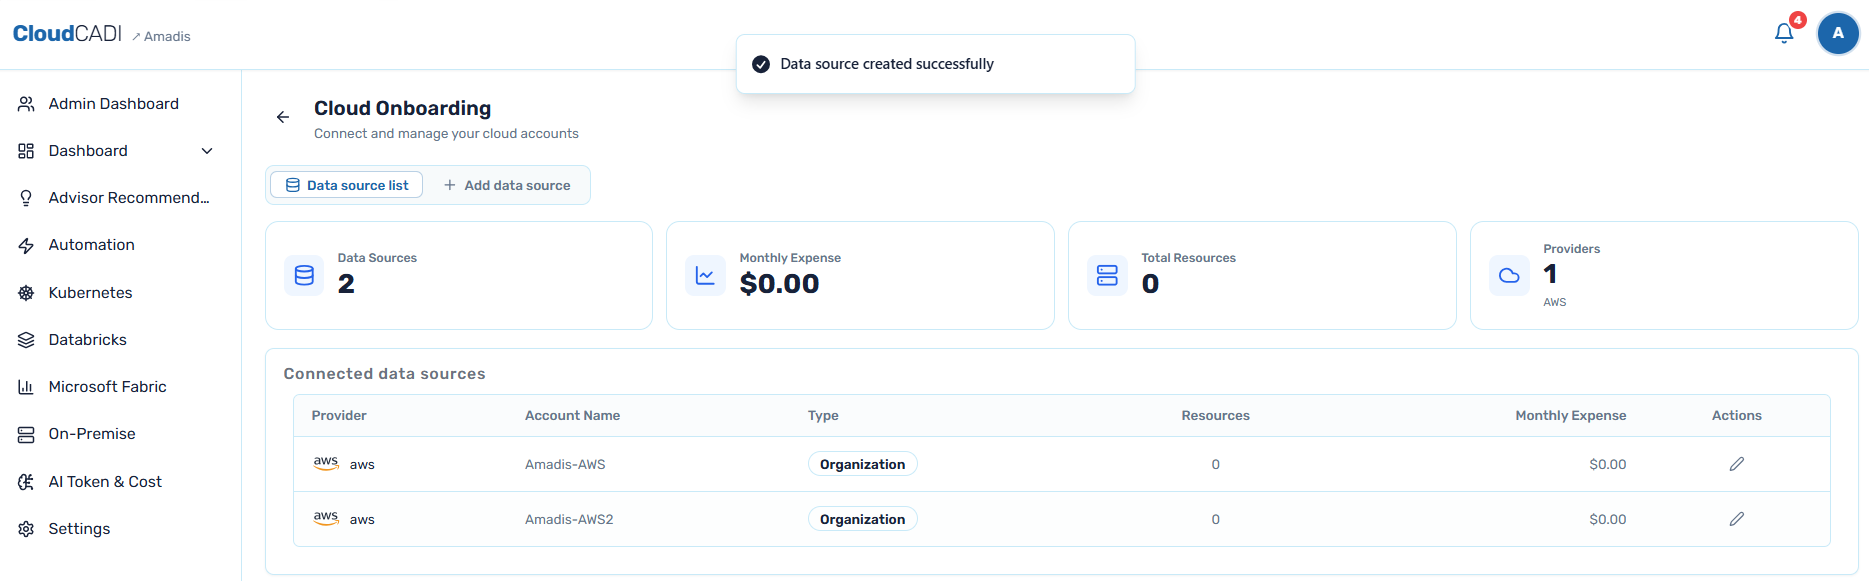
Navigate to the Data Sources list tab and confirm the AWS account appears, with the provider shown as AWS and the configured Account name.
-
After successful onboarding, AWS cost and usage data becomes available across CloudCADI dashboards.
Update S3 Bucket Policy
-
In the AWS Console, navigate to the S3 bucket configured for the cost export path.
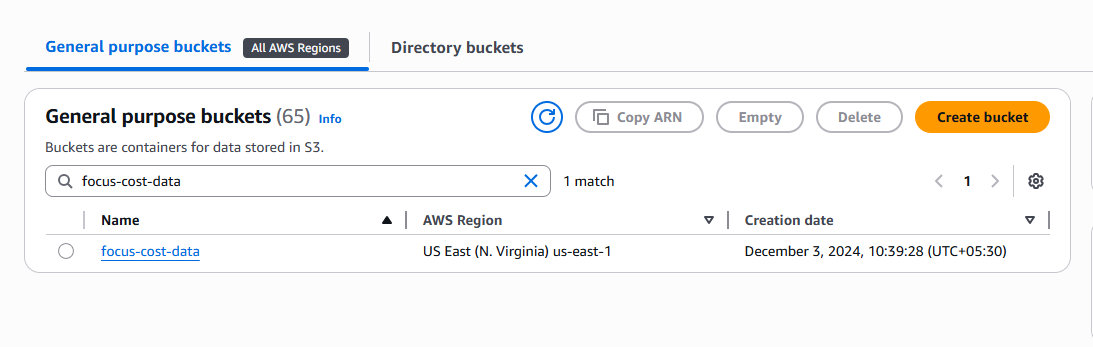
-
Go to the Permissions tab and click Edit.
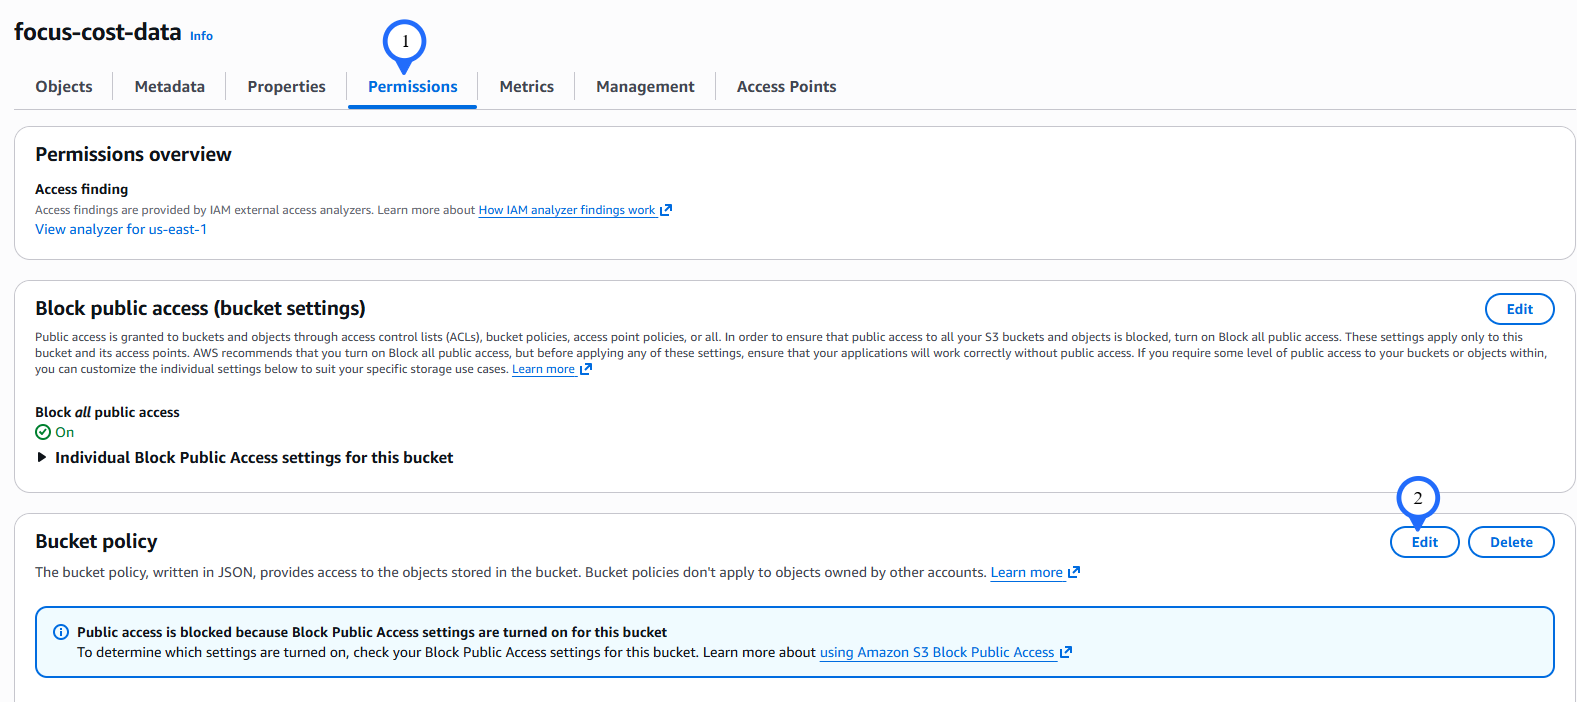
-
Add the following statement to the existing bucket policy and click Save changes.
{"Effect": "Allow","Principal": {"AWS": "<ROLE_ARN>"},"Action": ["s3:GetObject", "s3:ListBucket"],"Resource": ["arn:aws:s3:::<BUCKET_NAME>", "arn:aws:s3:::<BUCKET_NAME>/*"]}tip- Replace
<ROLE_ARN>with the Role ARN obtained during stack creation. - Replace
<BUCKET_NAME>with your S3 bucket name.
warningDo not remove existing statements in the bucket policy. Only add the above statement.
- Replace
Manual Setup
This section explains how an Admin can onboard AWS accounts into CloudCADI using the Manual Setup flow.
Step 1 - Configure Data Source for Deployed Account
-
In the Add Data Source tab, select Manual Setup.
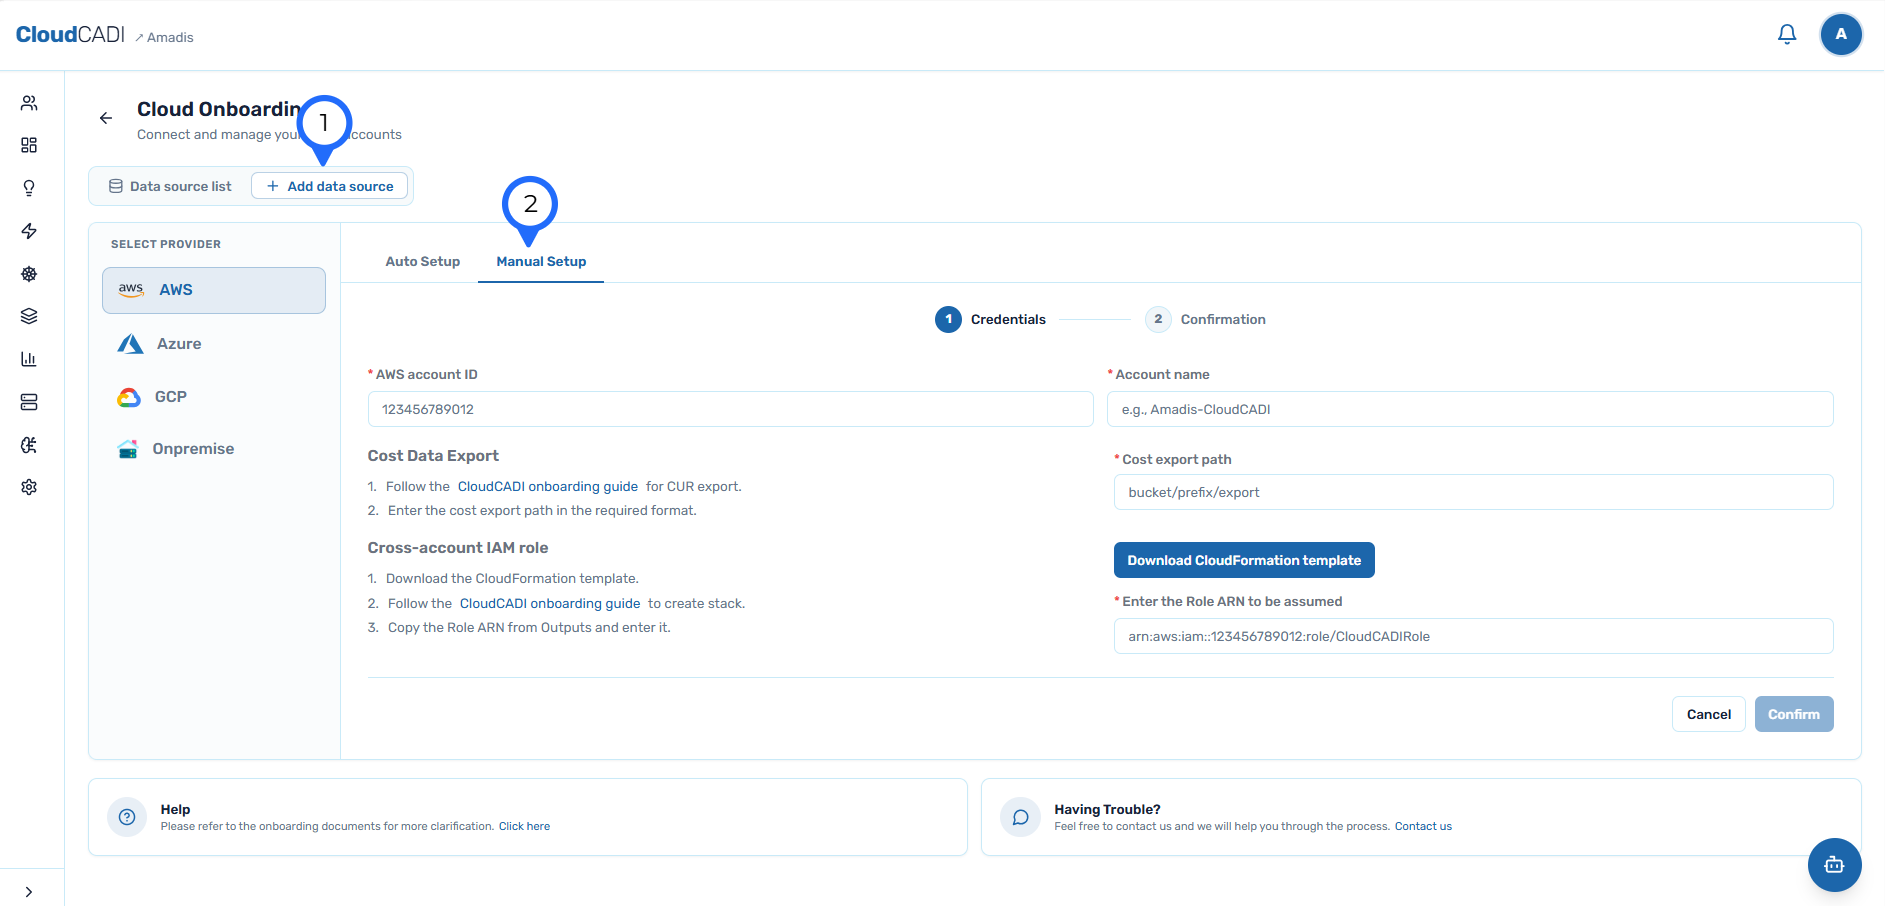
-
To complete onboarding for a CloudCADI-deployed account, enter the AWS Account ID, Account Name, and Cost export path.
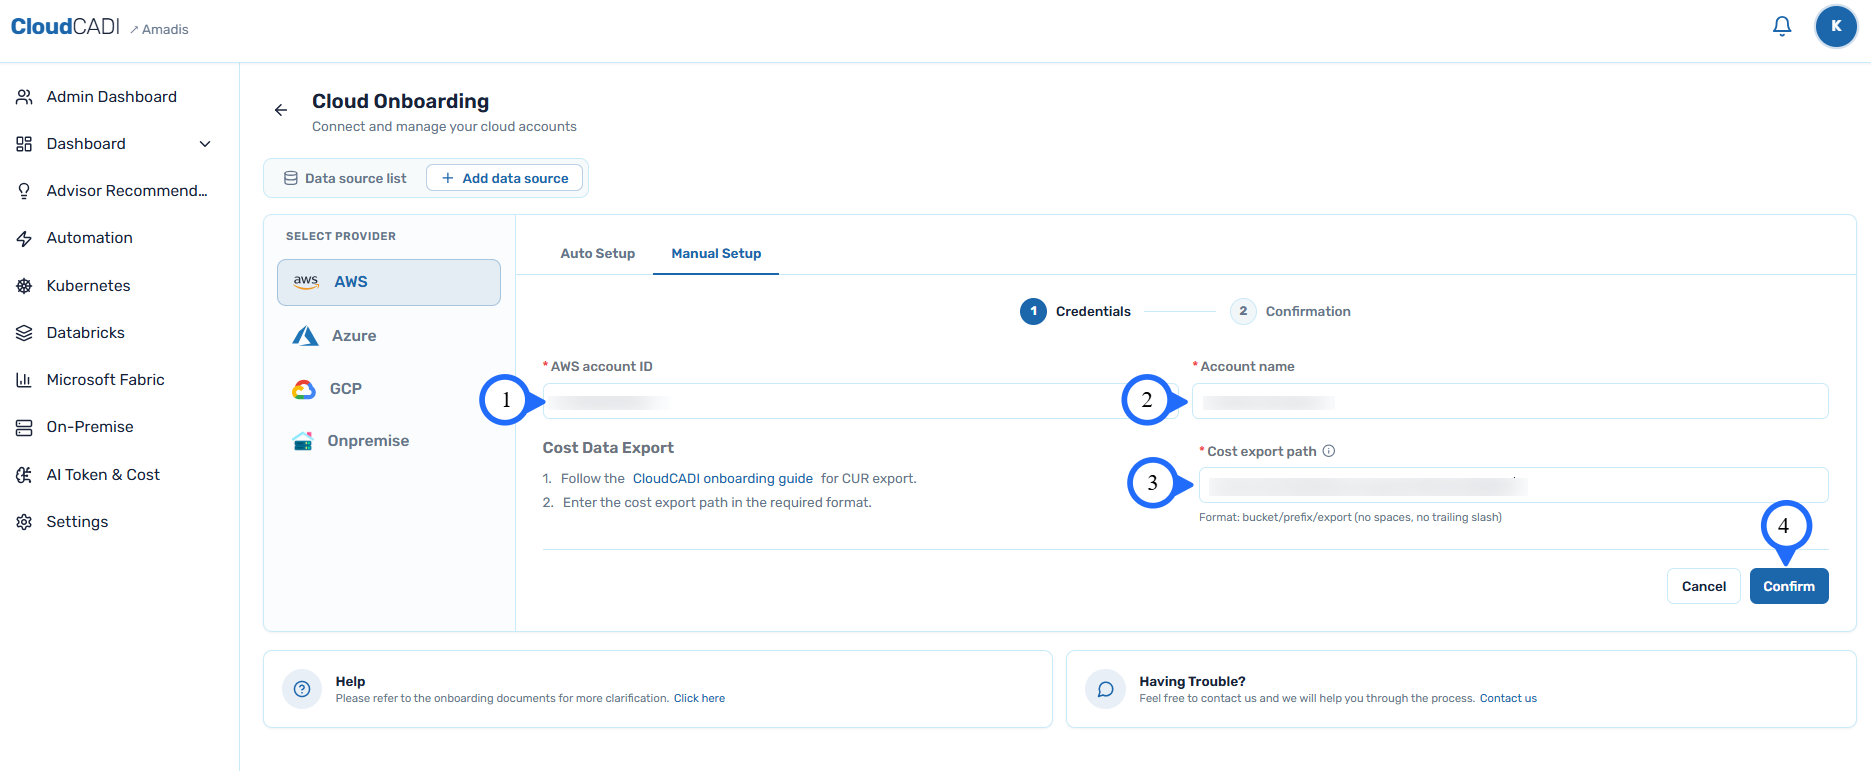
-
Click Next.
-
CloudCADI validates the cost export path and required permissions.
-
Refer to the AWS Cost & Usage Data Export (FOCUS) documentation for detailed steps.
-
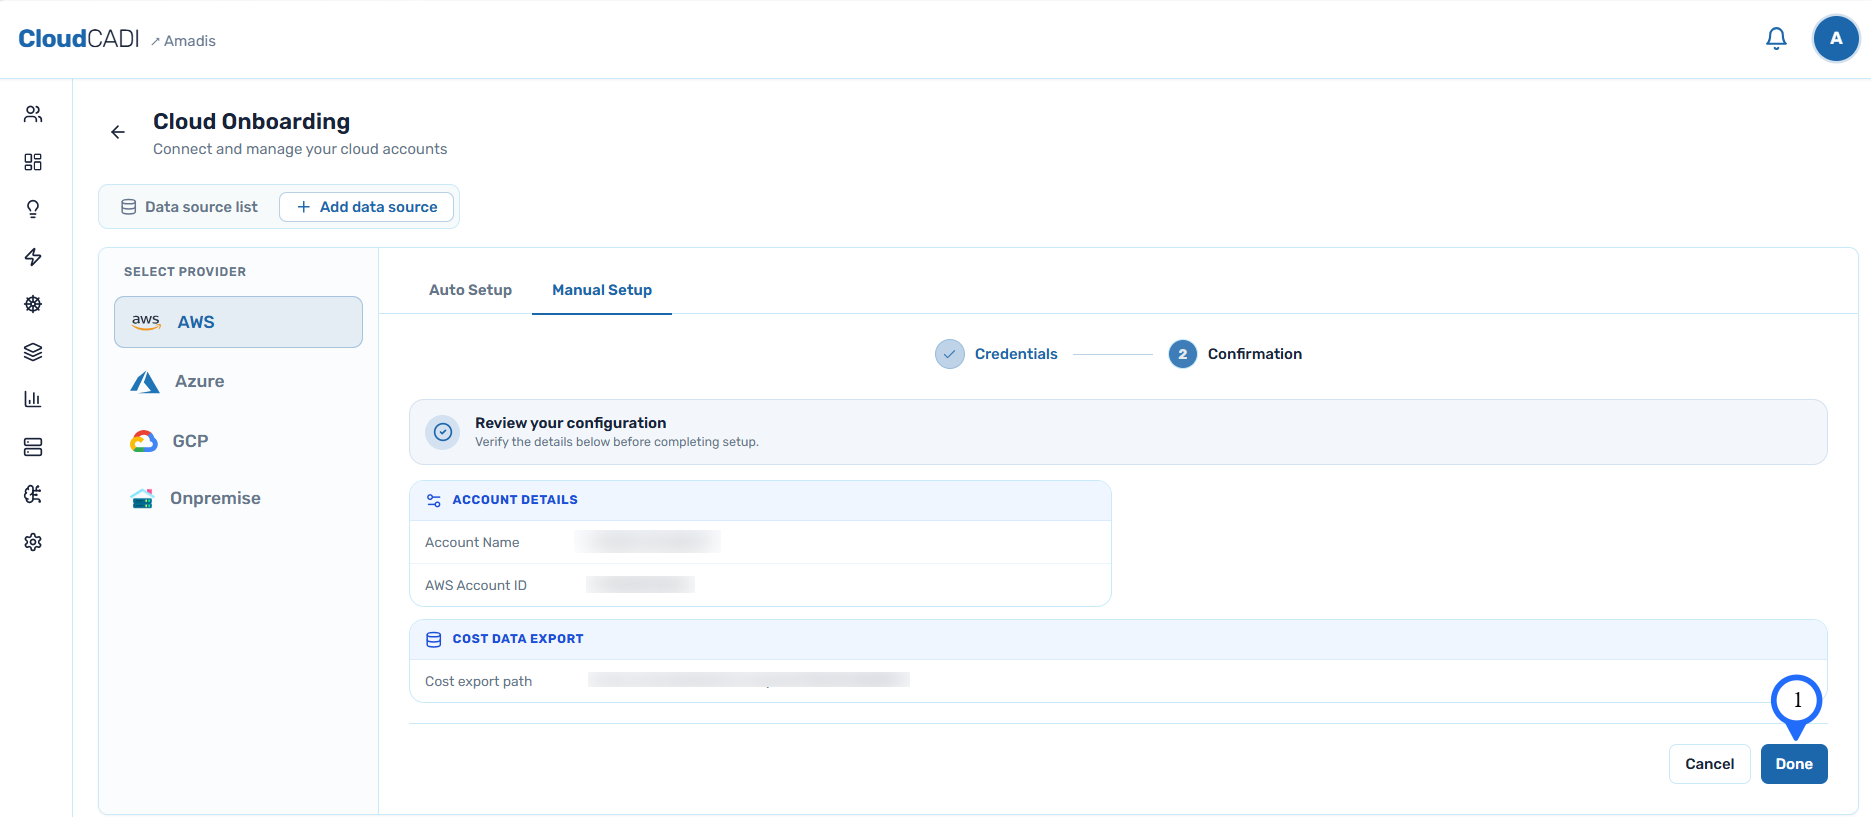
Once validation is complete, a confirmation page is displayed. Click Done to create the data source.
-
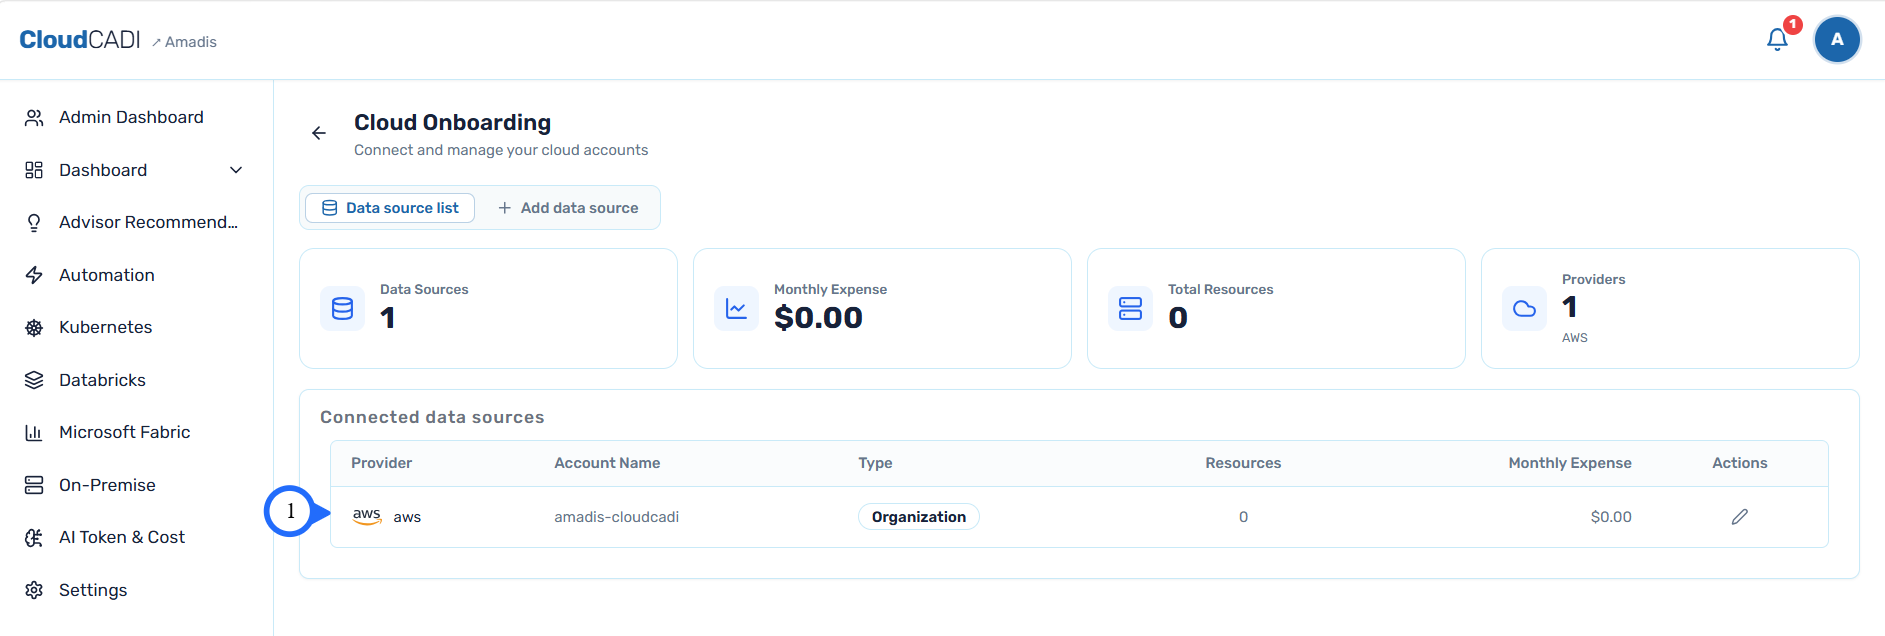
You will be redirected to the Data Sources list page.
Step 2 - Configure Cross-Account Setup
-
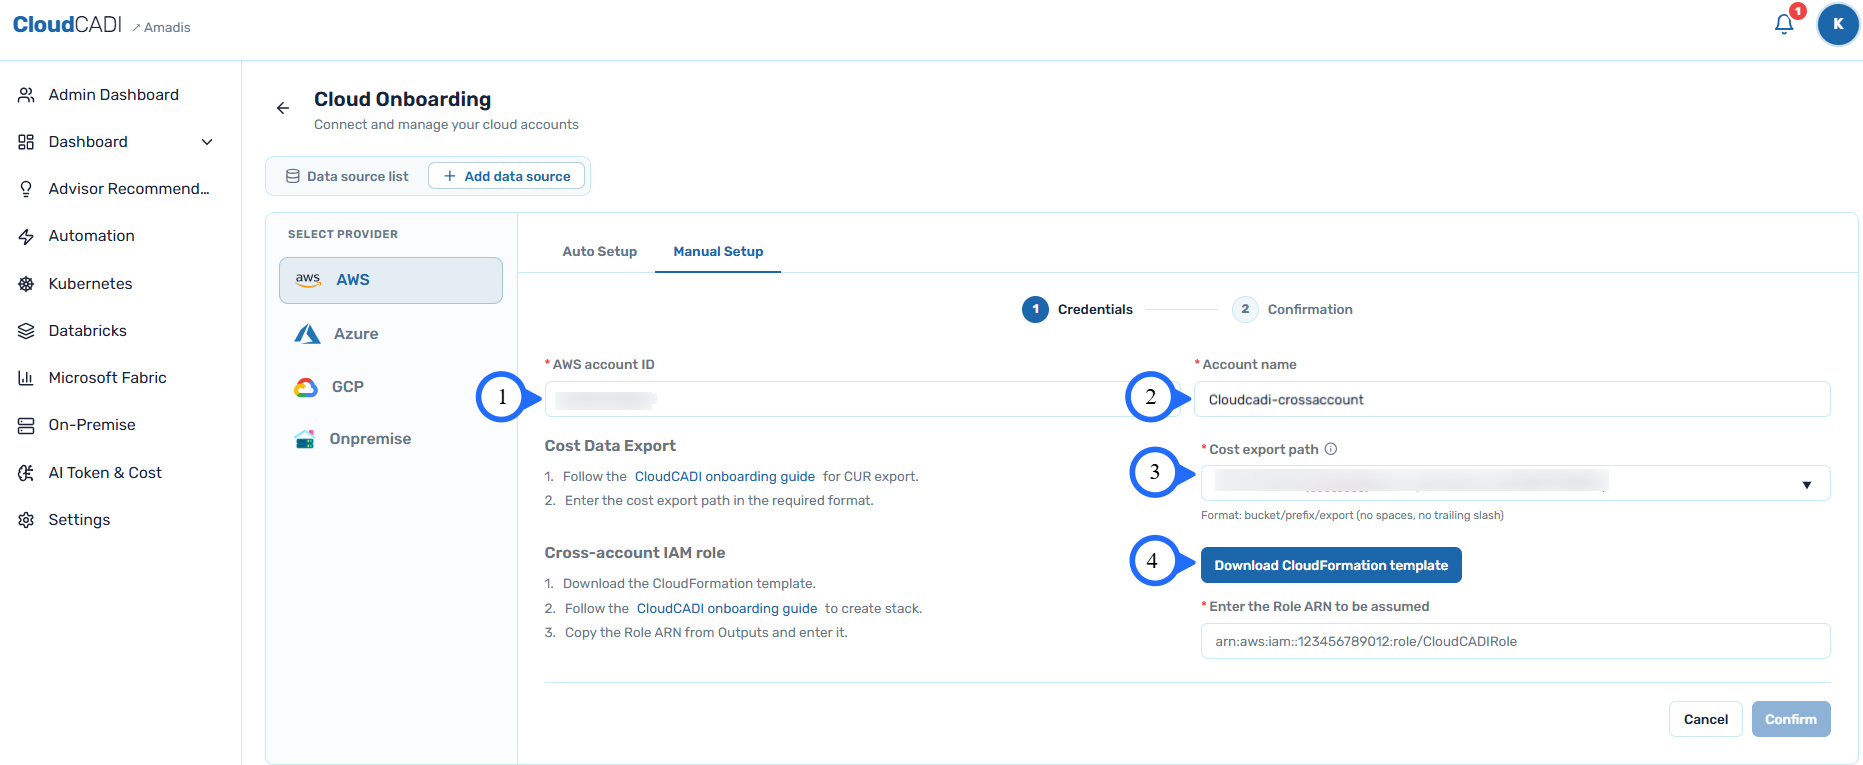
To onboard a cross-account setup, enter the AWS Account ID, Account Name, and Cost export path, then follow the stack deployment steps mentioned below.
-
Click Download CloudFormation Template.
Step 3 - Deploy CloudFormation Stack
-
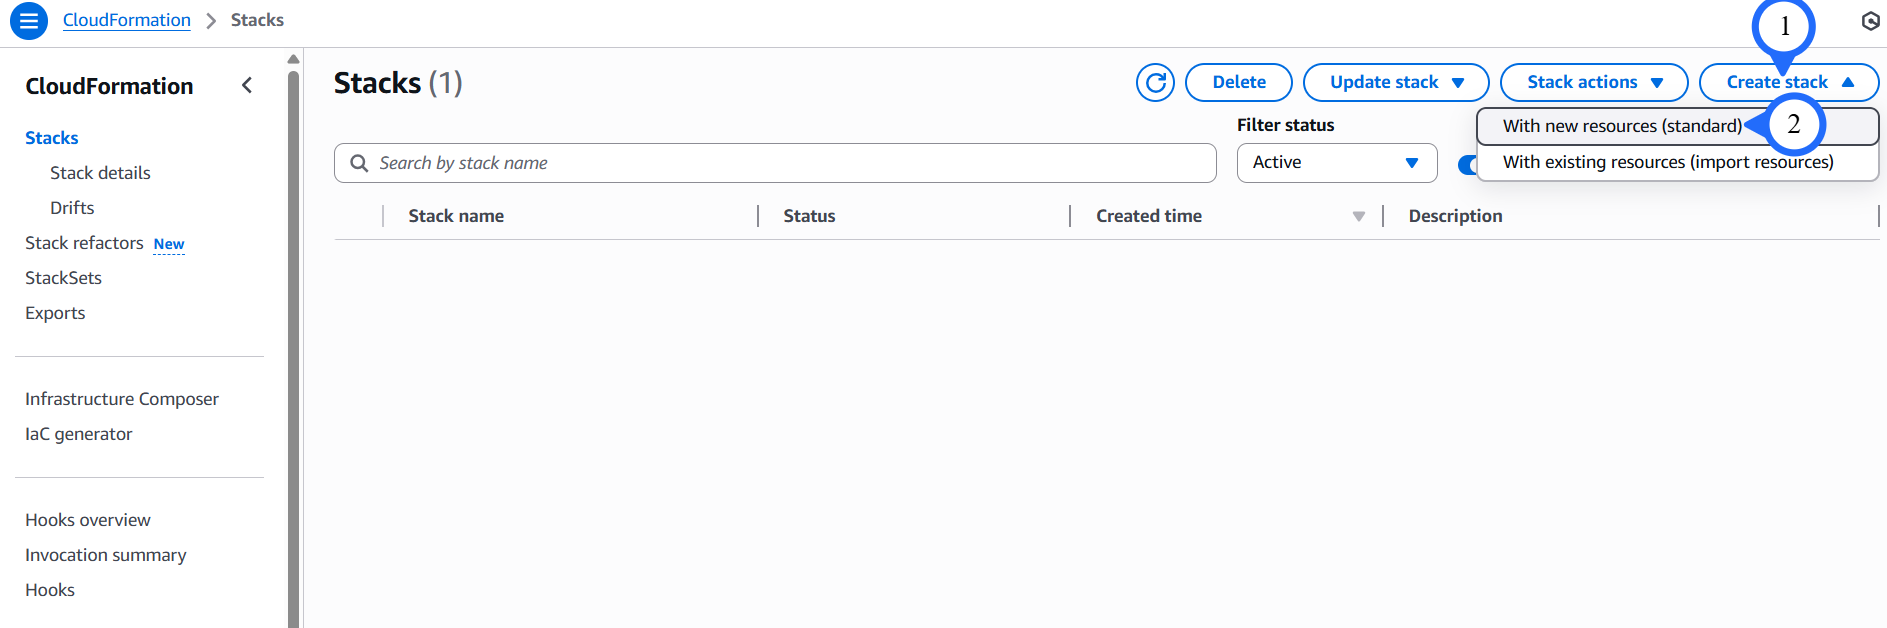
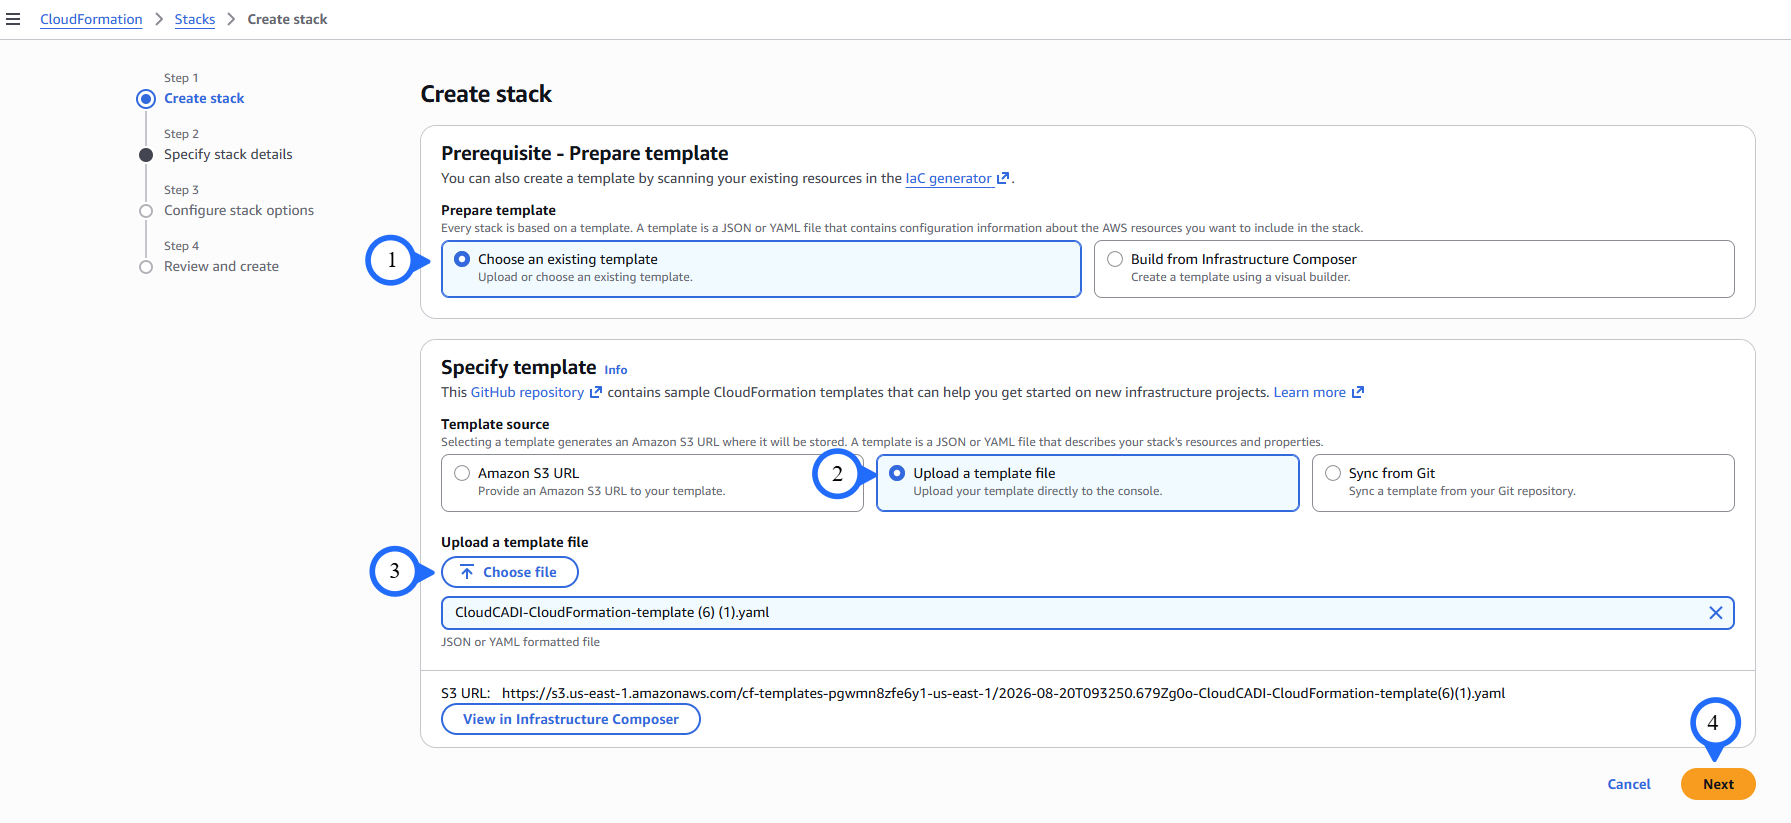
After downloading the script, go to the AWS Console for the respective account, navigate to the CloudFormation service, and create a stack with new resources.
-
Select Choose an existing template.
-
Select Upload a template file.
-
Click Choose file and upload the downloaded script.
-
Click Next.
-
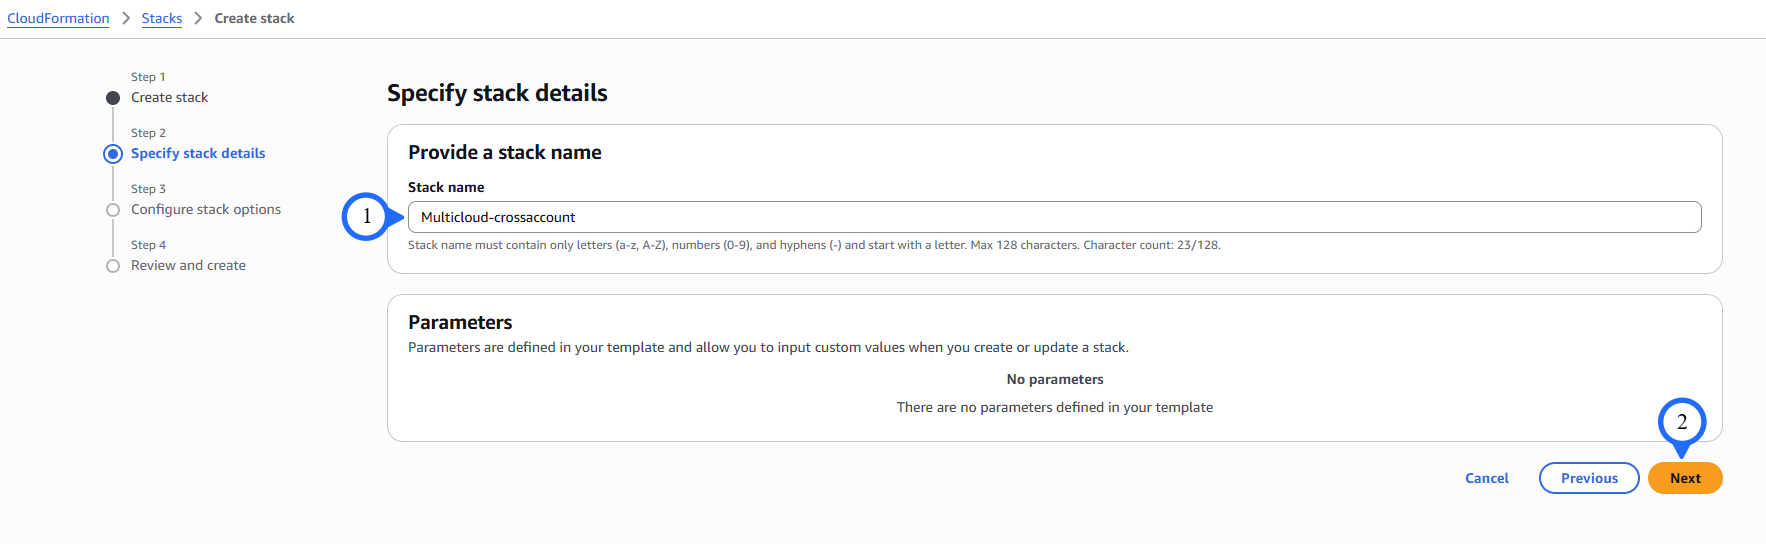
Enter the Stack name.
-
Click Next.
-
Enter the Tag key and Tag value.
-
Click Next. The Review page appears.

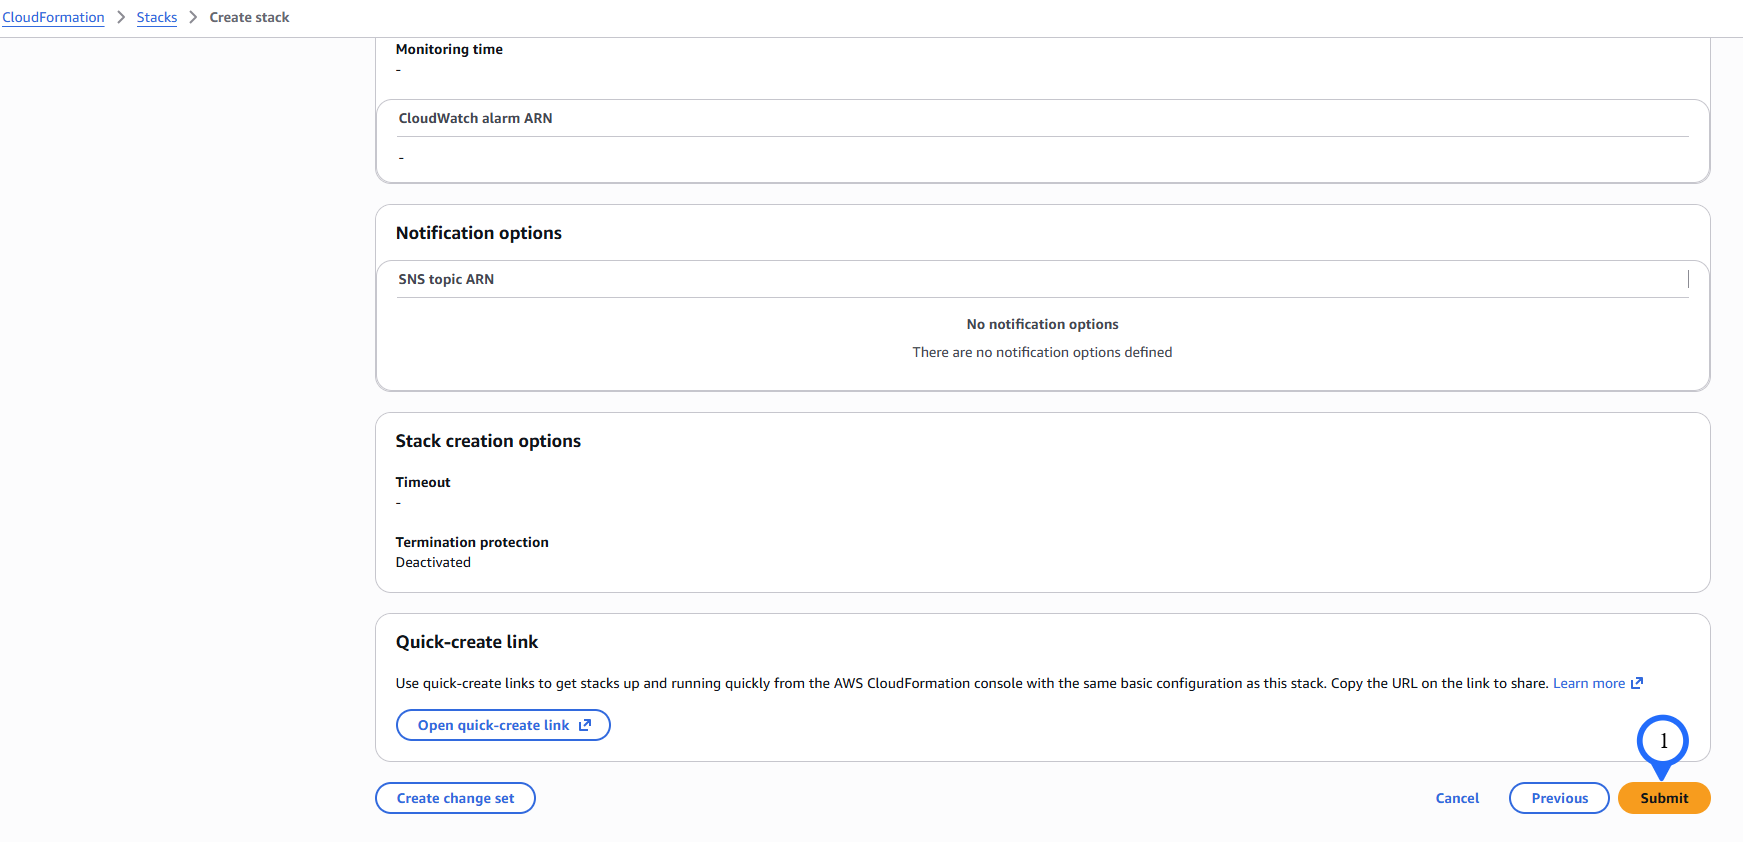
- Review the details and click Submit. It will take up to 5 minutes to finish the resource creation.
Step 4 - Complete Cross-Account Onboarding
-
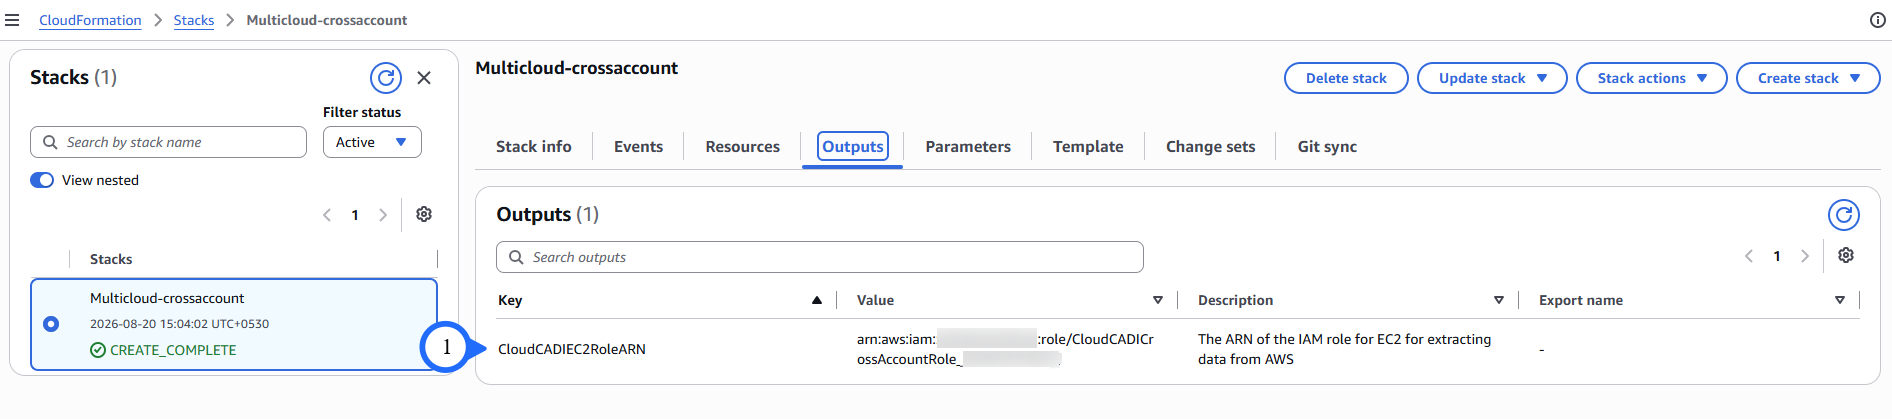
Once the stack has been created successfully, go to the Outputs tab and copy the Role ARN.
-
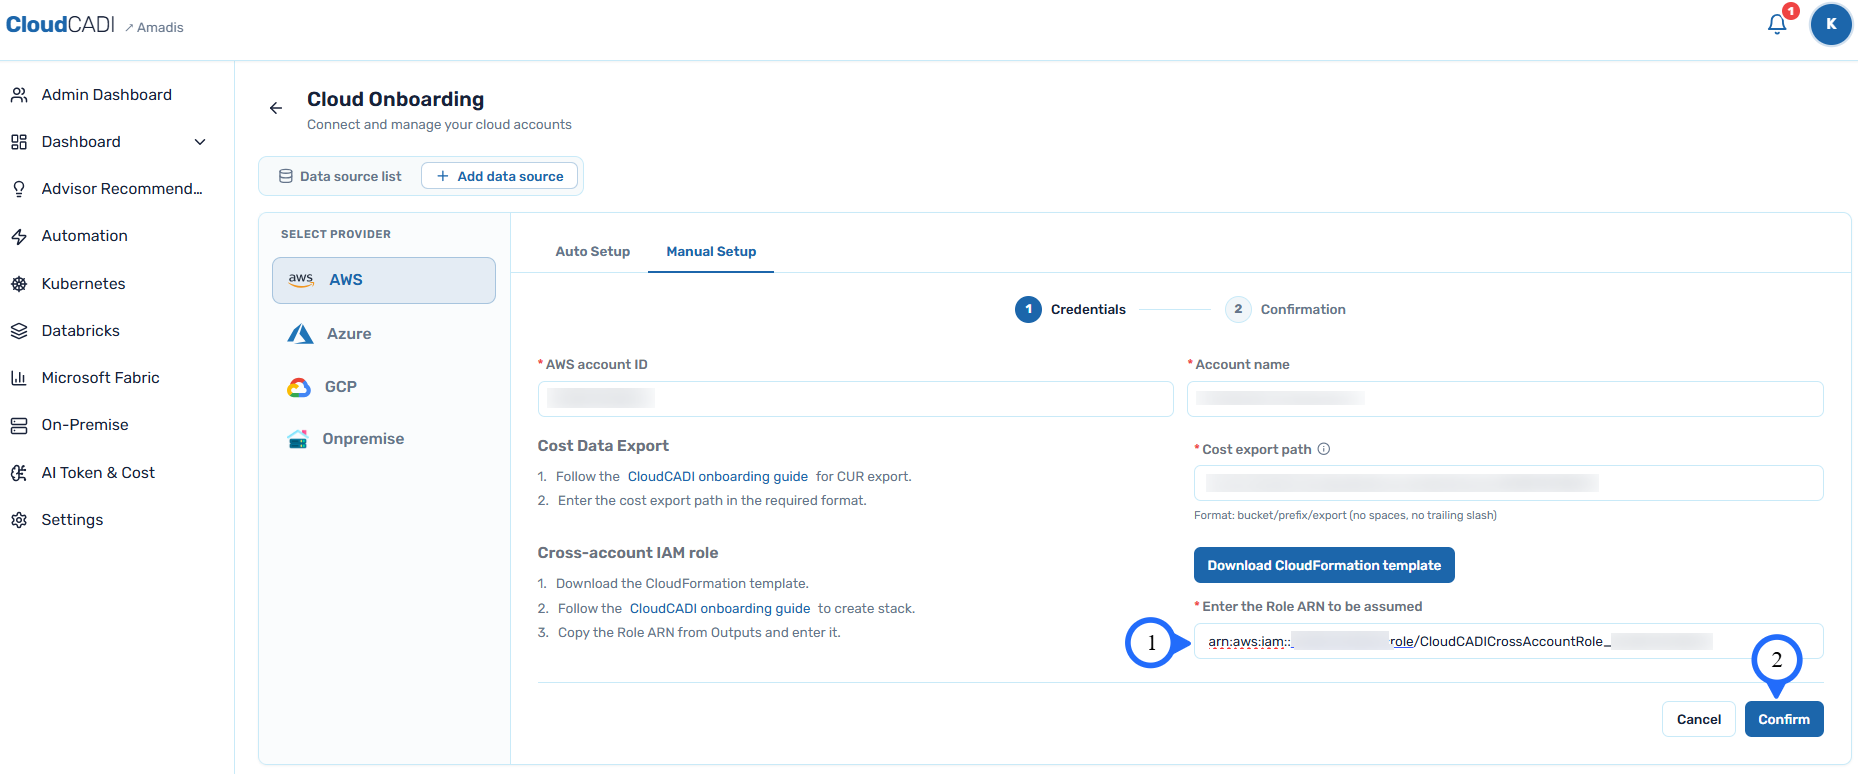
Paste the Role ARN in Enter the Role ARN to be assumed, obtained during stack creation, and click Confirm.
-
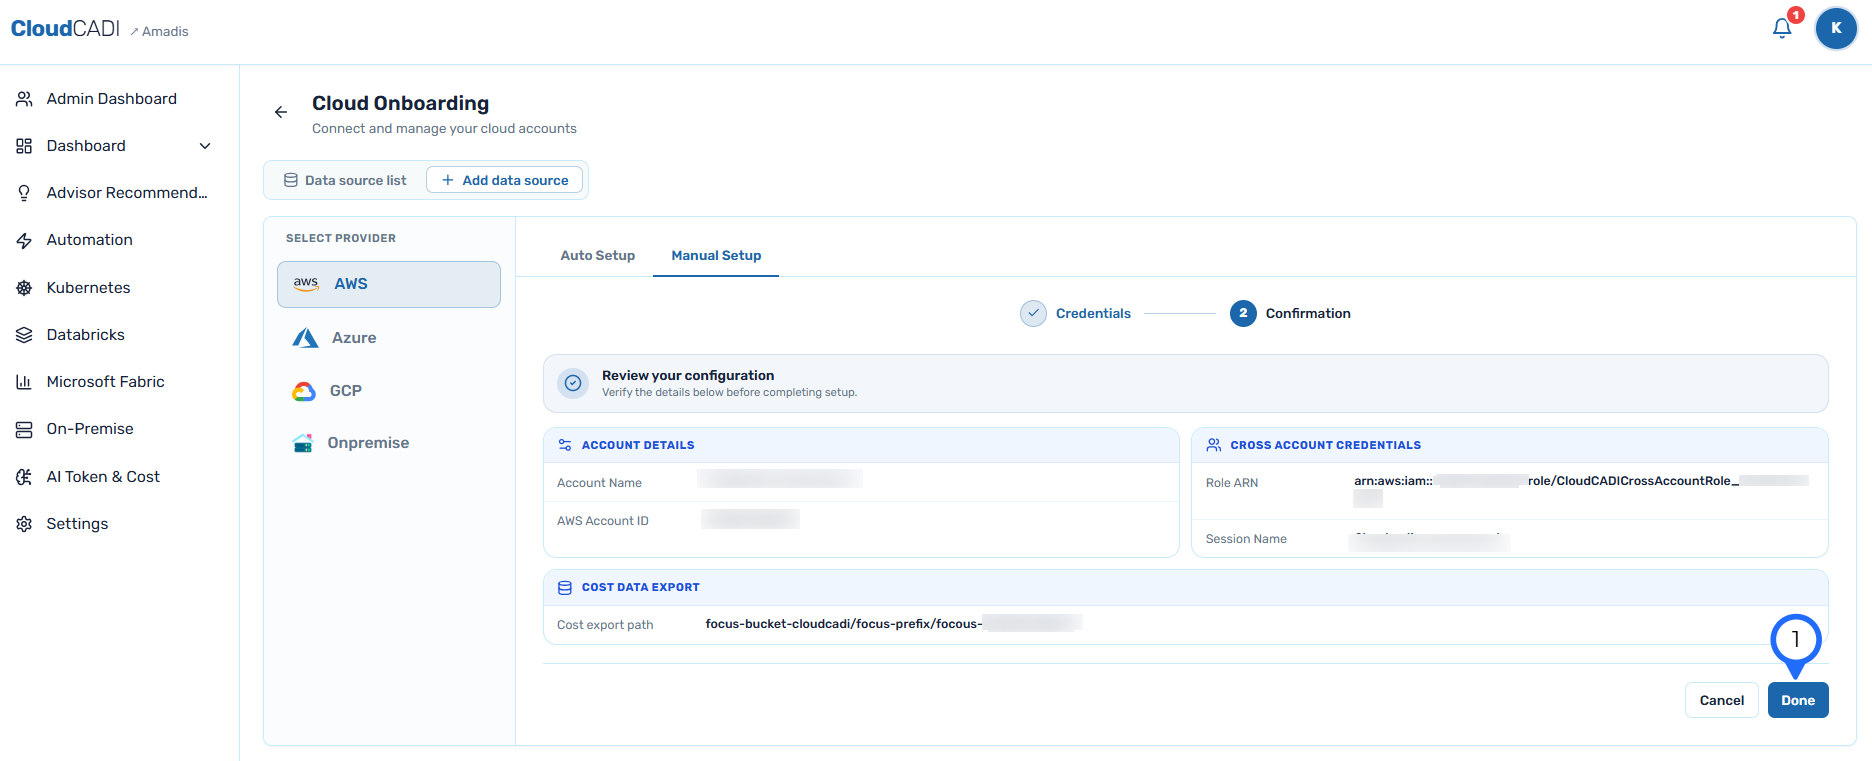
Once validation is complete. Verify the details and click Done to complete account creation.
-
Navigate back to the Data Sources list tab and confirm the AWS account appears, with the provider shown as AWS and the configured Account name.