Connect an Azure Account (CloudCADI Hosted on AWS)
Prerequisites
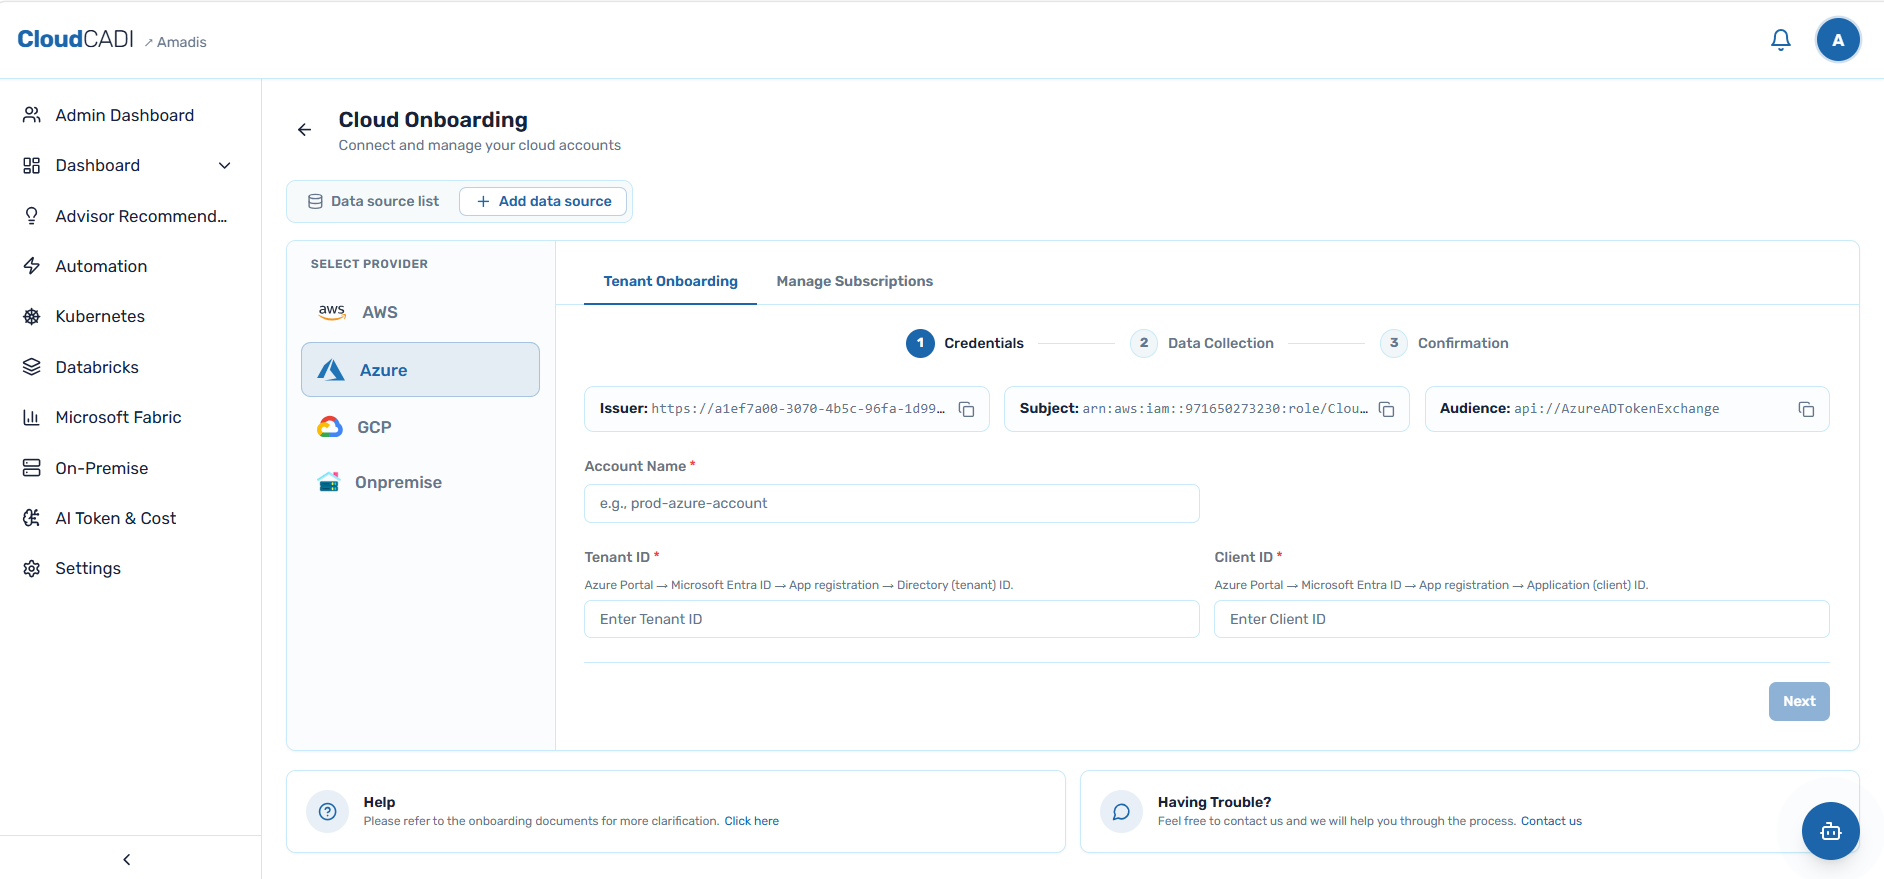
Open CloudCADI's Azure onboarding page and note down the three values shown there - Issuer, Subject, and Audience.
Azure Configuration
Step 1 – Service Principal Configuration and Access Control
This section describes the configuration required to enable authentication for CloudCADI and grant the necessary permissions to access Azure resources and read data from Log Analytics.
1. Register an Application
-
Log in to the Azure Portal and open Microsoft Entra ID.

-
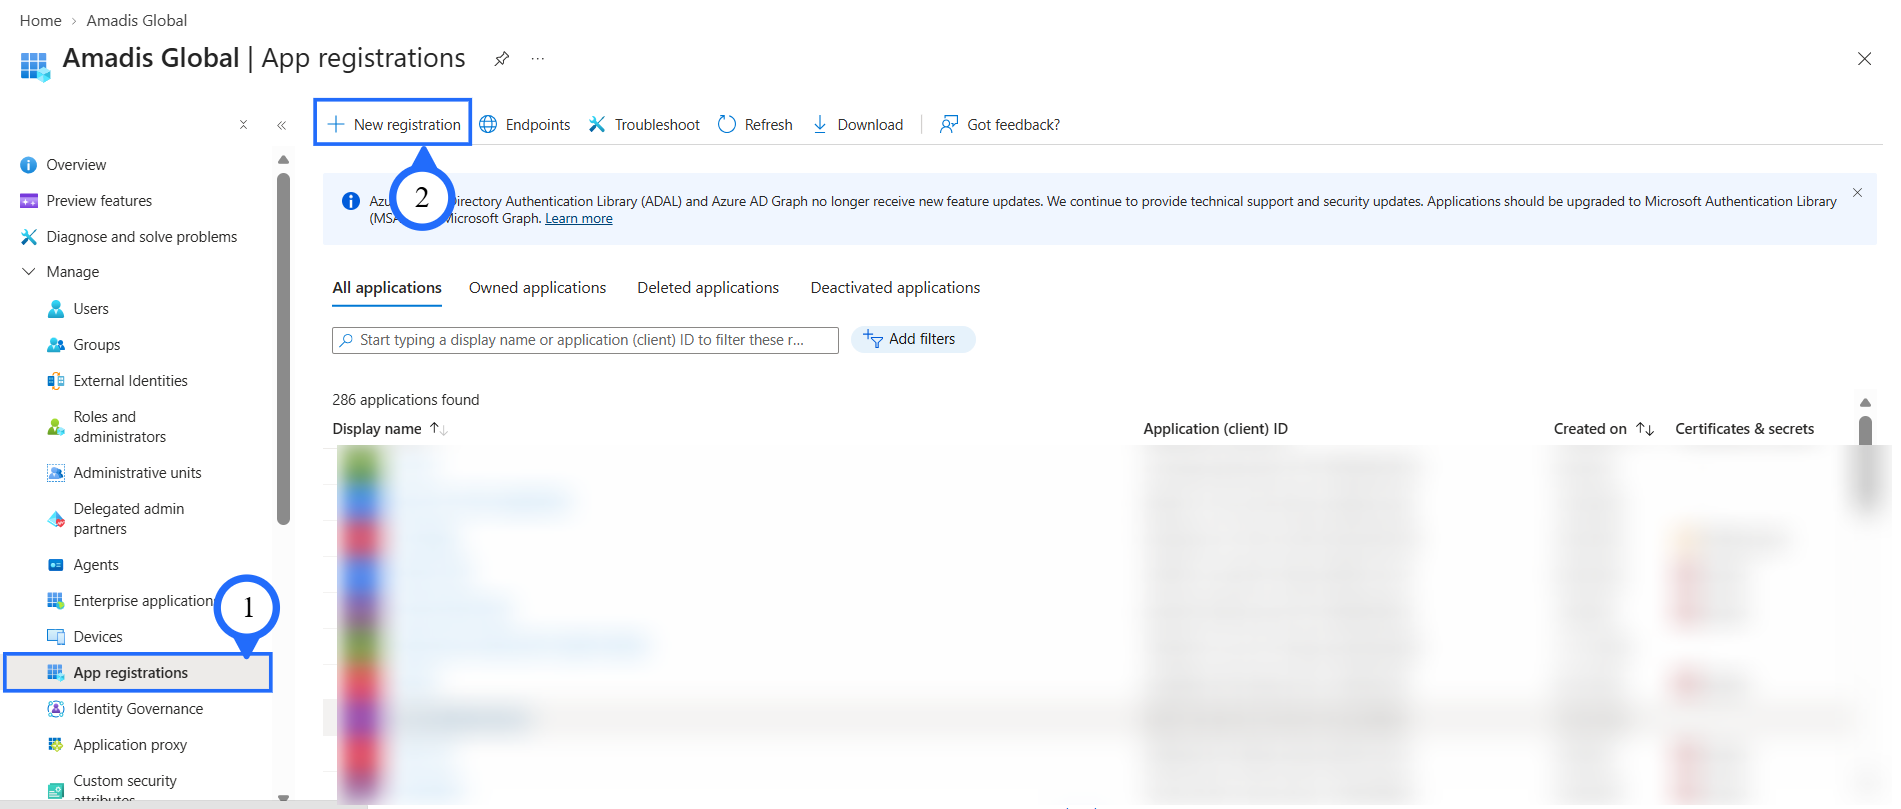
Expand the Manage section and click App registrations.
-
Click New registration.
-
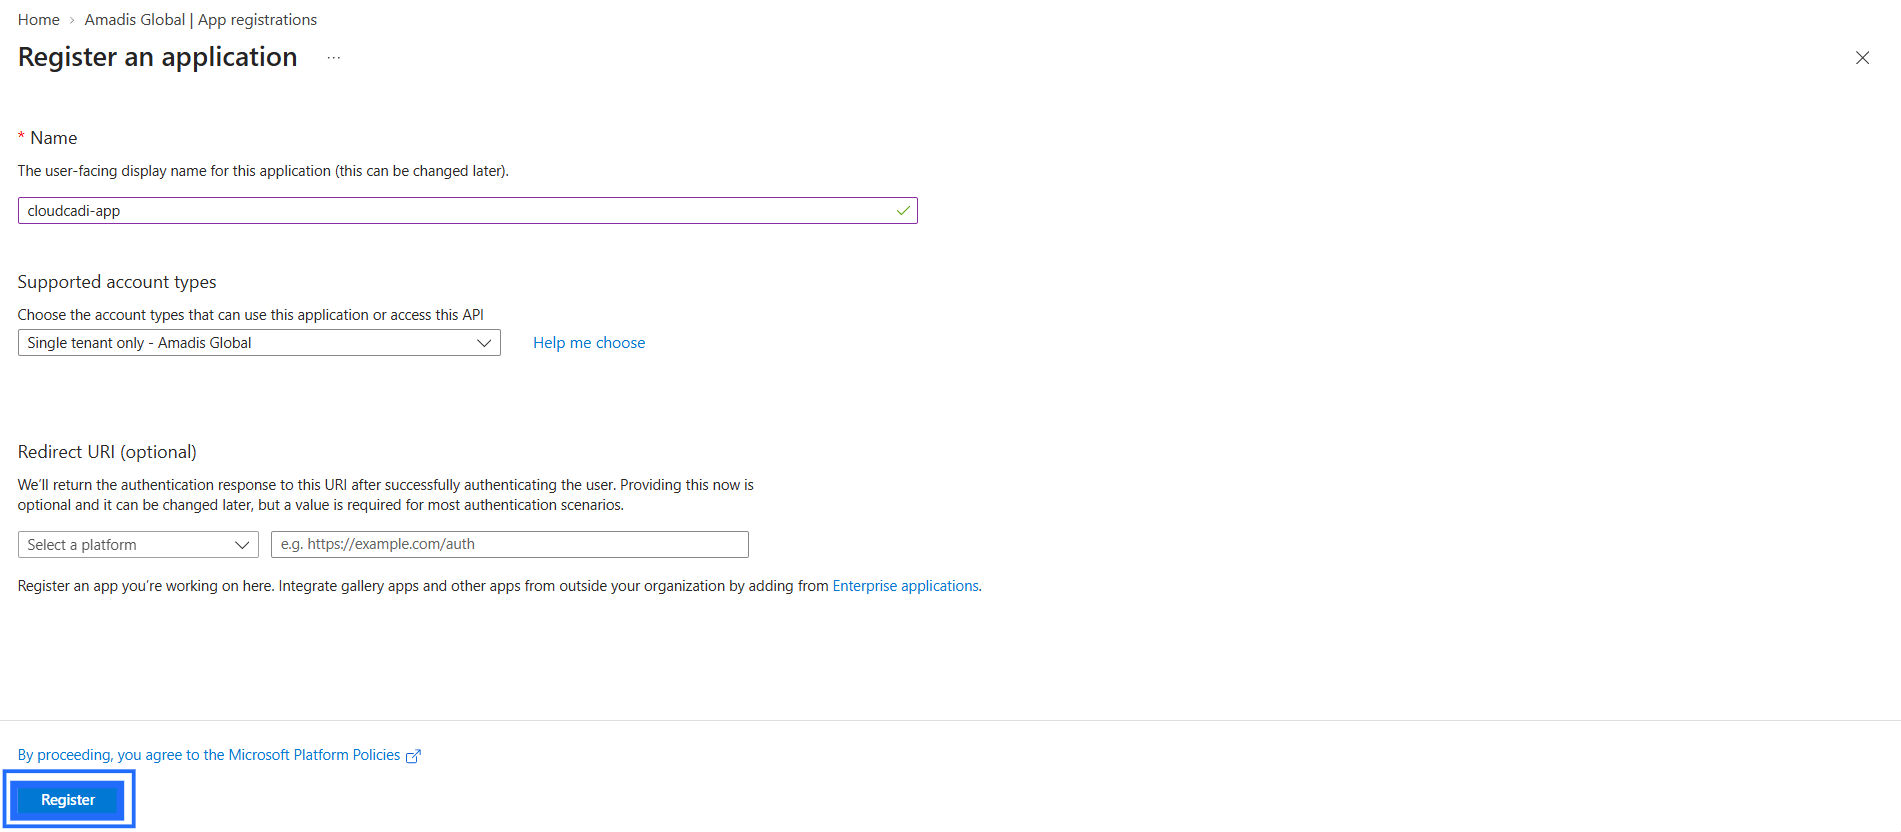
Enter the application name and register it.
2. Configure the Federated Credential
-
Open the newly registered application.
-
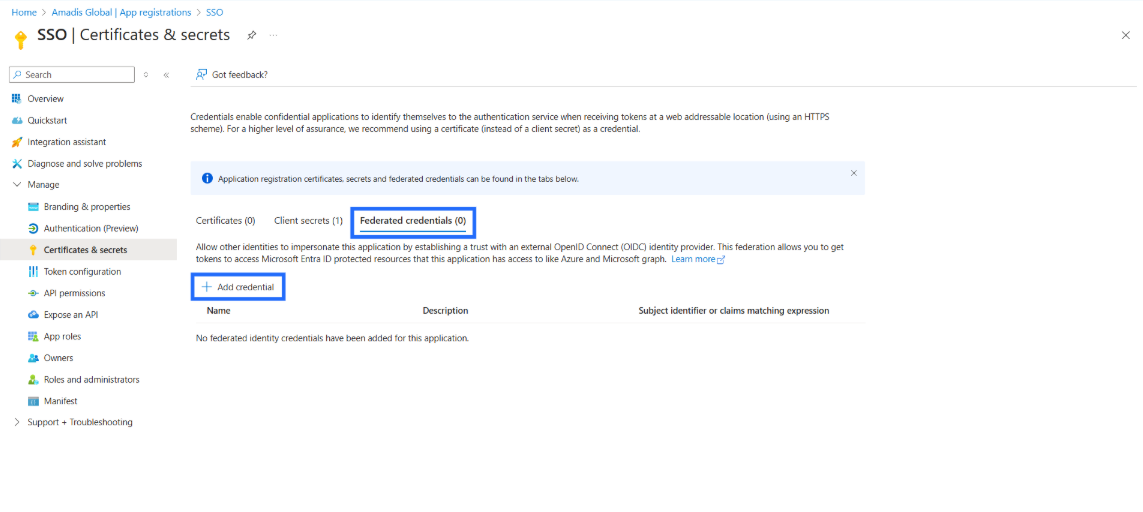
Go to Certificates & secrets.
-
Select the Federated credentials tab.
-
Click Add credential.
-
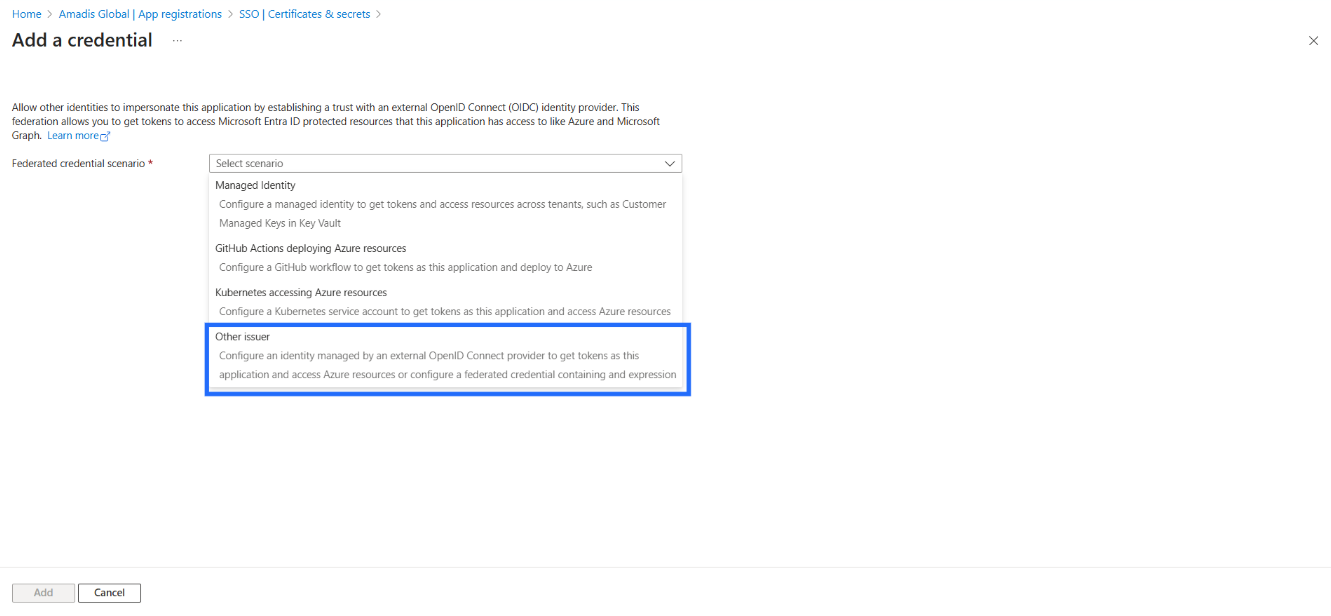
Select Other issuer from the credential type dropdown.
-
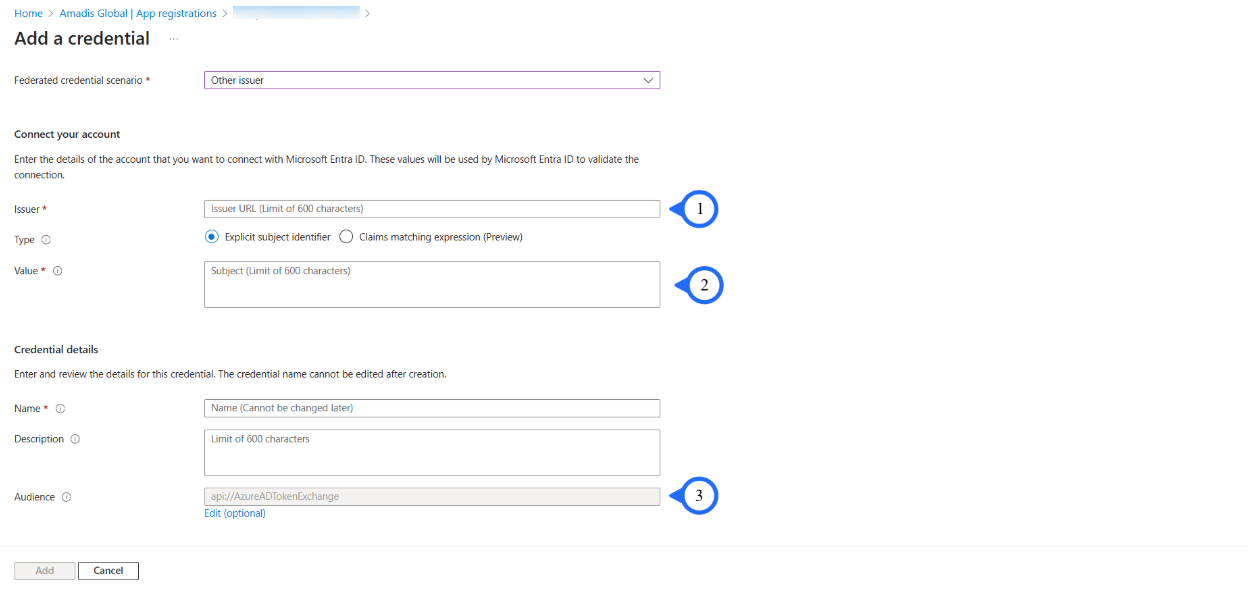
Enter the Issuer, Subject, and Audience values noted from CloudCADI's Azure onboarding page , enter them in the Azure Add a credential page as follows:
- Issuer → CloudCADI Issuer
- Value → CloudCADI Subject
- Audience → CloudCADI Audience (click Edit if required)
Step 2 – Assign the Reader Role at the Subscription Level
-
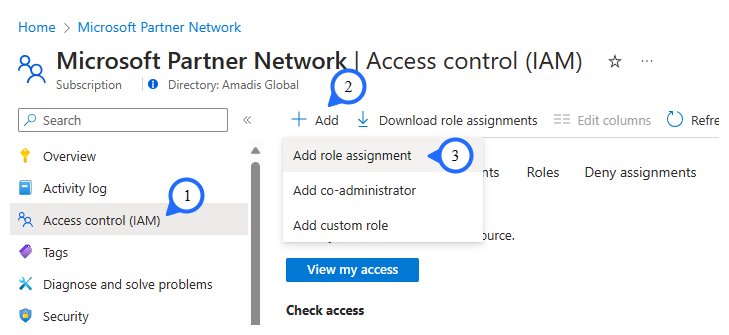
Open the required Subscription in the Azure Portal.
-
Select Access control (IAM) from the left-side menu.
-
Click + Add.
-
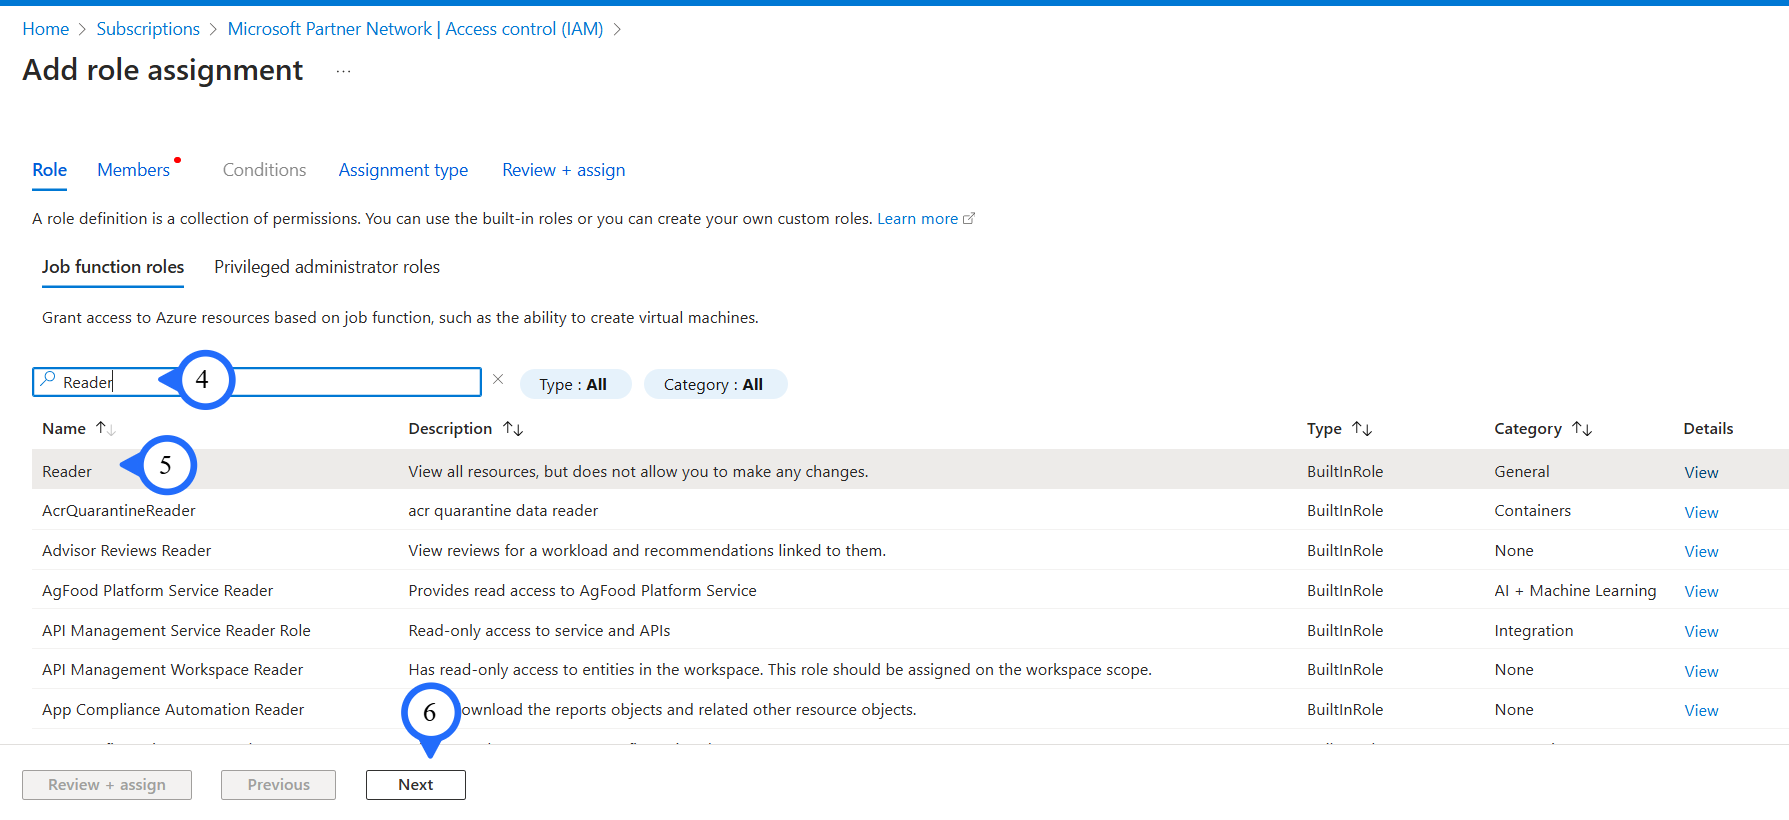
Select Add role assignment.
 Role Assignment
- Reader
- Log Analytics Contributor
- Monitoring Contributor
- Virtual Machine Contributor
- Azure Kubernetes Service Contributor Role
- Cost Management Contributor
- Storage Account Contributor
- Storage Blob Data Reader - assign this one on the subscription where cost data is exported
-
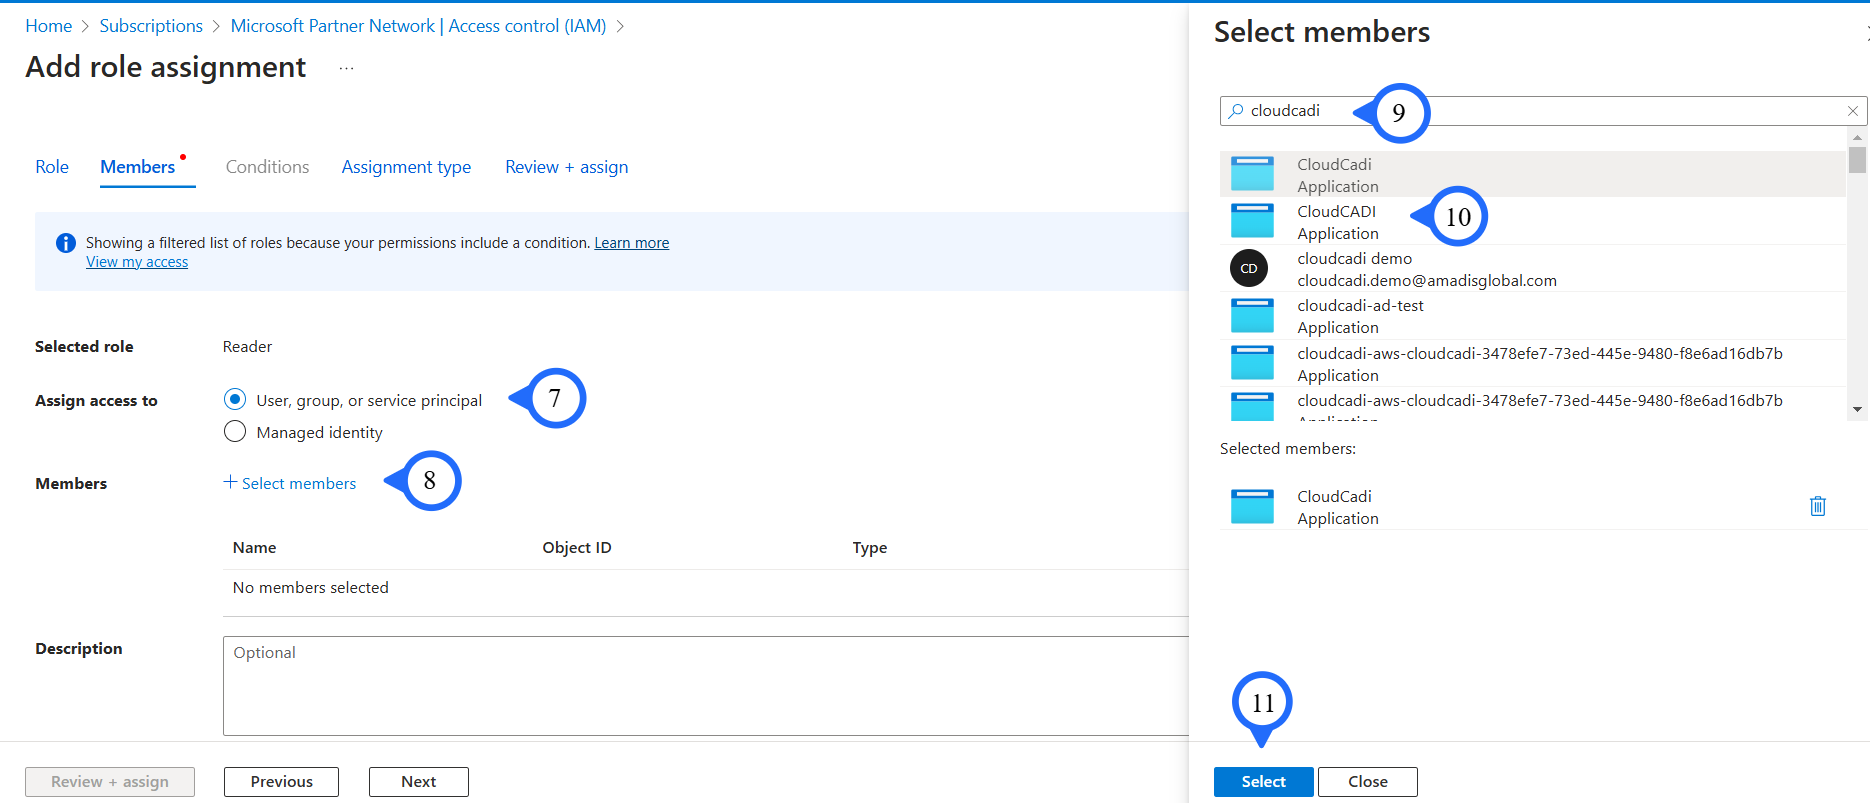
Under Assign access to, select User, group, or service principal.
-
Click + Select members.
-
Search for and select the service principal created during the application registration process.
-
Click Next.
-
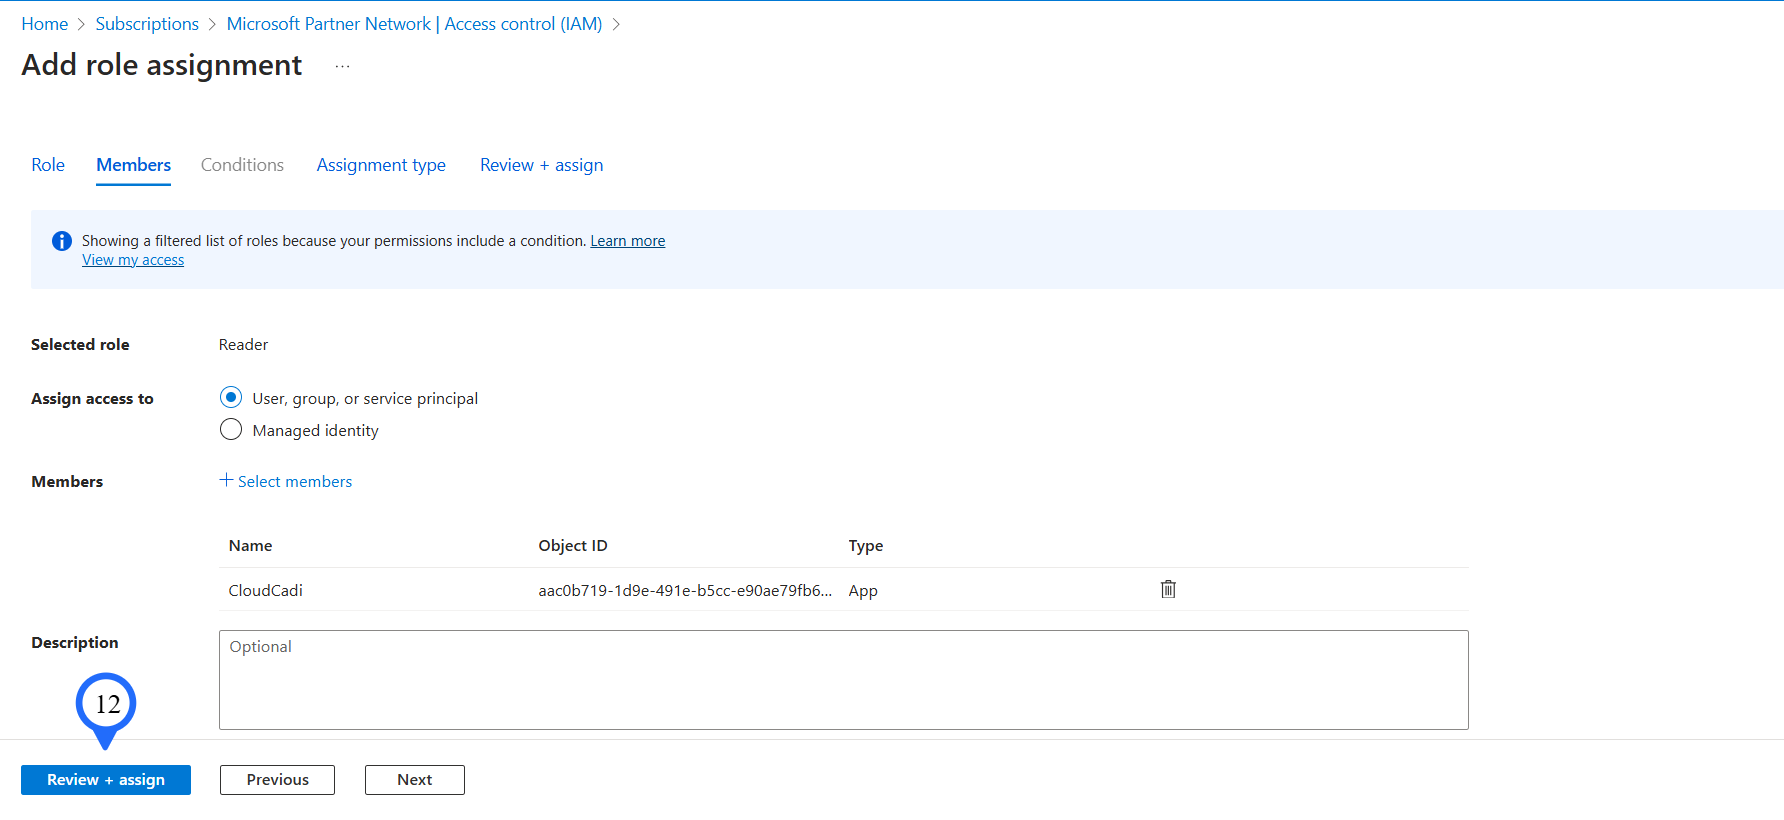
Click Review + assign to complete the role assignment.
Azure Tenant Onboarding
Step 1: Access the CloudCADI Onboarding Section
-
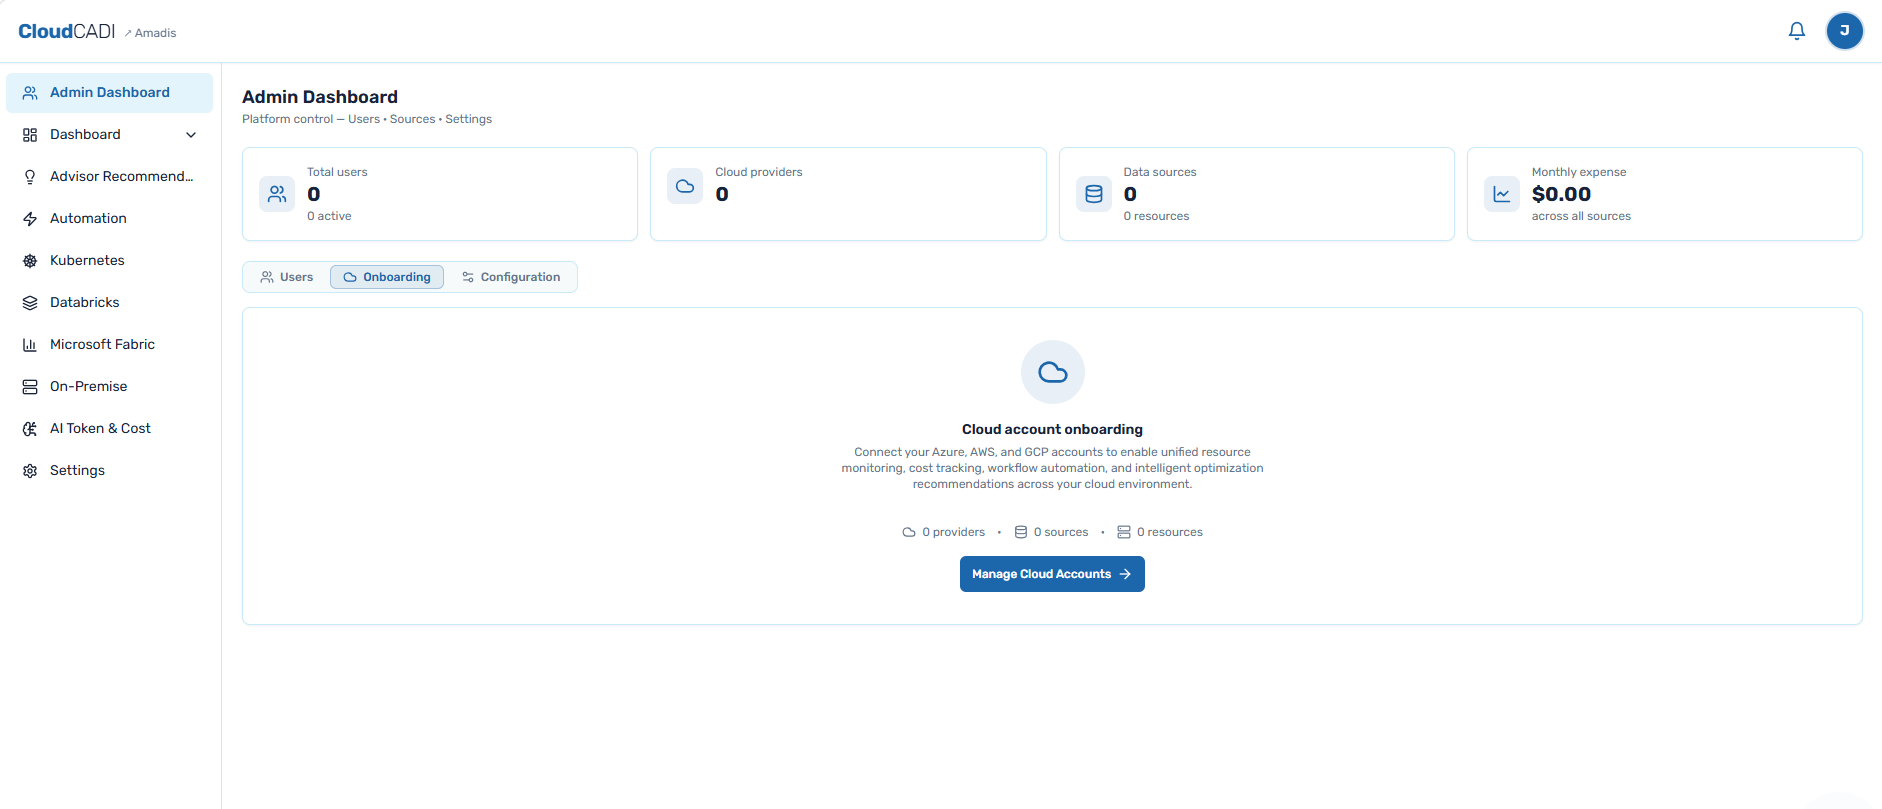
Log in to CloudCADI using an Admin account.
-
From the left navigation menu, click Admin Dashboard, then select the Onboarding tab and click Manage Cloud Accounts.
-
Under Select Provider, choose Azure. On the Tenant Onboarding tab, enter the Account Name, Tenant ID, and Client ID, then click Next.
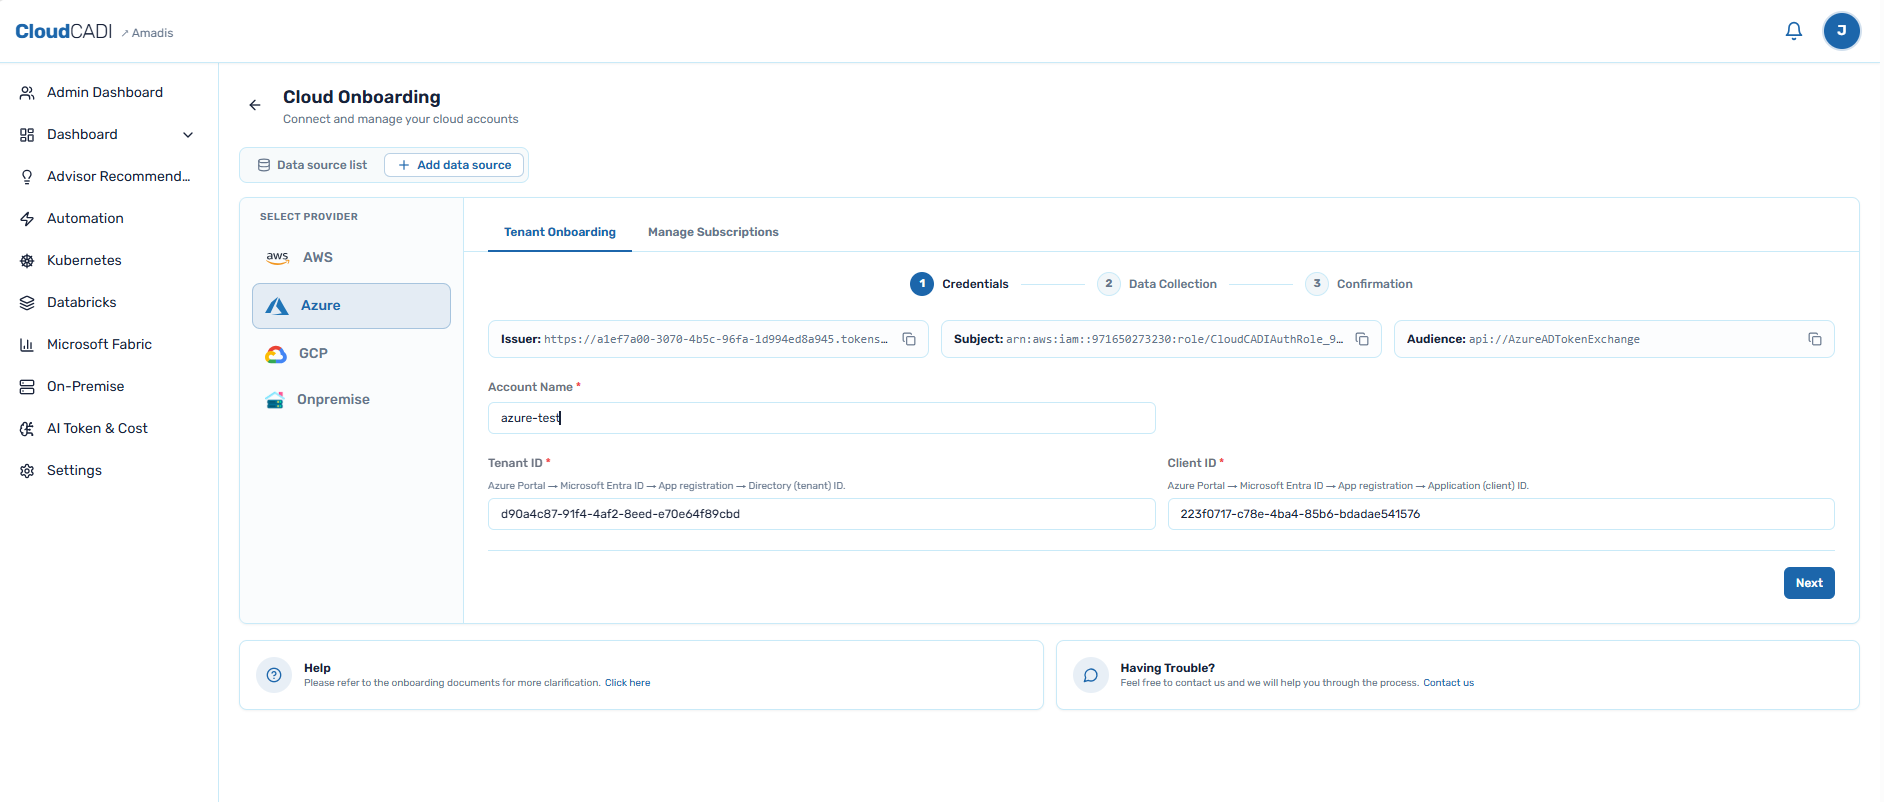
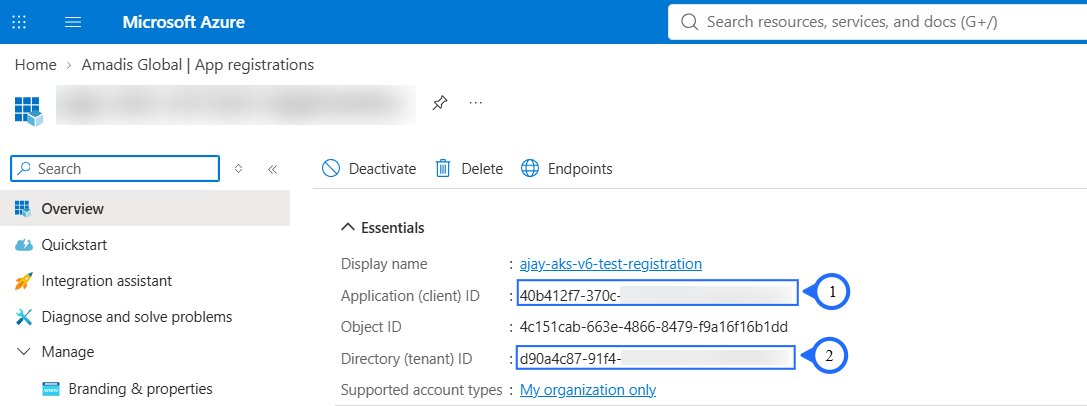
How to get Tenant Id, Client Id ?
- Login to your Azure Portal.
- Open the Microsoft Entra ID and click on App registration.
- Open the Service principal which you created or selected during Managed App Creation.
- Under the Overview tab, copy the Application (client) ID and the Directory (tenant) ID.
-
Enter the Workspace ID, DCR name, and Storage account name, then click Next.
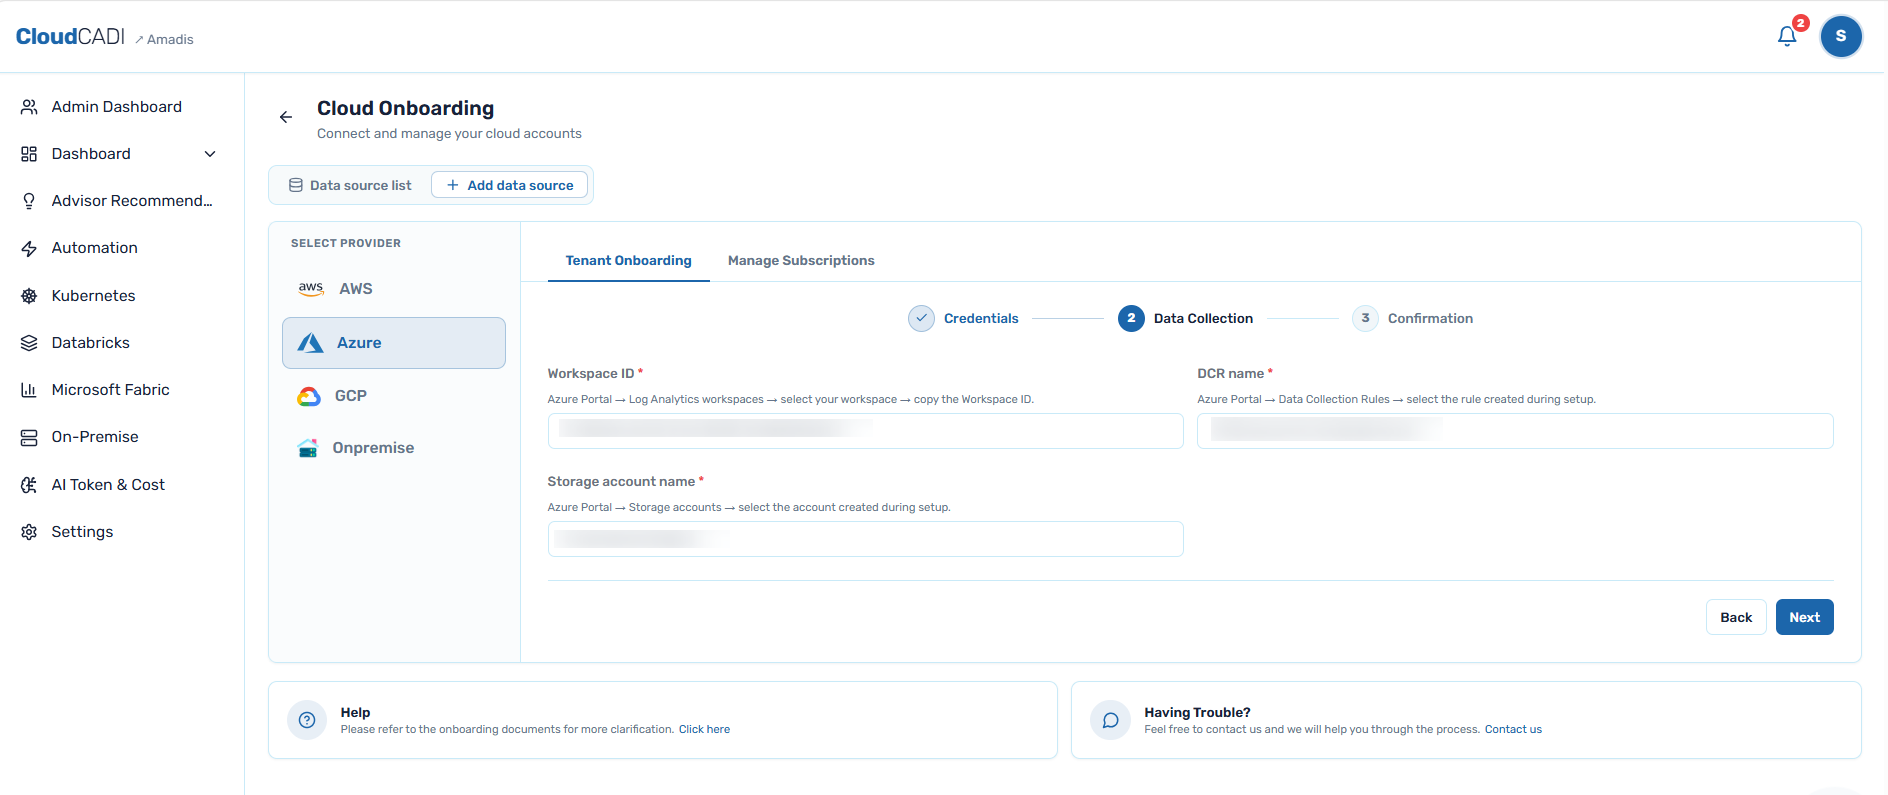
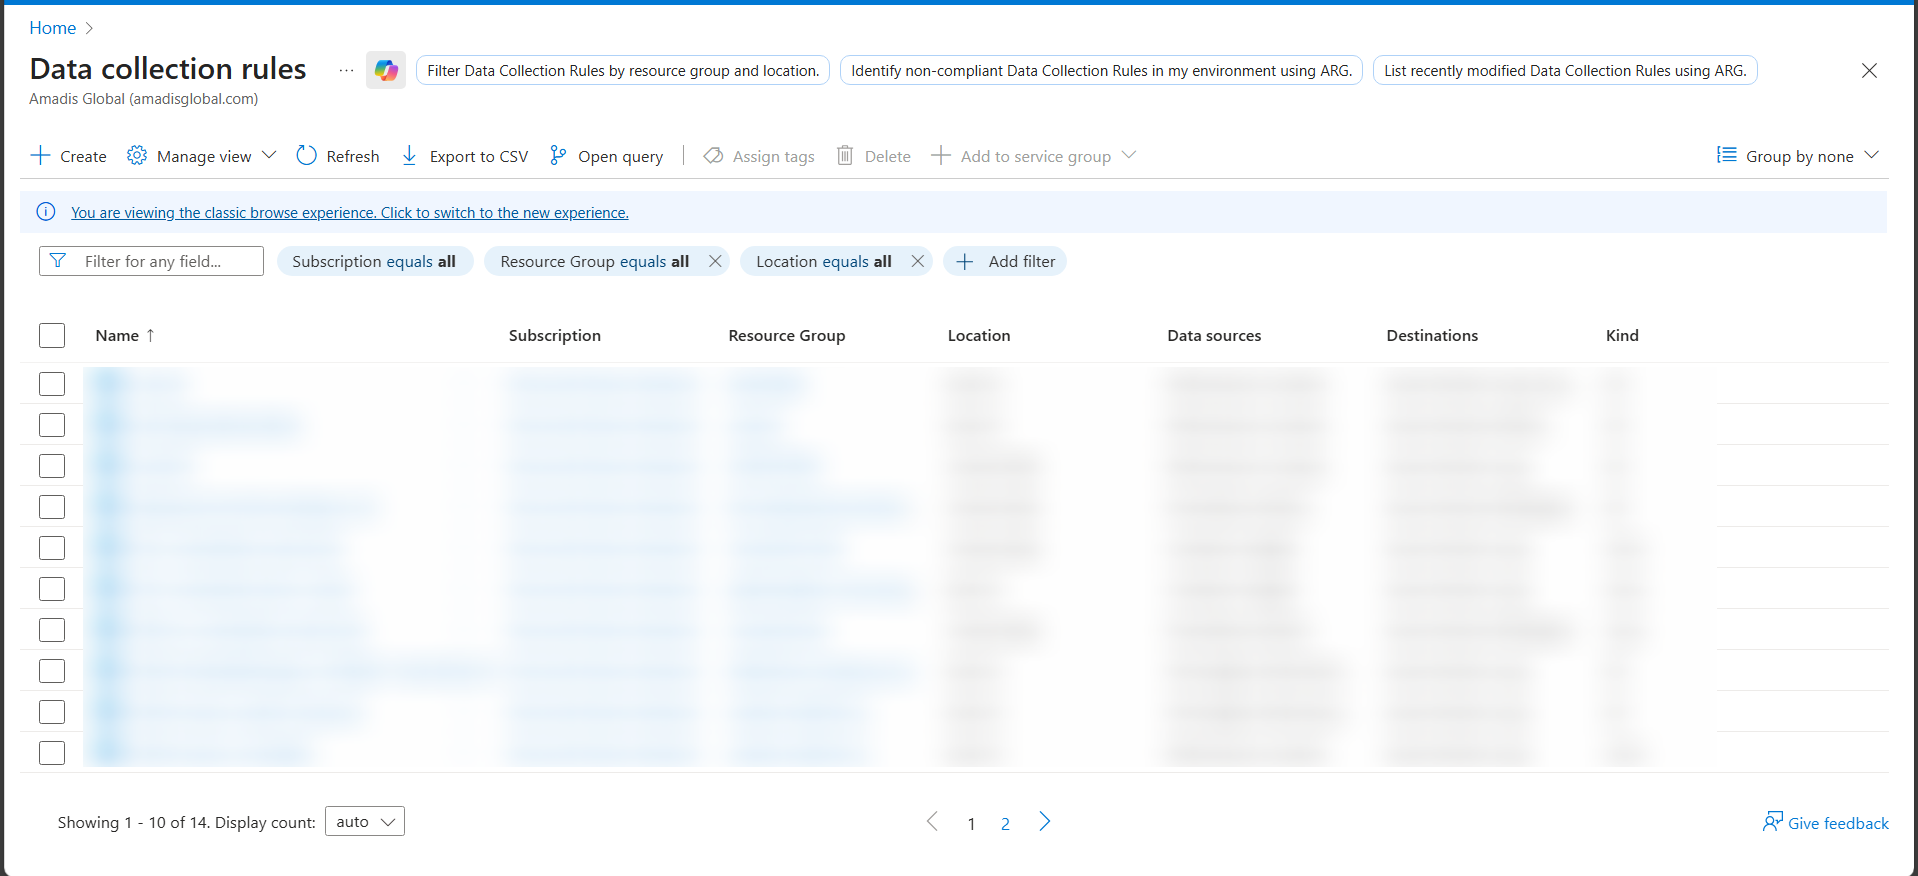
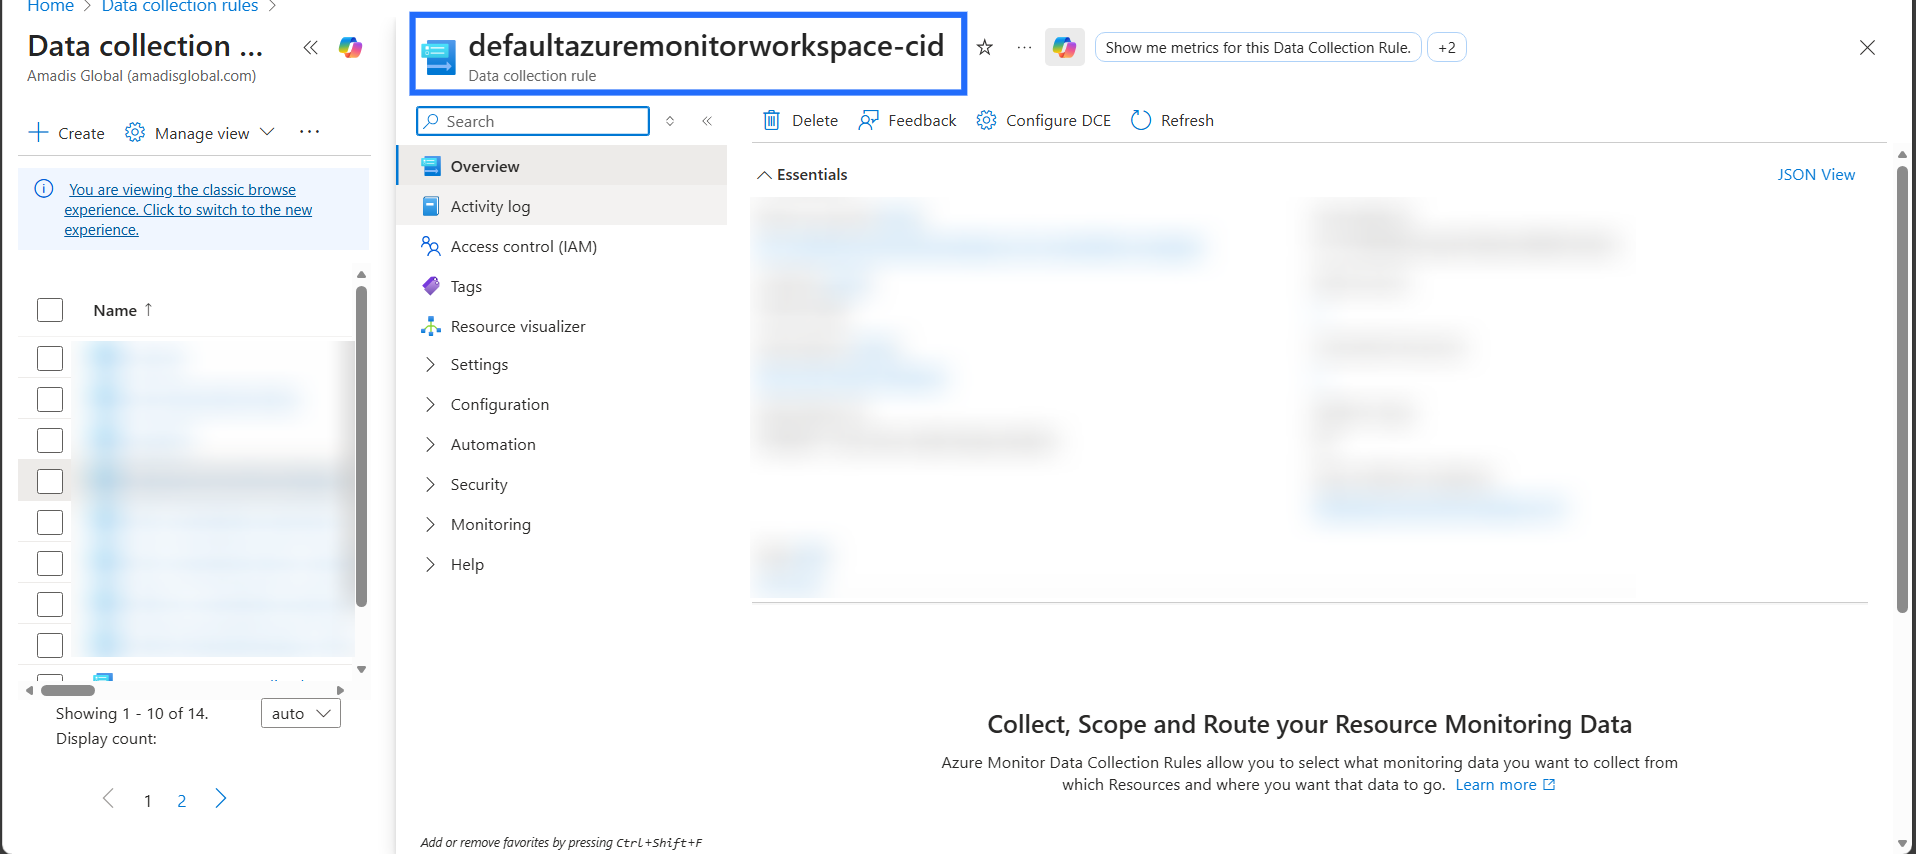
How to get DCR name ?
- Login to your Azure Portal.
- Search for Data Collection Rules.
- Select the name which you have created during the setting up of data collection rule.
How to get Workspace Id ?
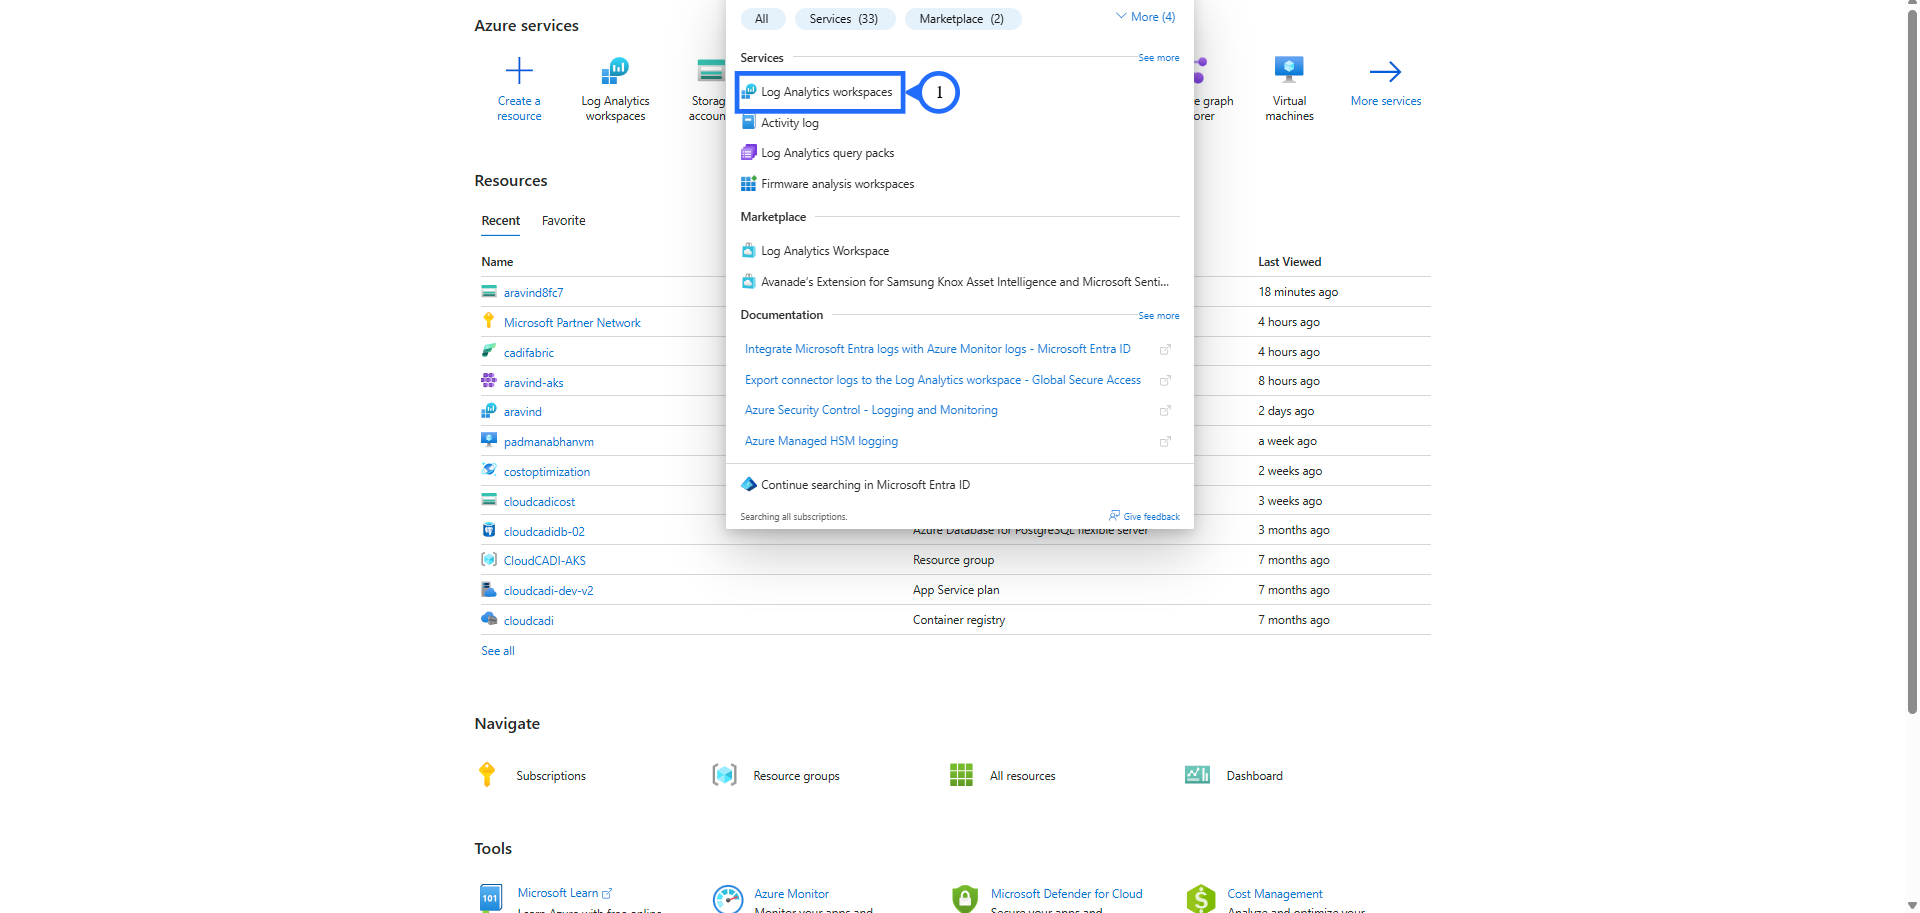
- Login to your Azure Portal.
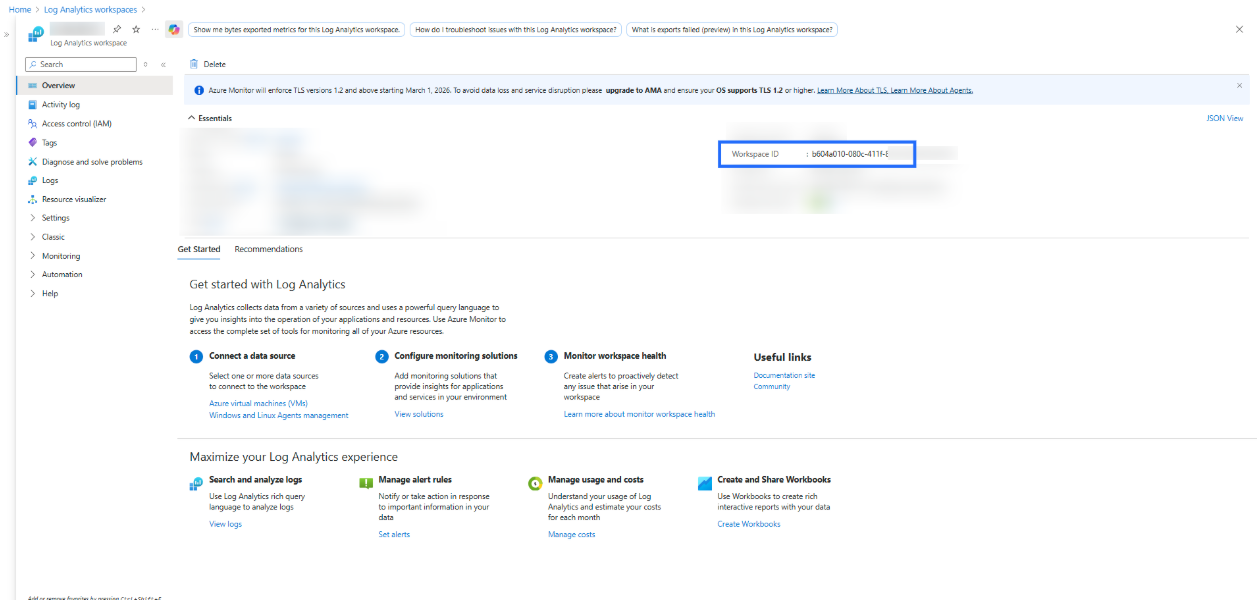
- Search for Log Analytics workspaces, and go to your workspace where diagnostic settings is enabled for all resources.
- Copy the Workspace ID.
How to get Storage account name ?
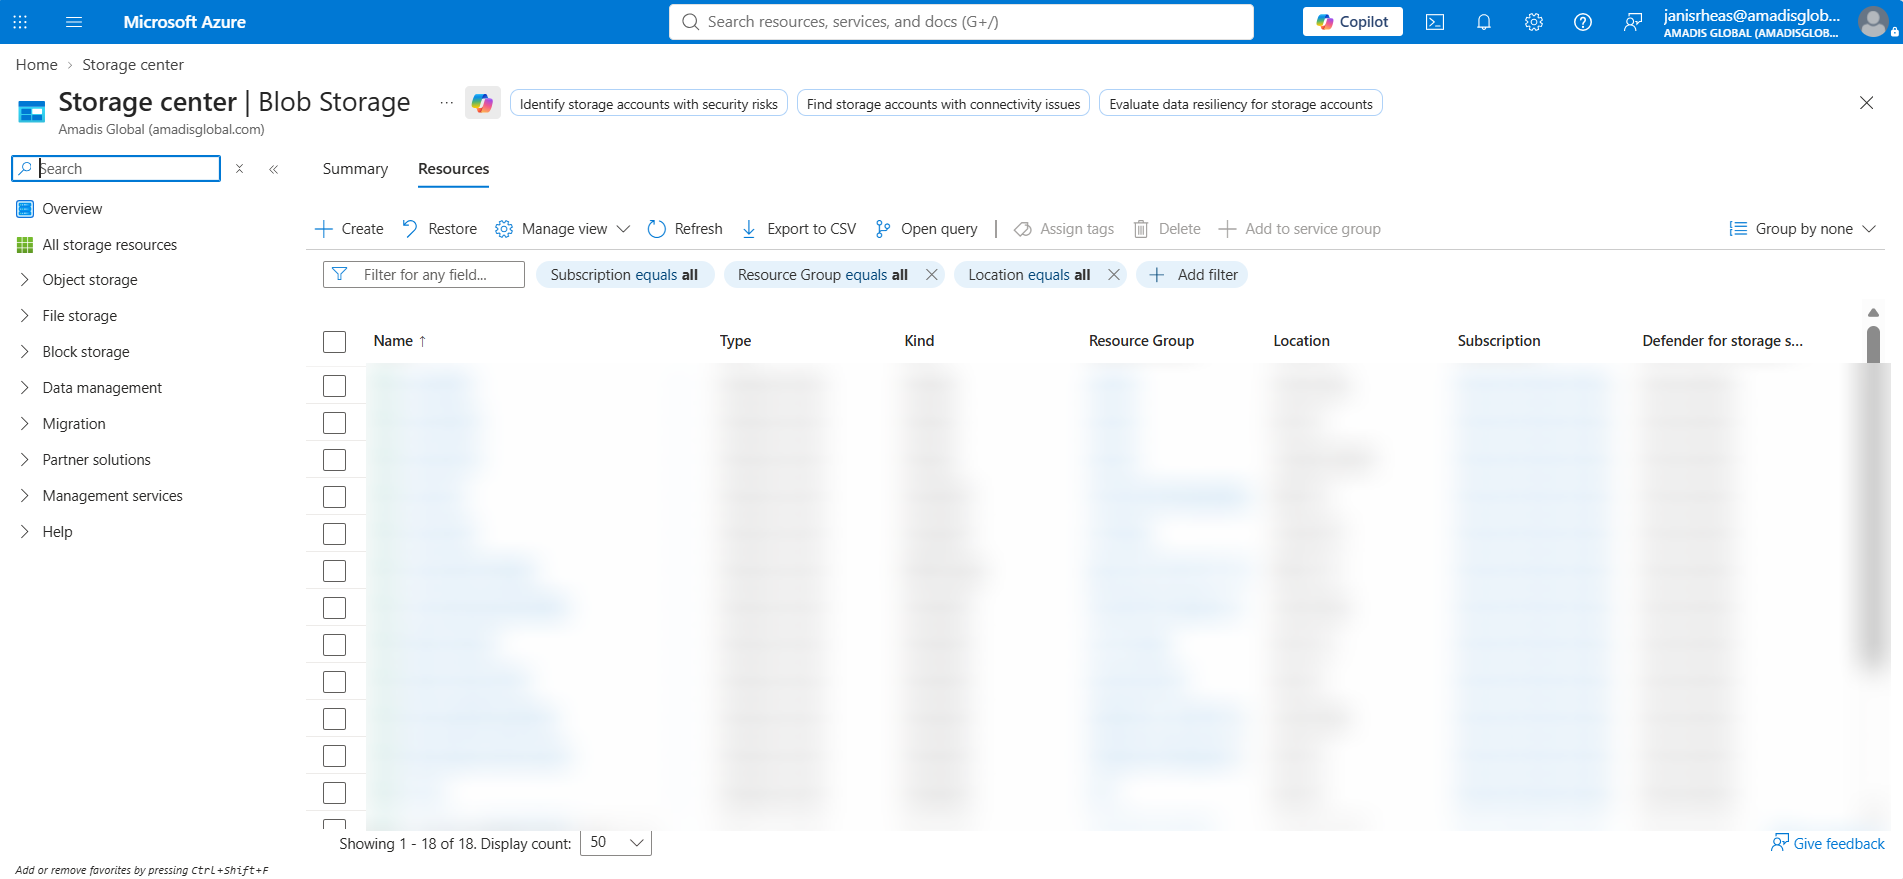
- Login to your Azure Portal.
- Search for Storage accounts, and select the storage account name where you need to create the cost export.
-
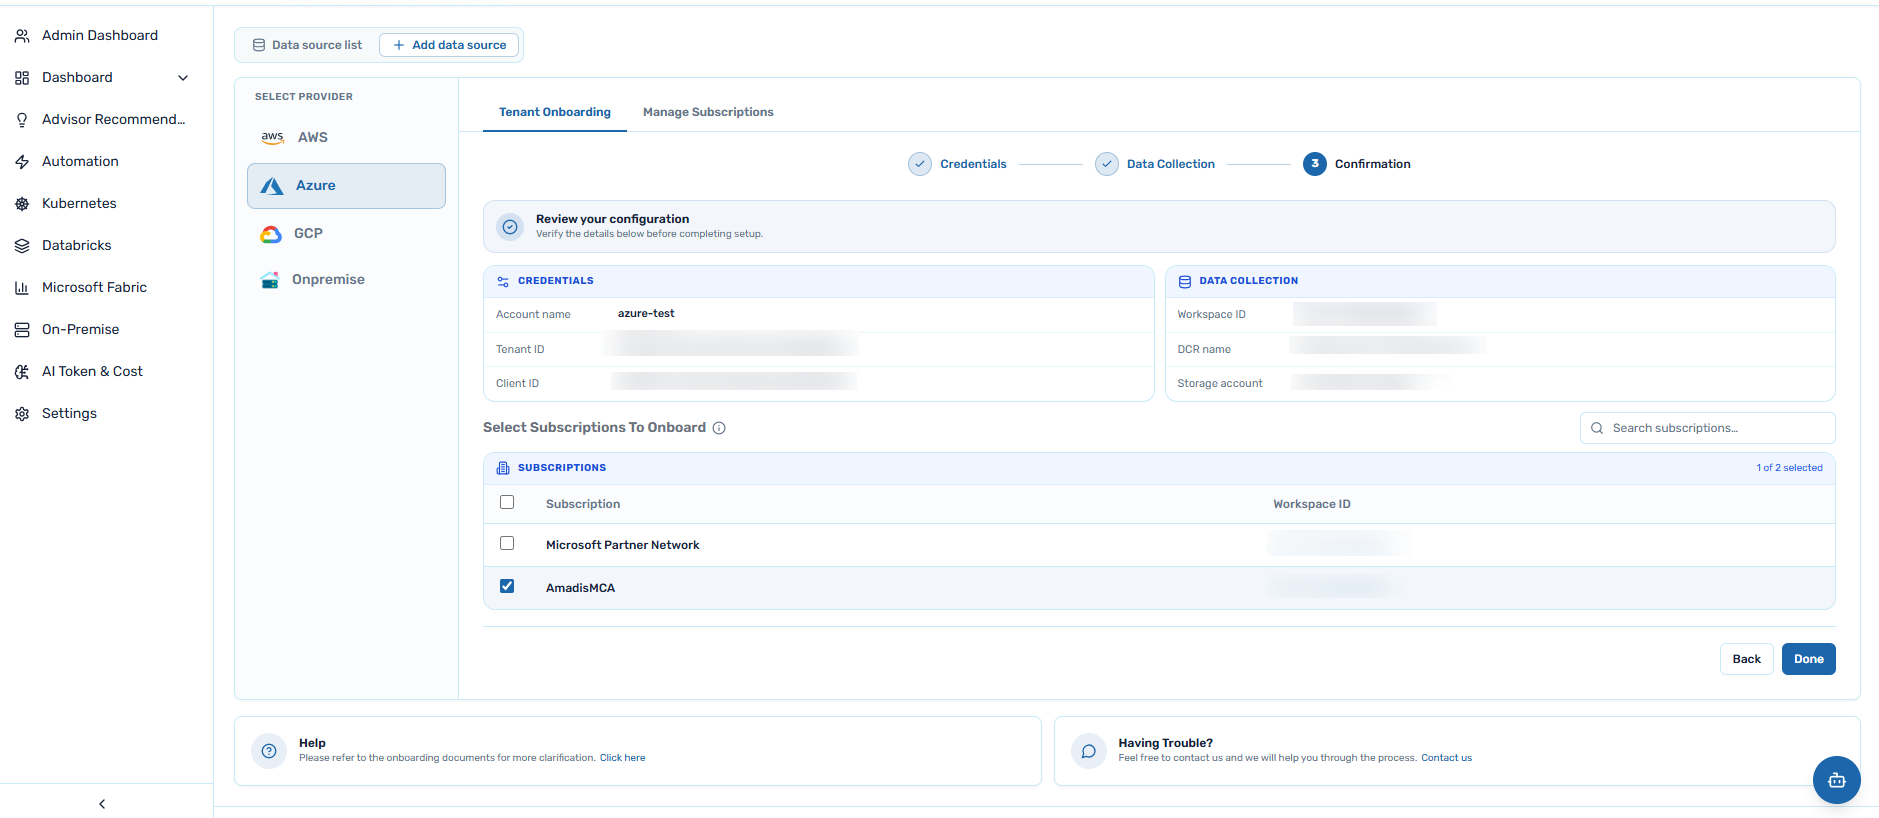
After clicking Next, review the Credentials and Data Collection details on the Confirmation page.
-
Select the subscription from the list where the cost export needs to be created.
-
For that, some permissions are required. For the onboarding subscription's storage account, two roles are needed: Storage Account Contributor and Storage Blob Data Contributor. And for the subscription where the cost export is created, one role is needed: Cost Management Contributor.
-
After clicking Done, the cloud credentials are stored in the database and the cost export is stored in the storage account.
Manage Azure Subscriptions
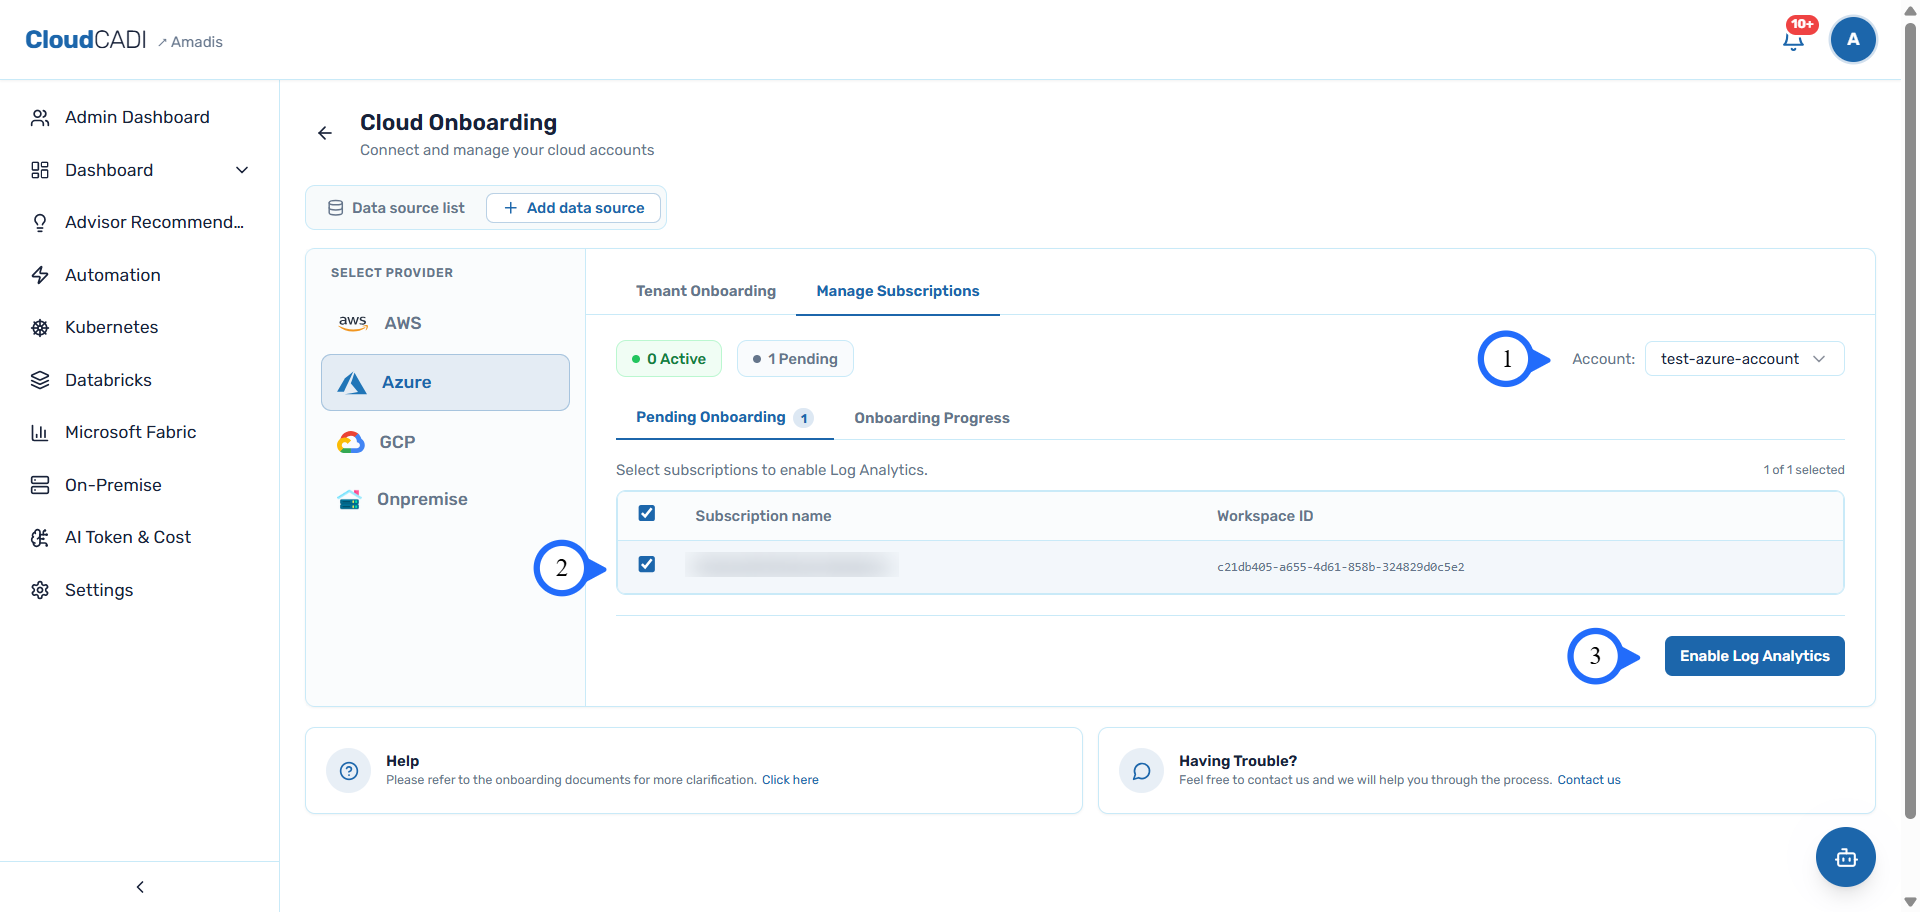
On an already-onboarded account, you can onboard any other available subscriptions under that same account.
Select the account, then the subscription, and click Enable Log Analytics. That subscription starts enabling Log Analytics, and its progress appears in the Onboarding Progress section.