Connect an AWS Account (CloudCADI hosted on Azure)
Auto and Manual Onboarding
Both Auto and Manual setup use the same cross-account IAM role. The CloudFormation template downloaded during setup provisions an OIDC identity provider trusting CloudCADI's Azure AD issuer, plus an IAM role (with a scoped read-only policy) that CloudCADI assumes via that provider. Deploy the template in your AWS account, then copy the Role ARN from the stack's outputs.
The difference between the two: Manual requires every account to be added one at a time. Auto only needs this once - after the first account is onboarded, every member account in the same AWS Organization is fetched automatically and can be onboarded in a couple of clicks, without repeating the CloudFormation step.
Auto
First account (one-time setup):
-
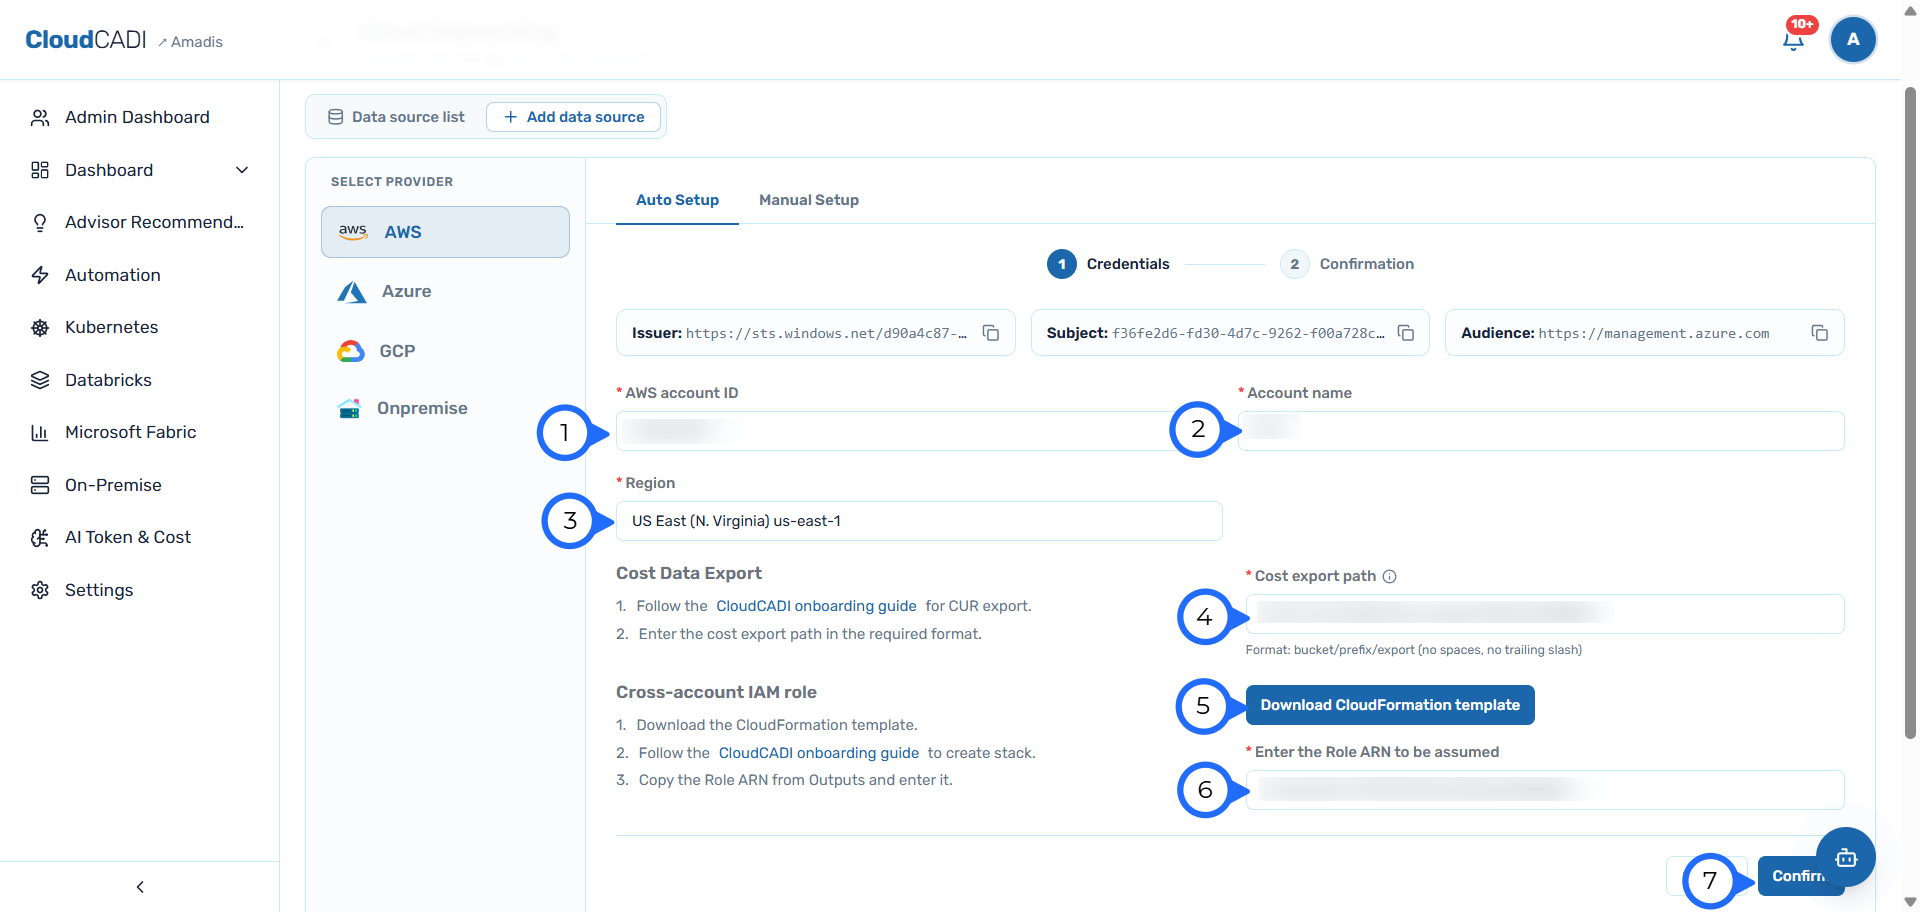
Enter the AWS account ID, Account name, Region, and Cost export path, then download the CloudFormation template.
-
Deploy the downloaded template in your AWS account:
-
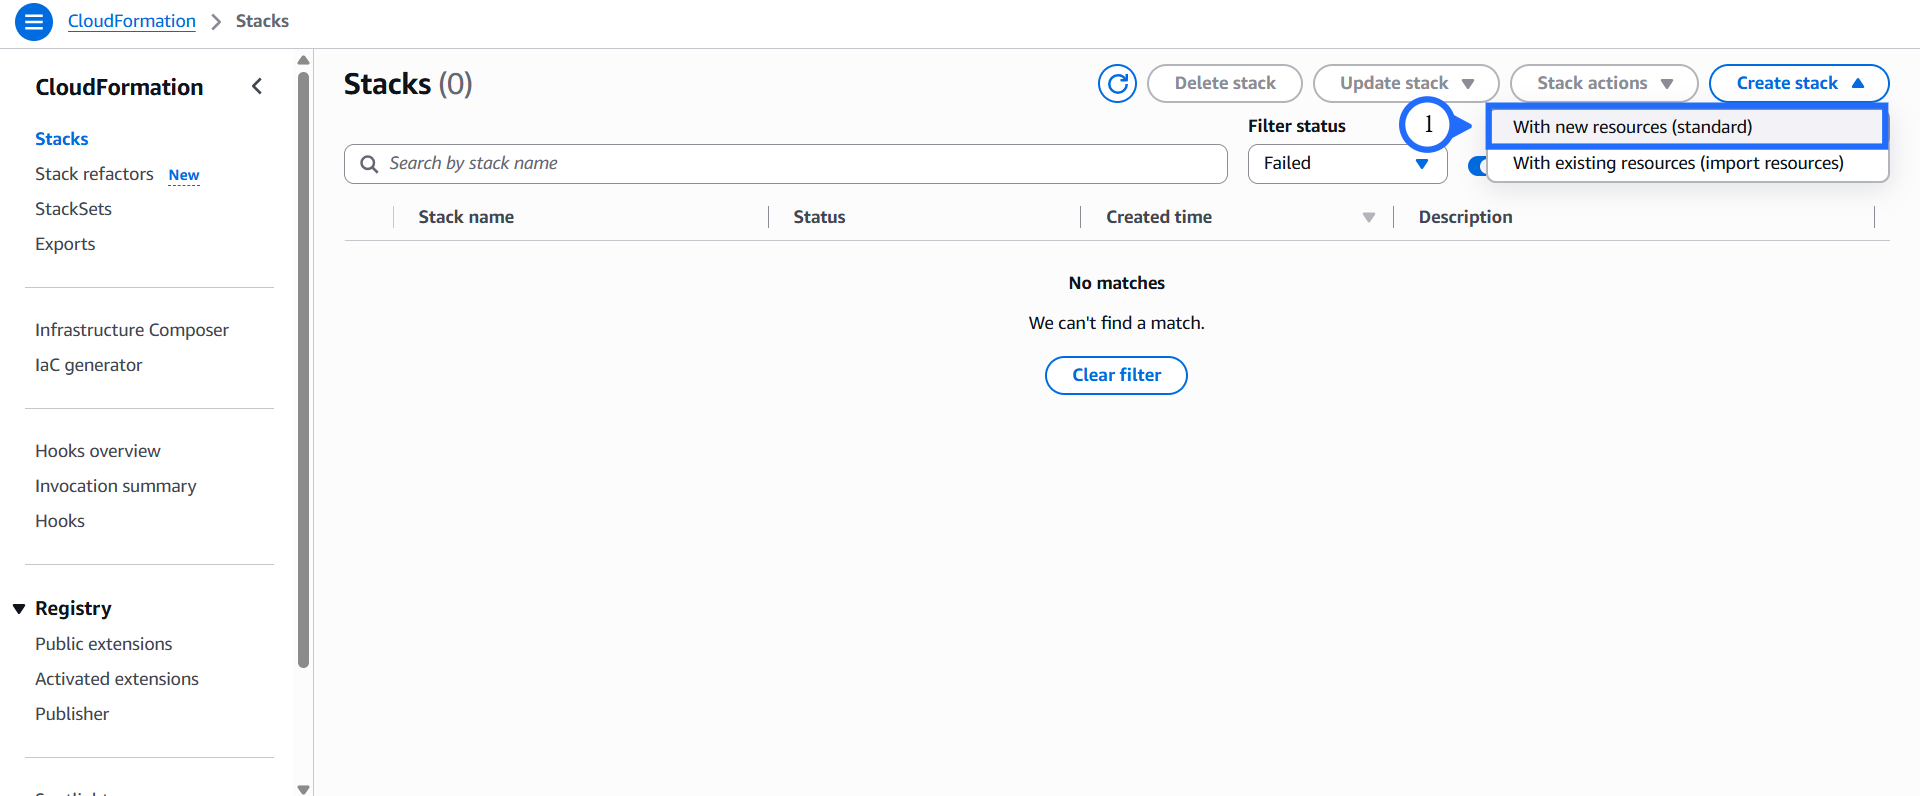
CloudFormation → Stacks → Create stack → With new resources (standard).
-
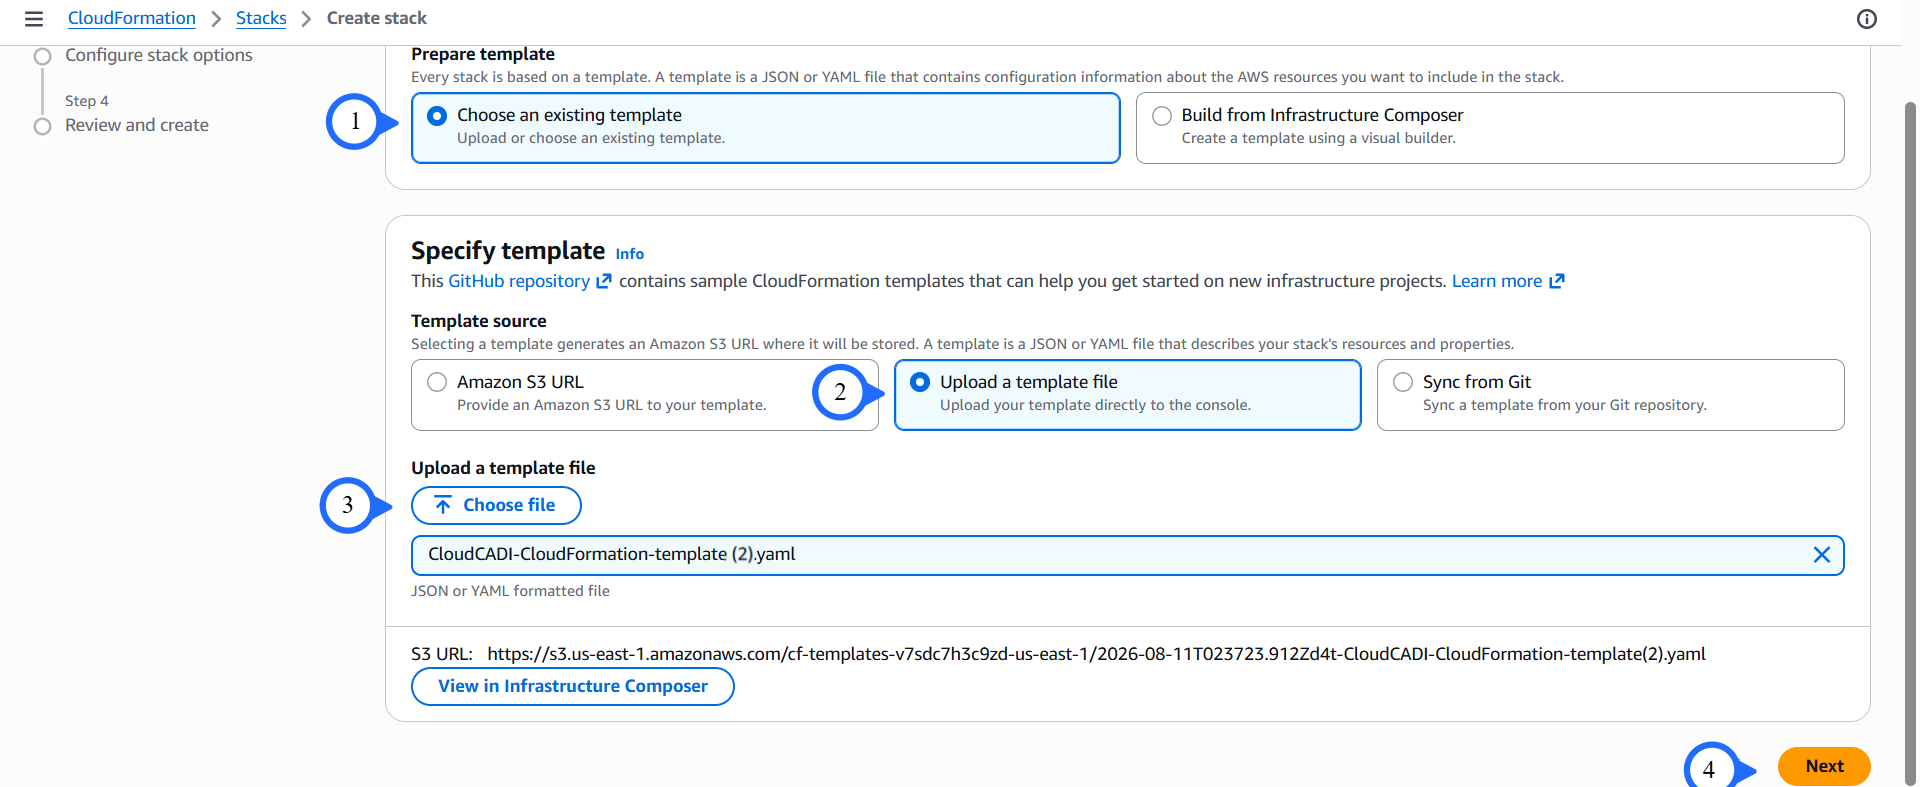
Choose an existing template → Upload a template file → Choose file → select the downloaded template → Next.
-
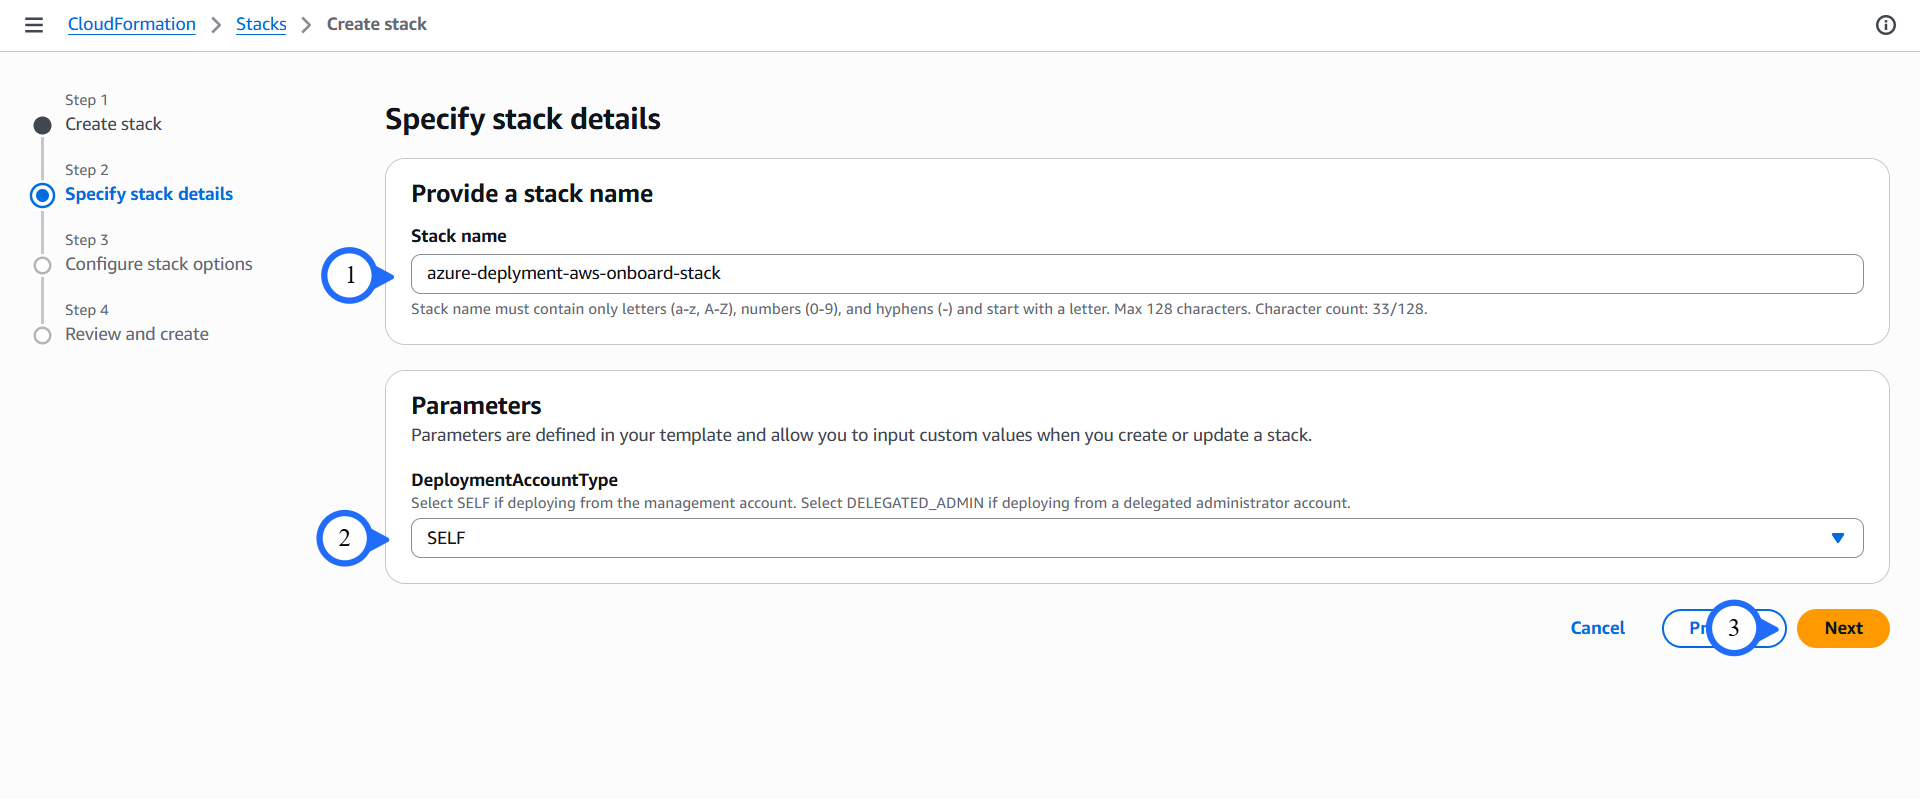
Under specify stack details. Enter stack name.
-
For DeployedAccountType, select SELF if the CloudCADI deployed account is the AWS Organizations management account. Select DELEGATED_ADMIN if it is a member account configured as a delegated administrator.
Enable Delegated Administrator
Follow these steps to enable a delegated administrator in AWS Organizations:
-
Sign in to the AWS Management Account and open AWS Organizations → Services.
-
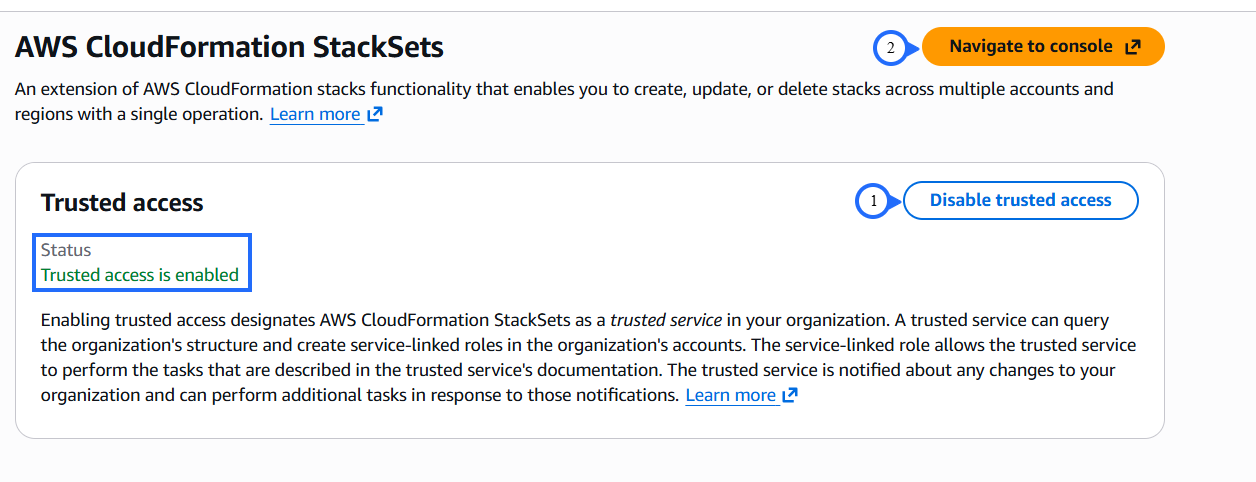
Find AWS CloudFormation StackSets and click Enable trusted access.
-
Click Navigate to Console.
-
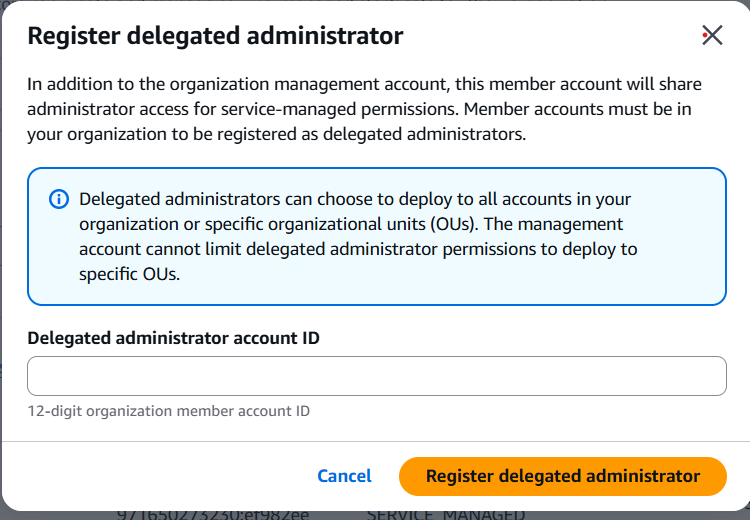
Under Delegated Administrators, click Register delegated administrator.

-
A popup will appear. Enter the Delegated Administrator Account ID and click Register Delegated Administrator.
-
The member account can now perform the required actions.
-
-
Click Next.
-
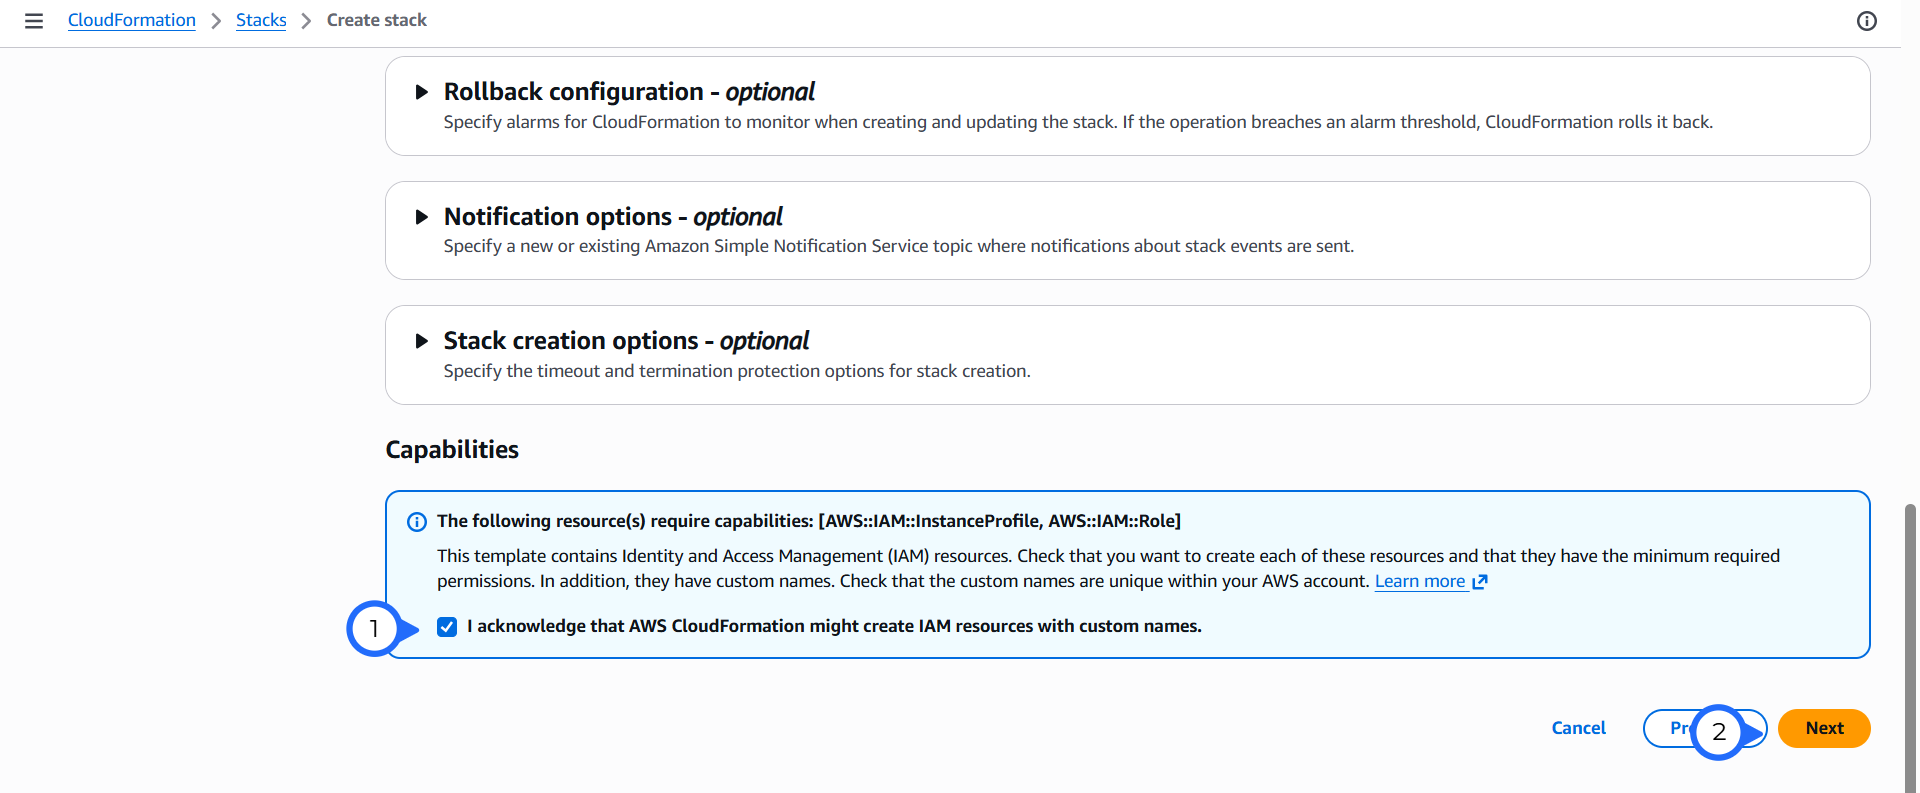
Check I acknowledge that AWS CloudFormation might create IAM resources with custom names → Next.
-
Scroll to the bottom and click Submit.
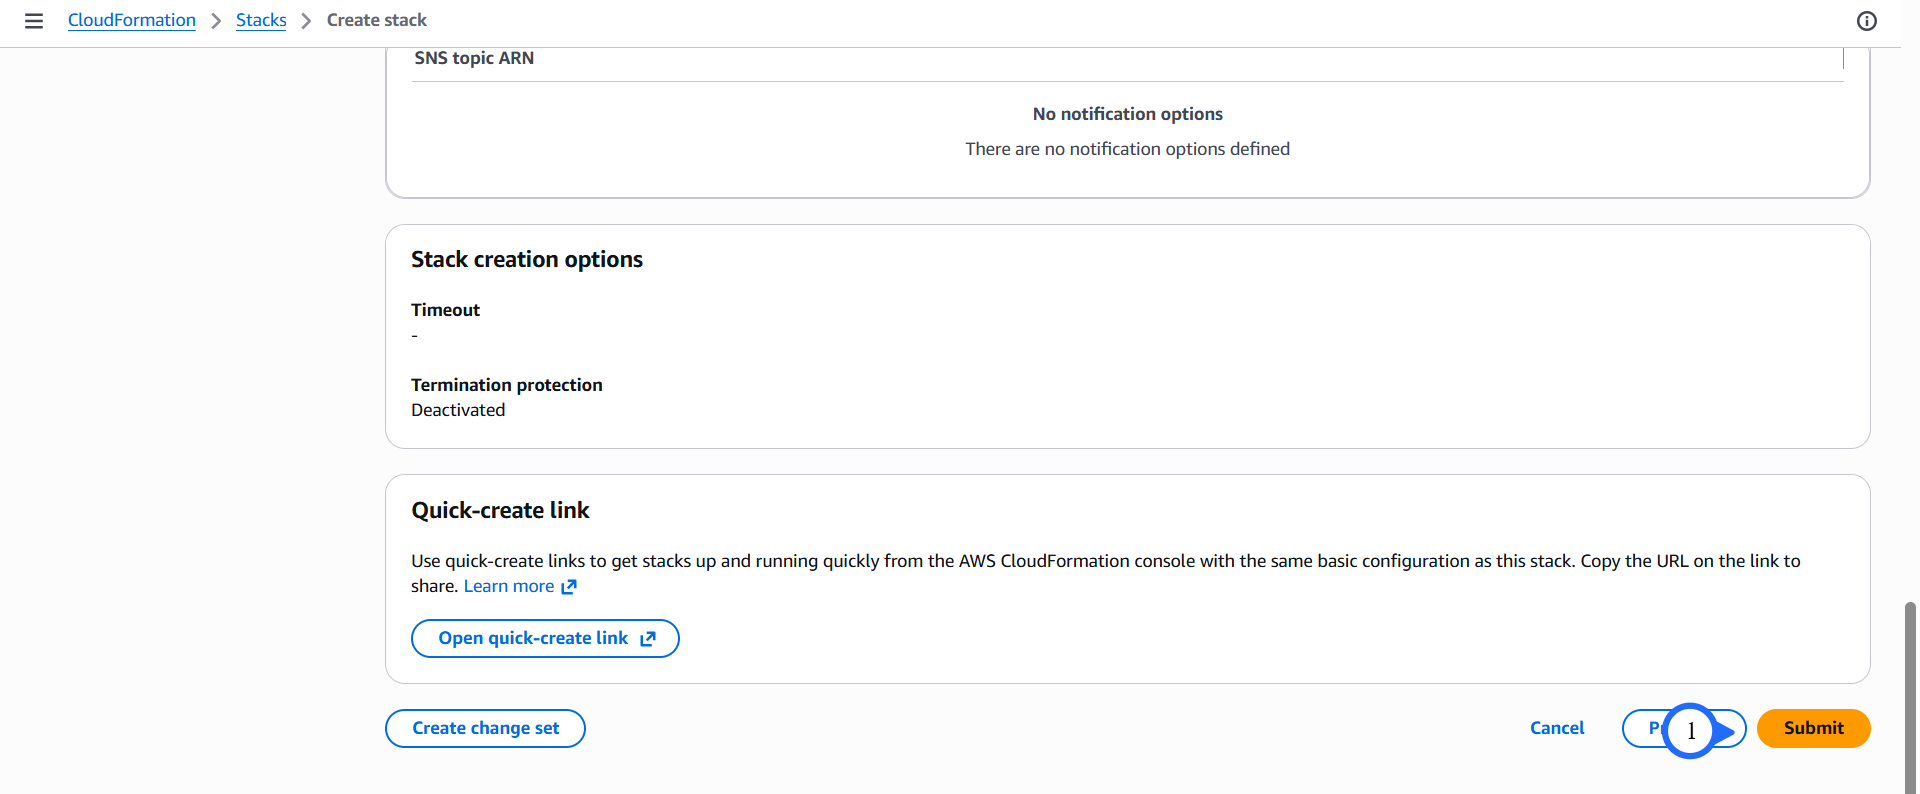
-
-
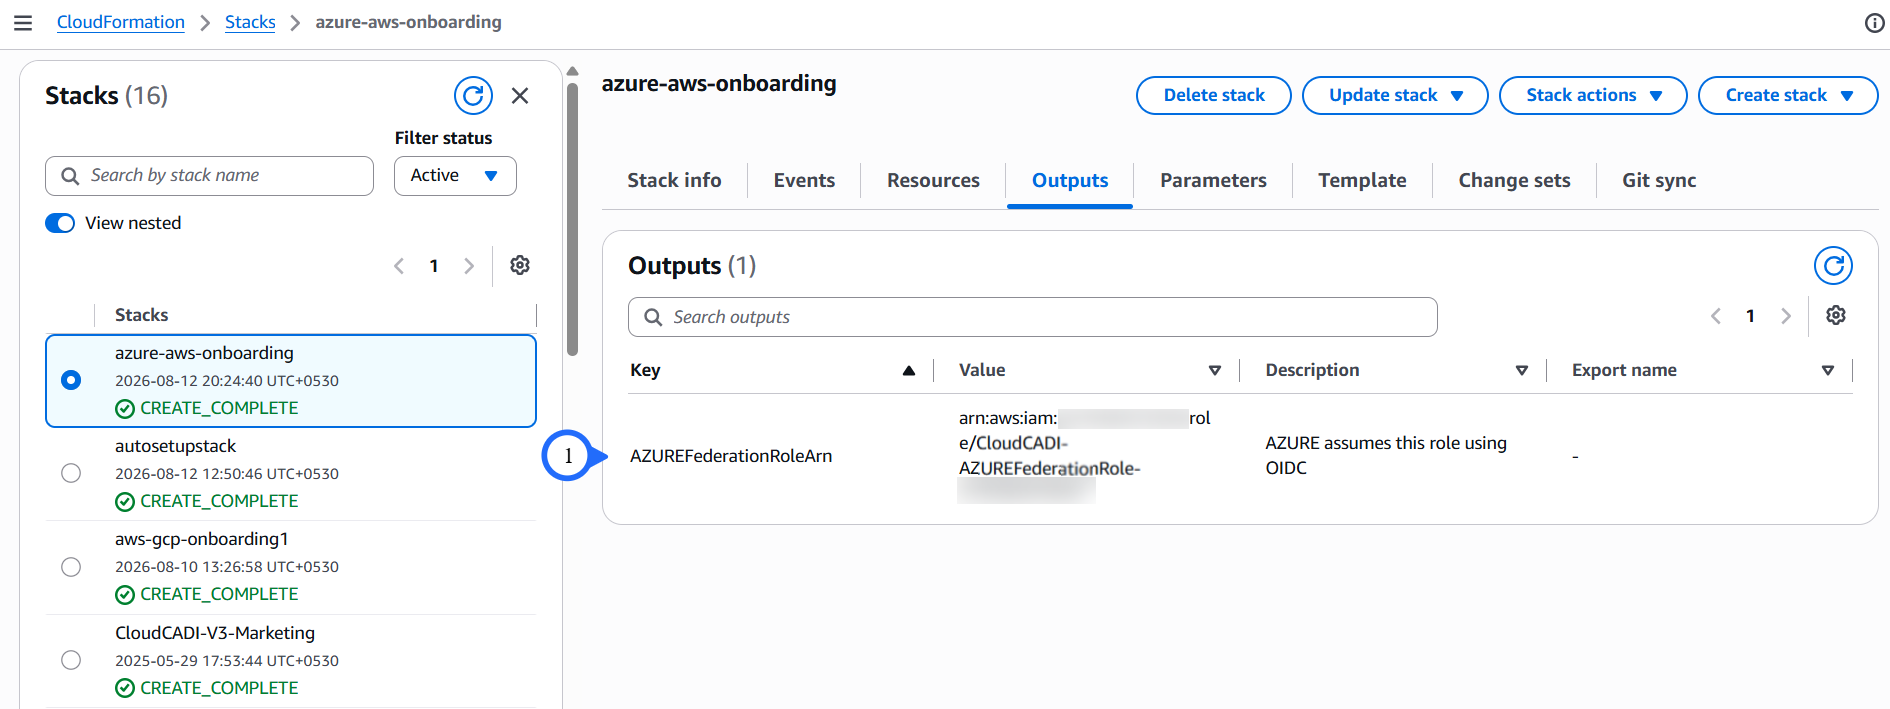
Once the stack shows CREATE_COMPLETE, copy the CloudCADIAZUREFederationRoleArn from its Outputs tab, paste it into CloudCADI, and click Confirm.
-
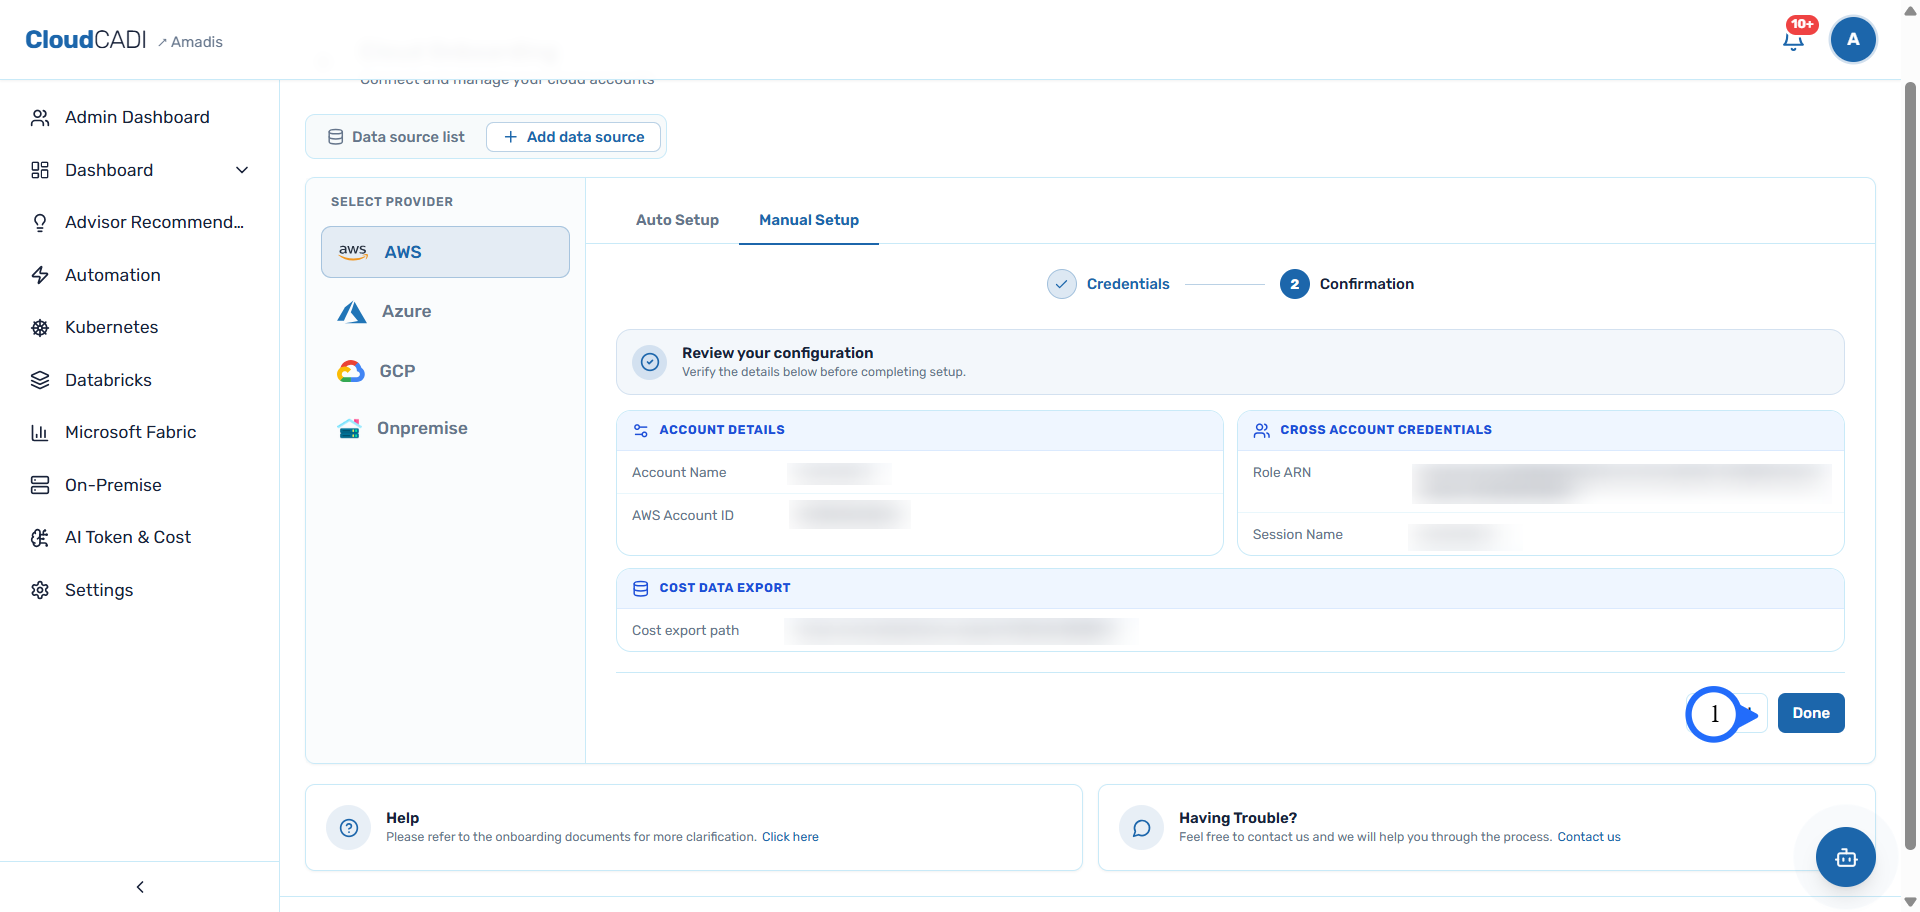
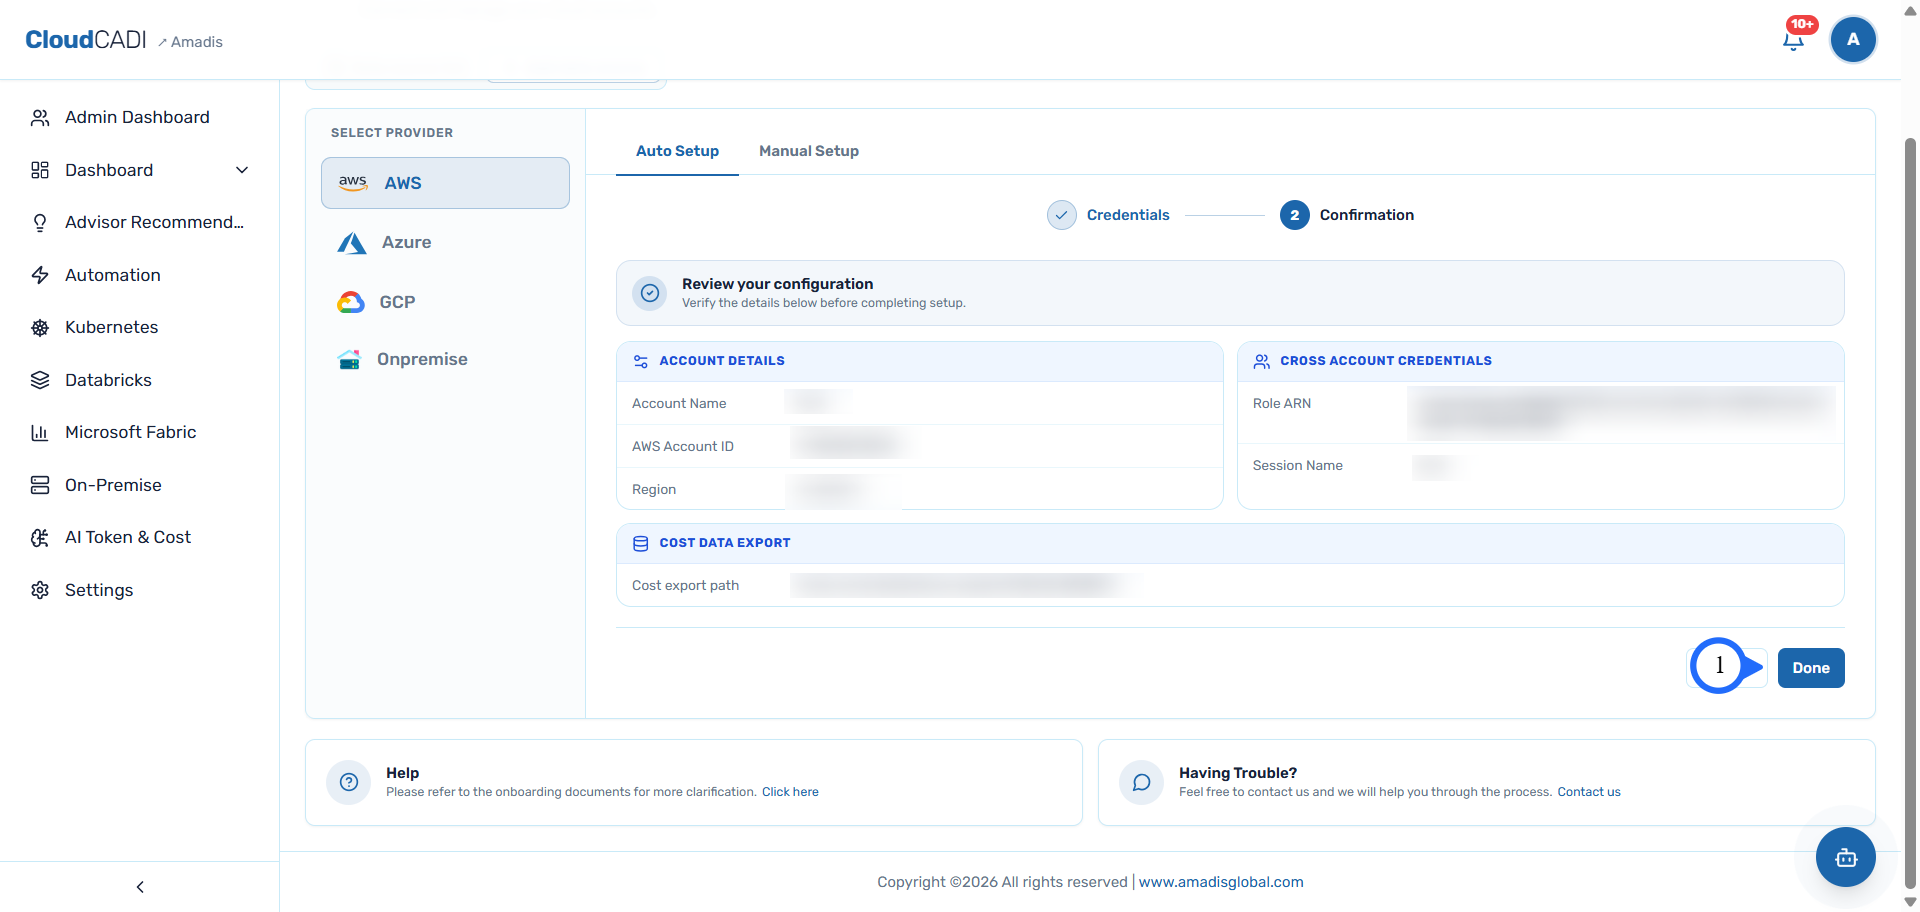
Review the configuration and click Done - this account is now onboarded.
Every account after that:
-
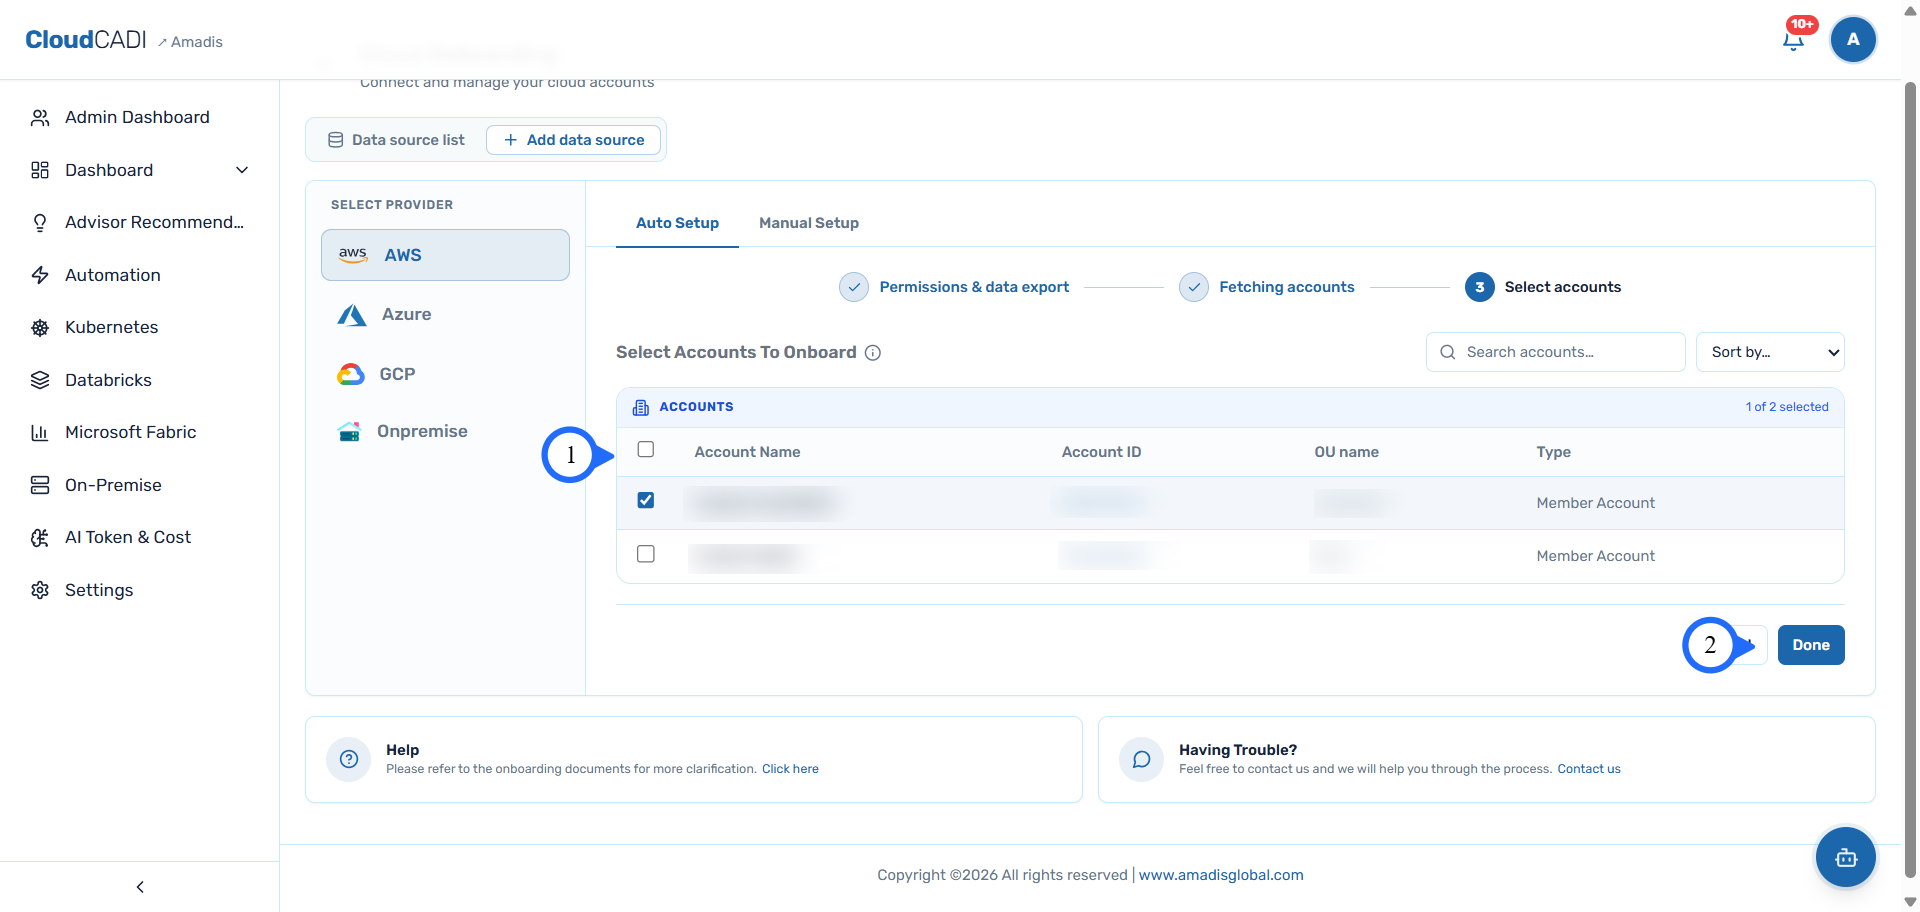
All other accounts in the same AWS Organization are fetched automatically. Select the accounts to onboard and click Done.
Manual
-
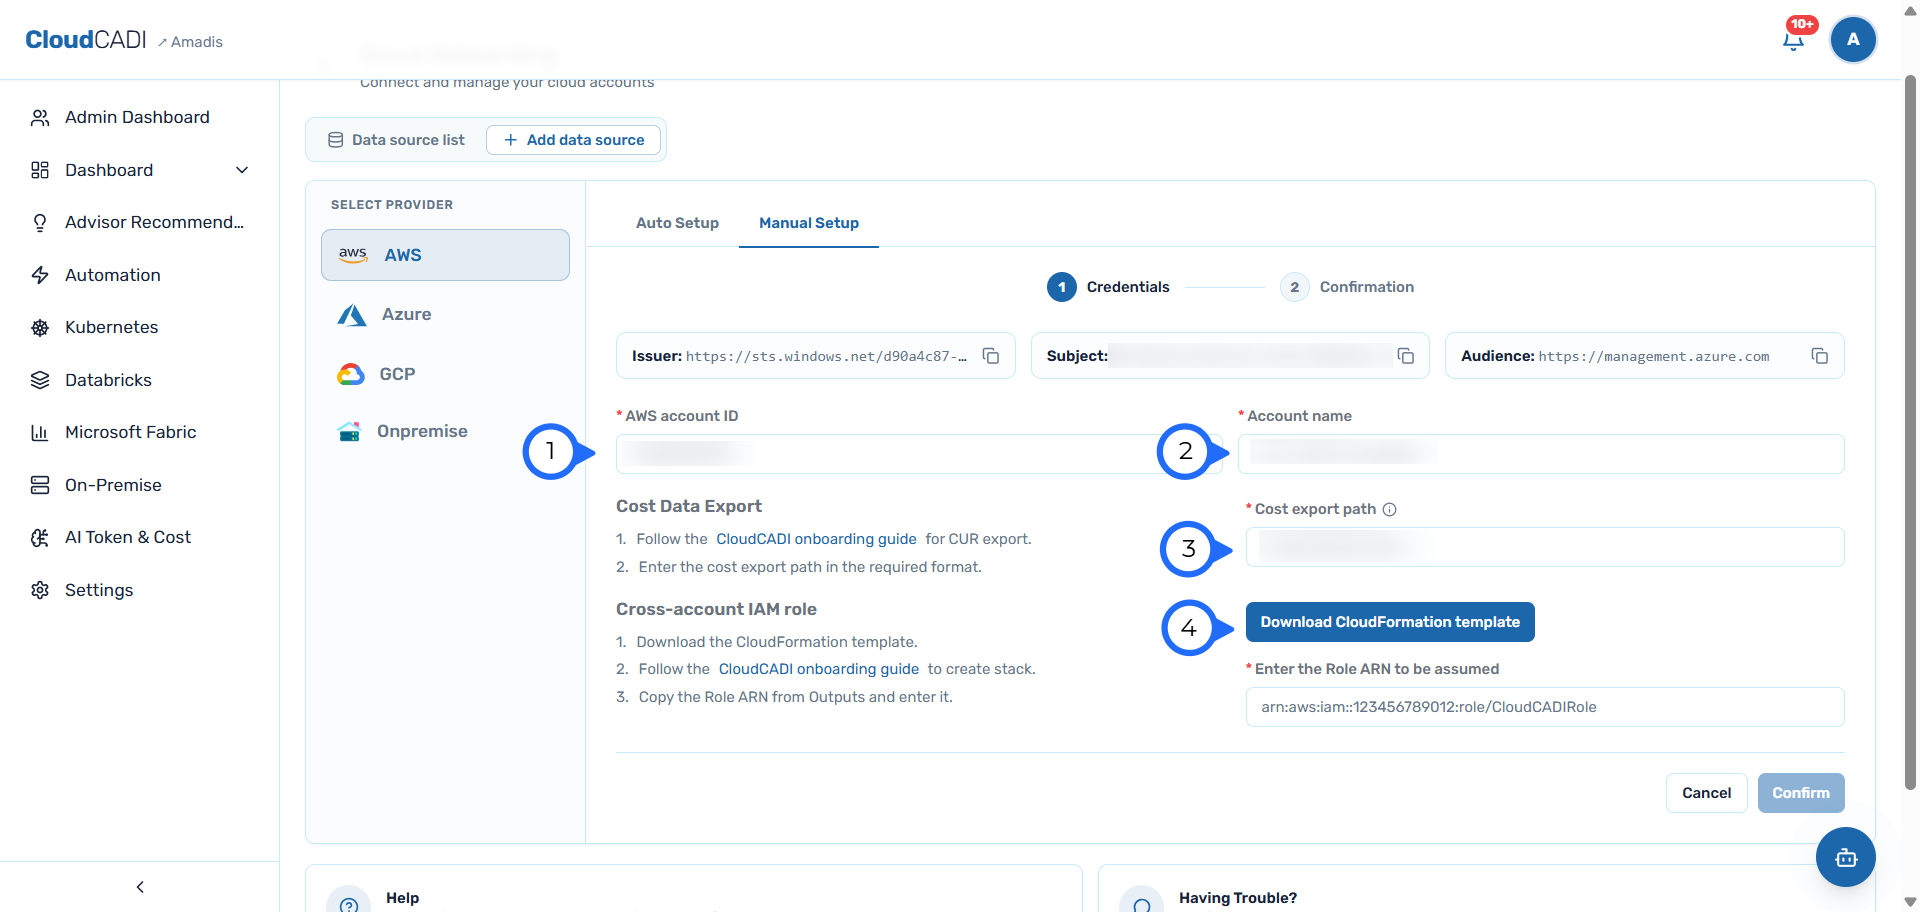
Enter the AWS account ID, Account name, and Cost export path, then download the CloudFormation template.
-
Deploy the downloaded template in AWS account that need to be onboarded:
-
In the AWS Console, go to CloudFormation → Stacks → Create stack → With new resources (standard).
-
Under Prepare template, leave Choose an existing template selected. Under Specify template, choose Upload a template file → Choose file → select the template downloaded in step 1 → Next.
-
On Specify stack details, enter a Stack name (e.g.
azure-deployment-aws-onboard-stack) → Next.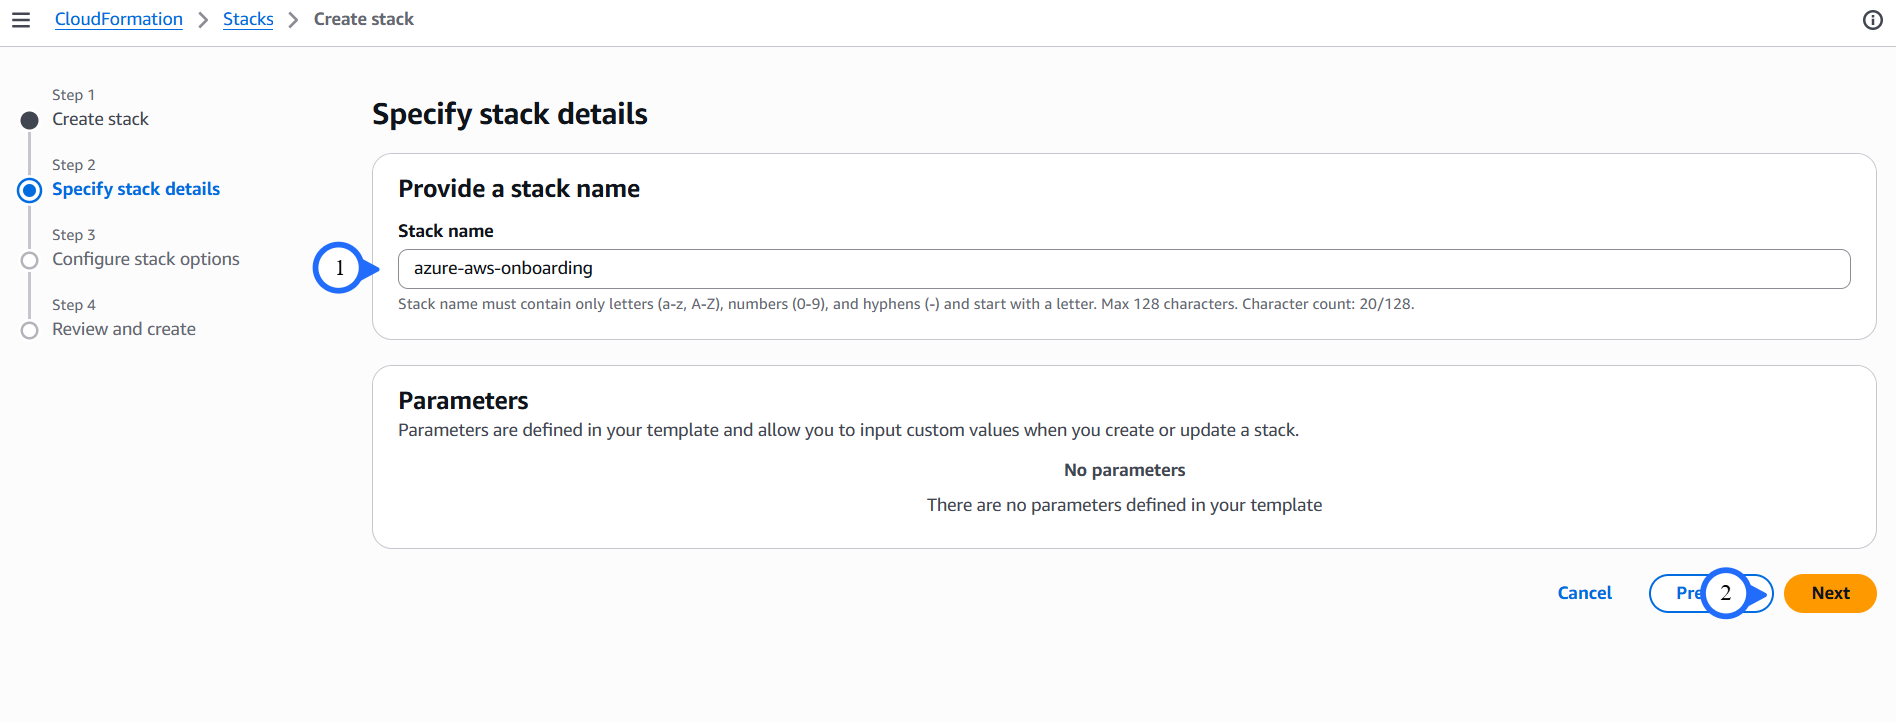
-
On Configure stack options, scroll down to Capabilities and check I acknowledge that AWS CloudFormation might create IAM resources with custom names → Next.
-
On Review and create, scroll to the bottom and click Submit.
-
-
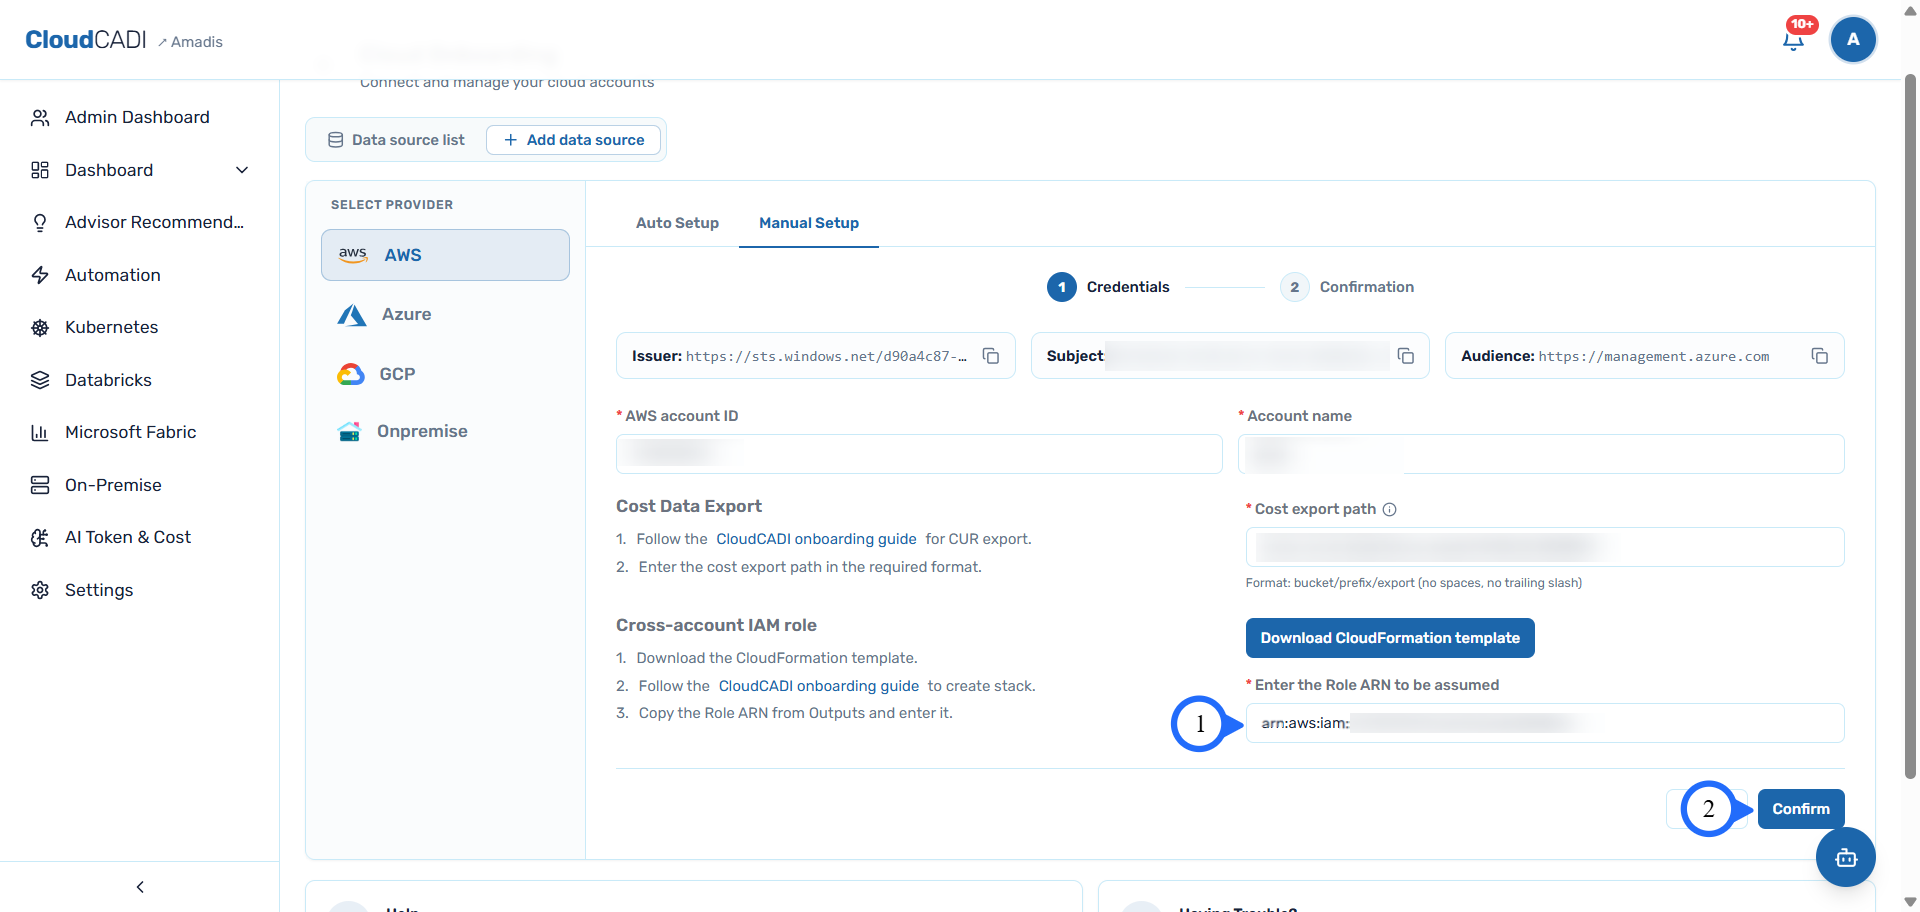
Once the stack status shows CREATE_COMPLETE, open its Outputs tab and copy the AZUREFederationRoleArn value.
Back in CloudCADI, paste it in and click Confirm.
-
Review the configuration on the confirmation page and click Done.