Connect a GCP Account (CloudCADI hosted on Azure)
Prerequisites
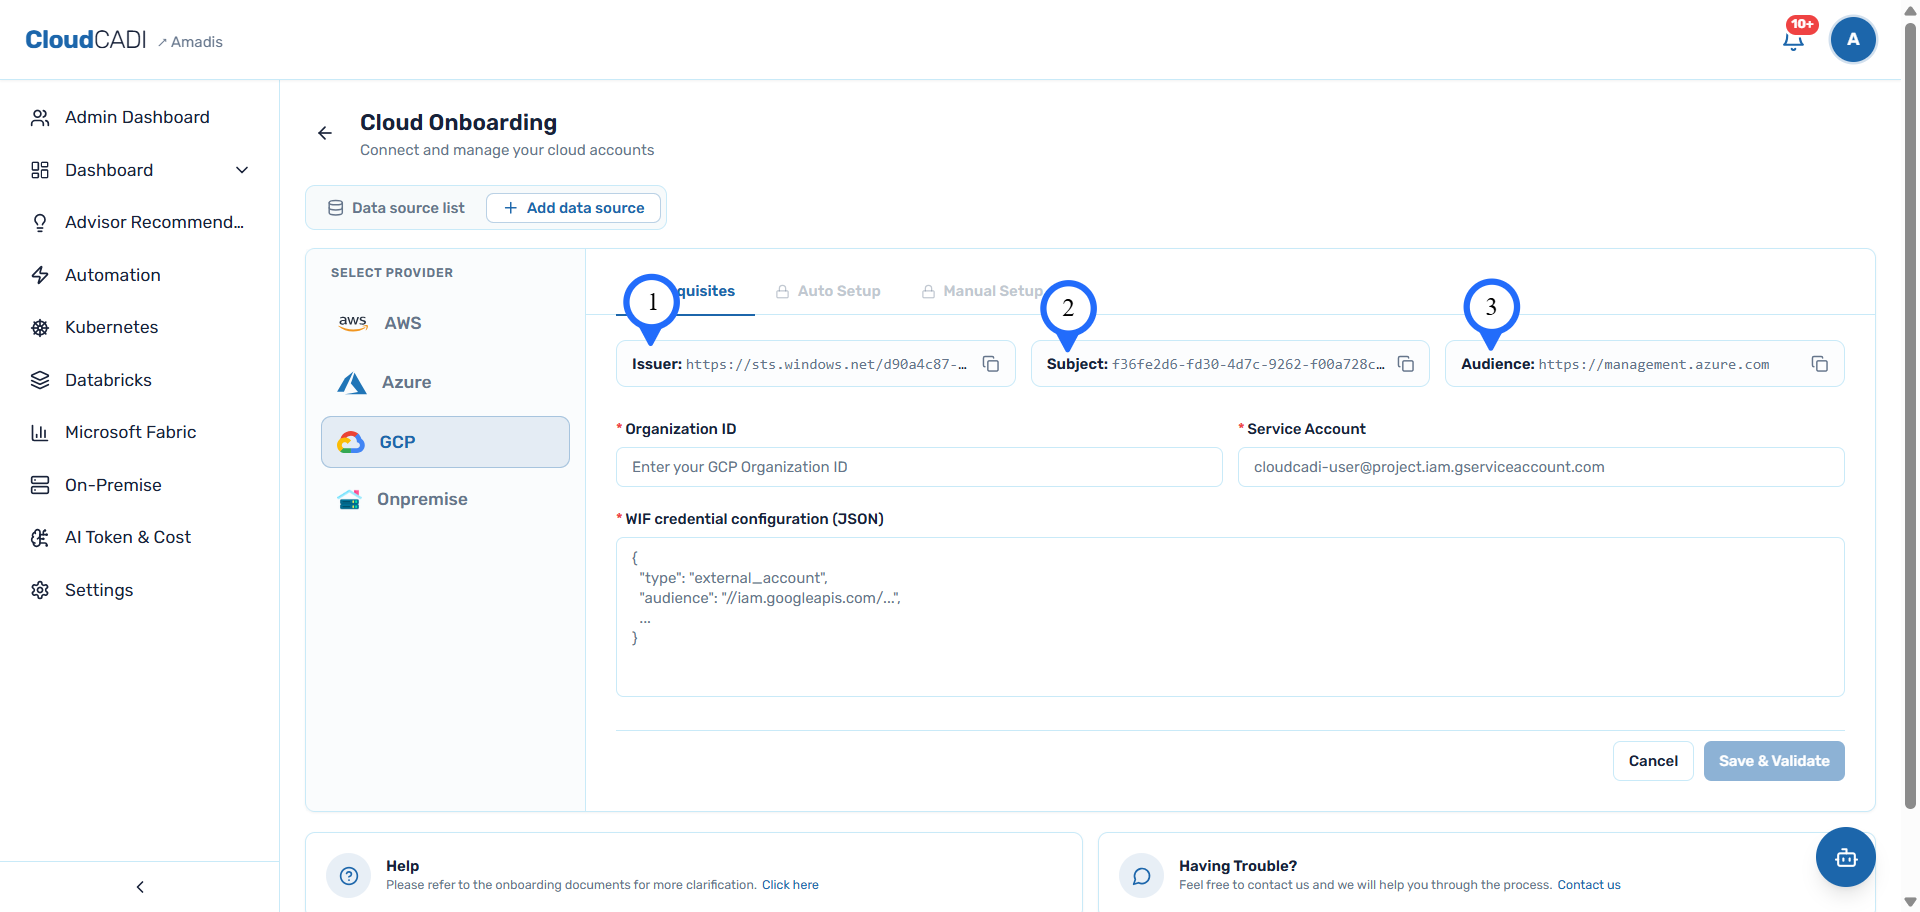
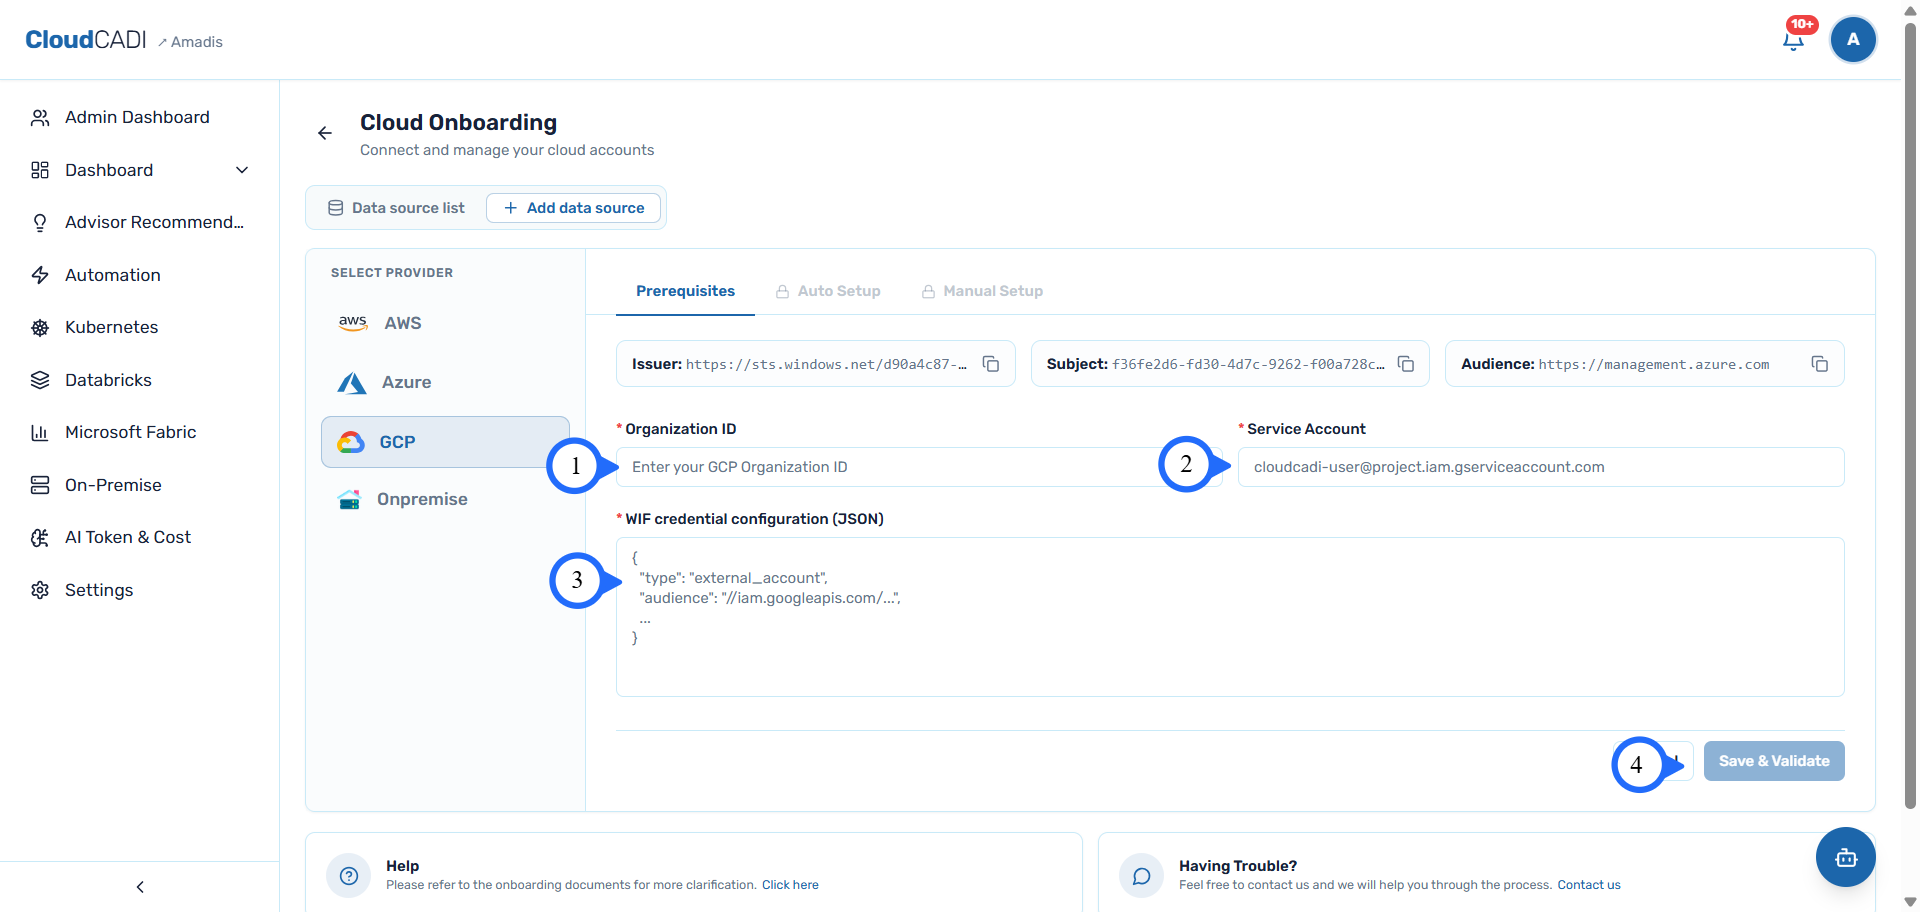
Open CloudCADI's GCP onboarding page and note down the three values shown there - Issuer, Subject, and Audience. You'll copy these into GCP in the steps below.
-
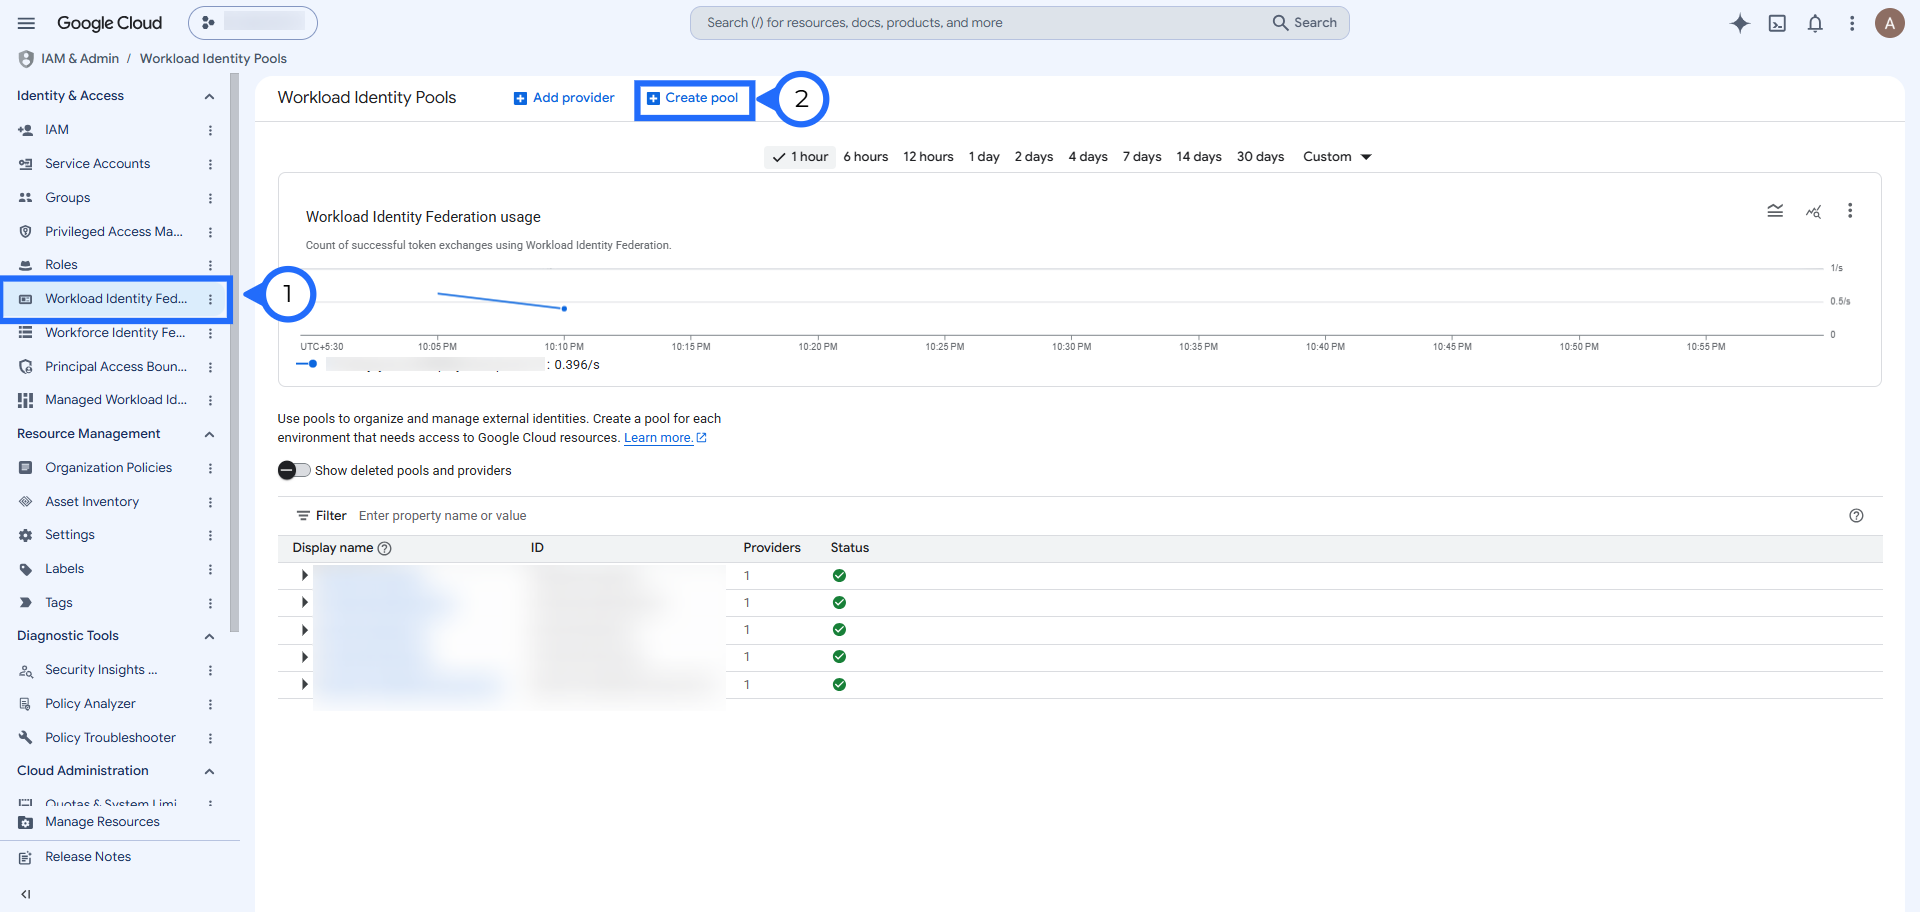
In the GCP Console, go to IAM & Admin.
-
Select Workload Identity Federation from the left panel, then click Create pool.
-
Enter a name for the identity pool (e.g.
CloudCADI-gcp-connect) and click Continue.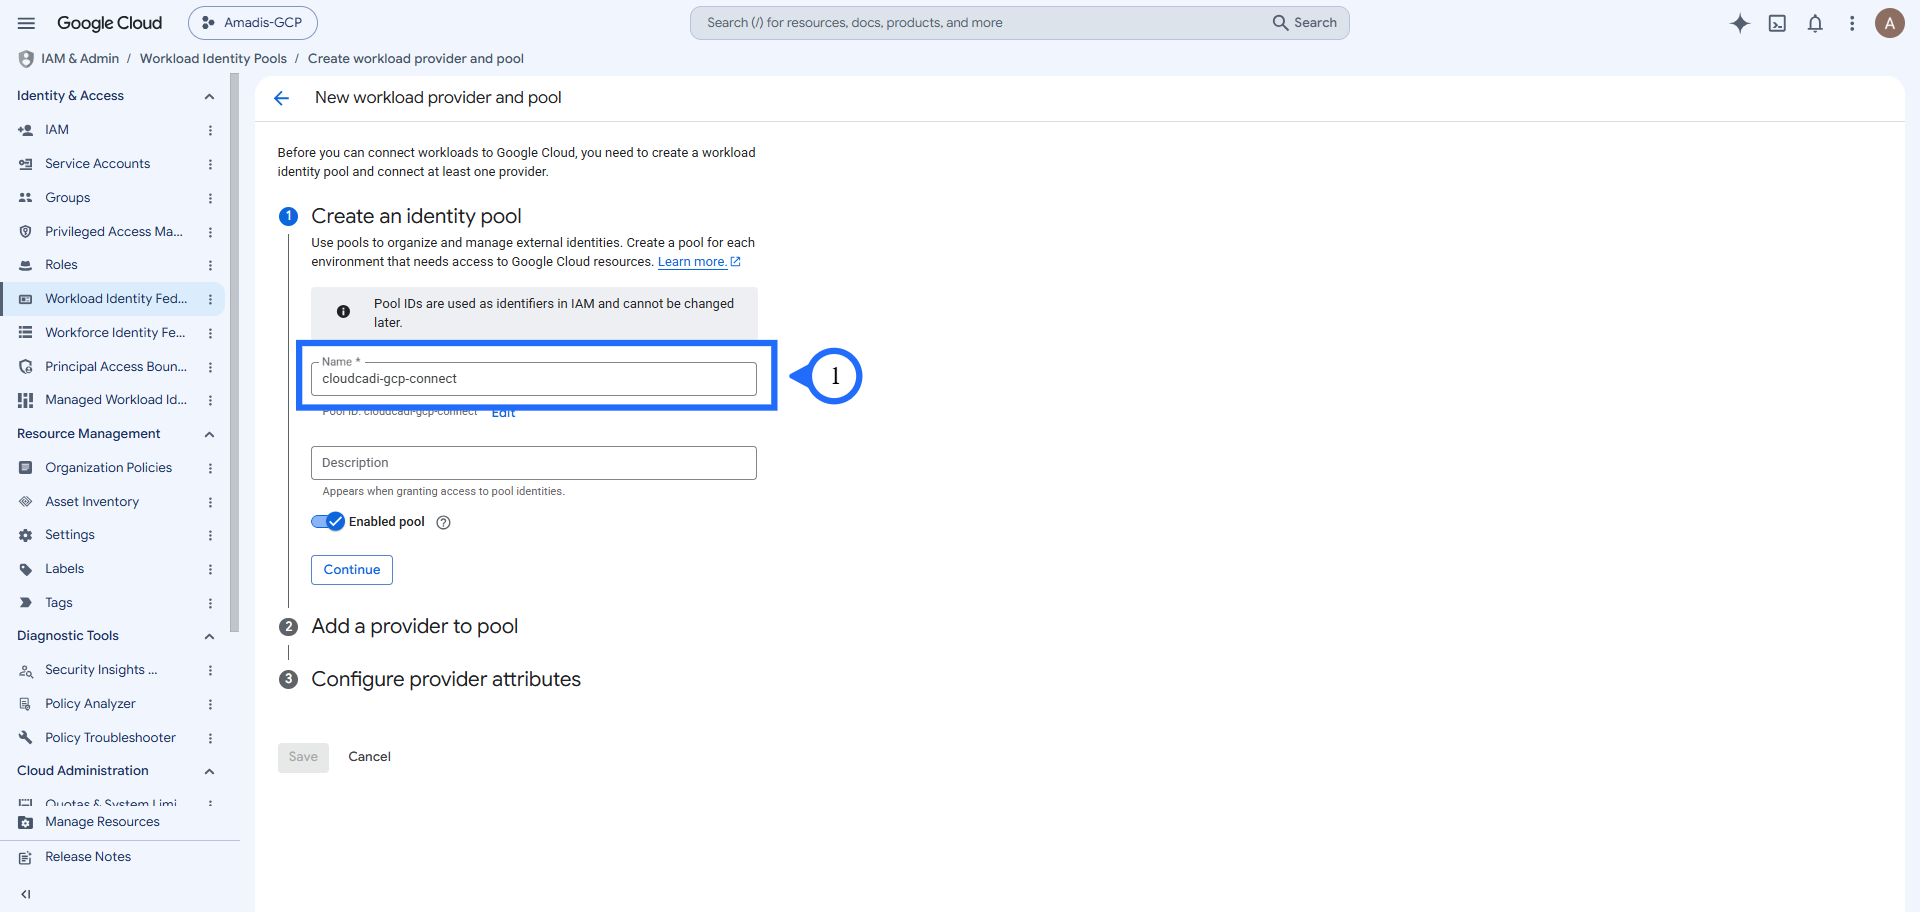
-
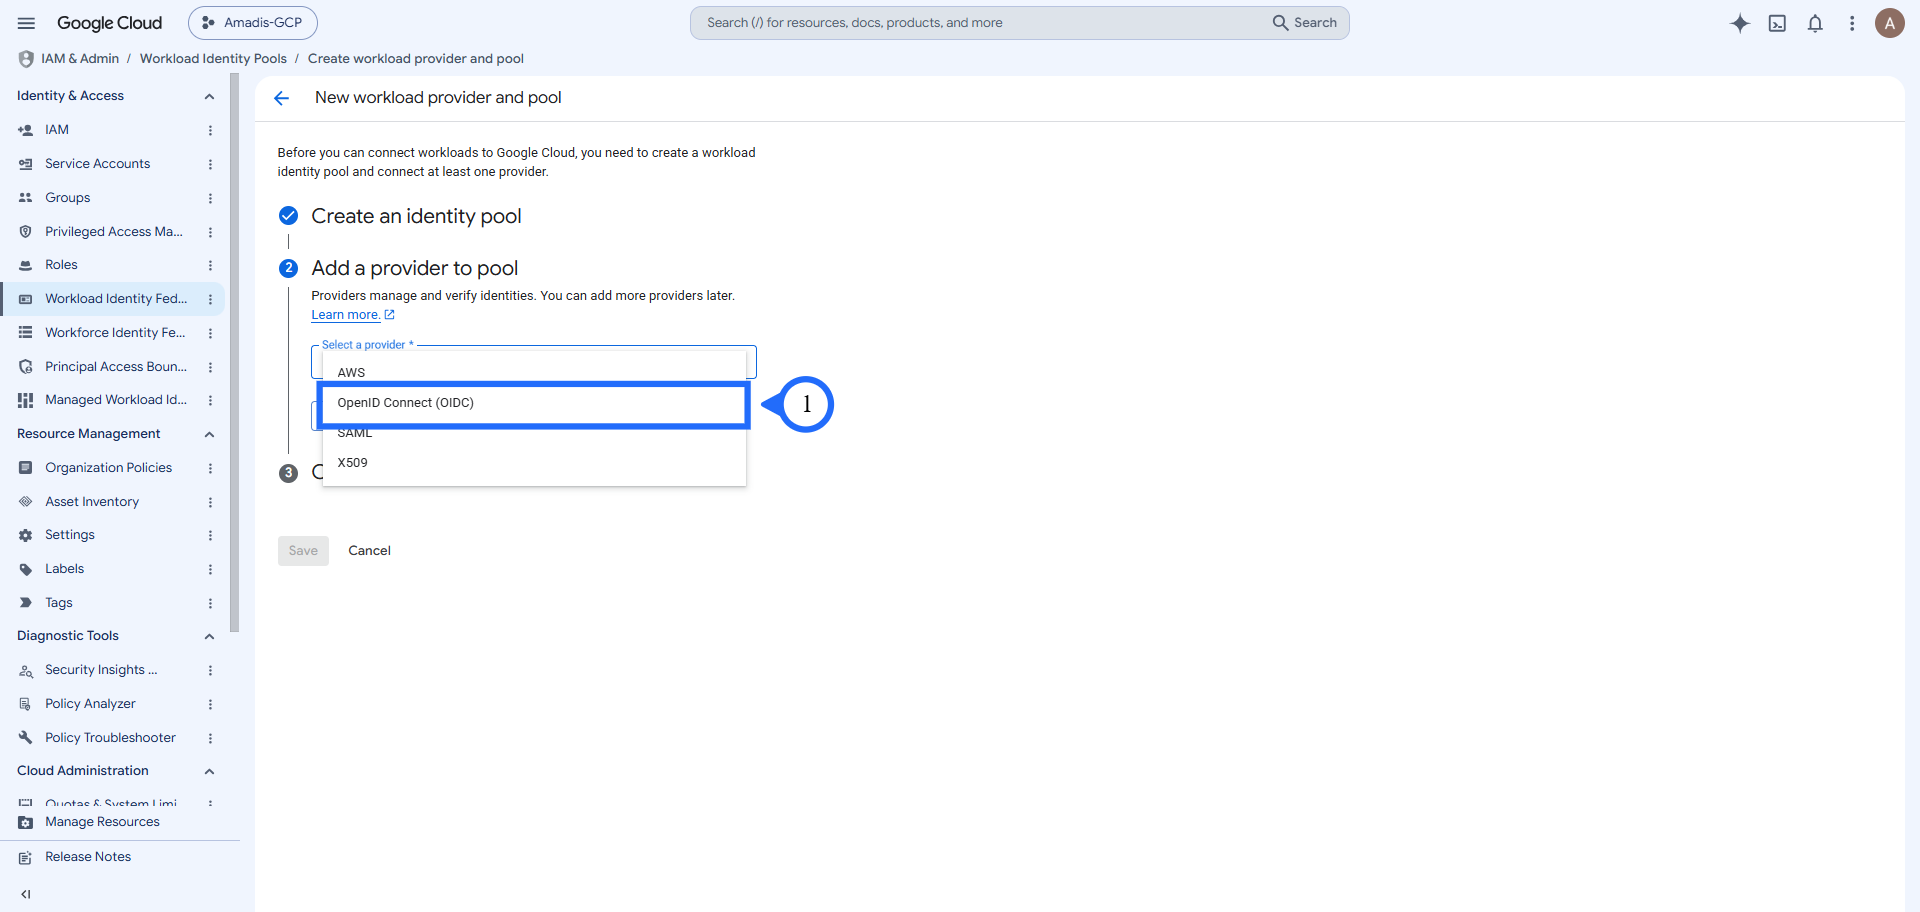
Under Add a provider to pool, select OpenID Connect (OIDC).
-
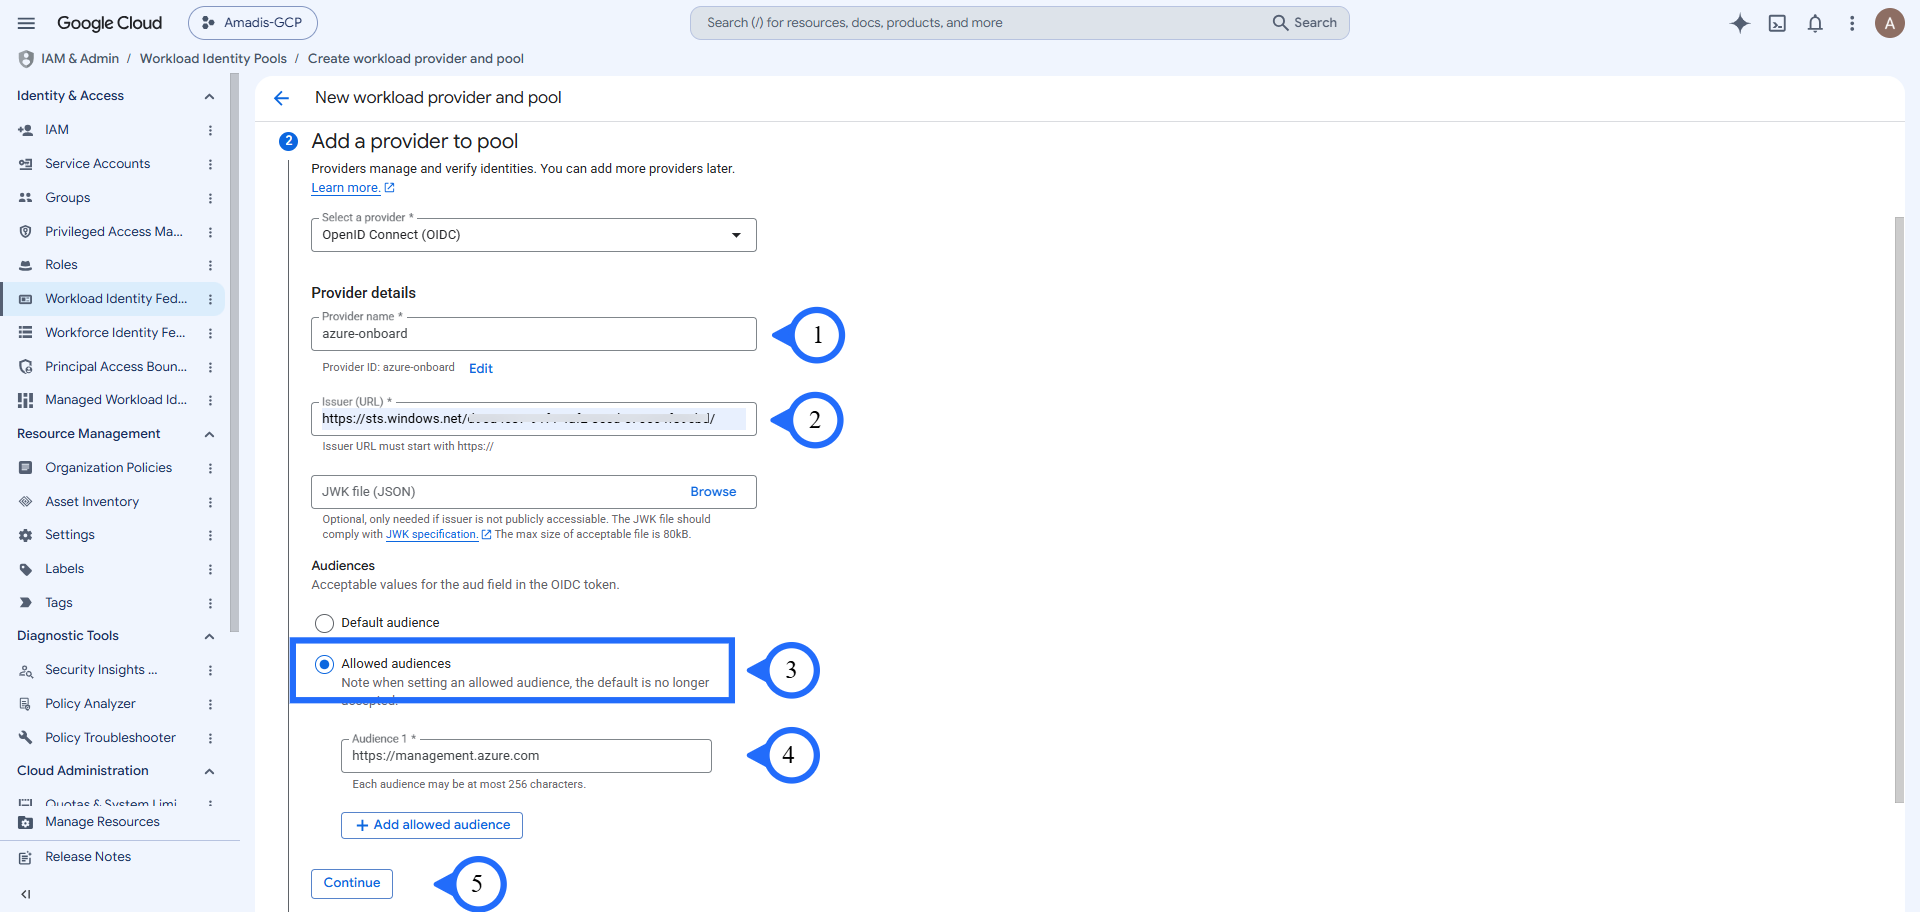
Fill in the provider details, using the values noted from CloudCADI's UI:
- Issuer (URL):
https://sts.windows.net/{TENANT_ID}/ - Allowed audiences:
https://management.azure.com
Click Continue.
- Issuer (URL):
-
Under attribute mapping, map
google.subjecttoassertion.sub, then click Save.{ "google.subject": "assertion.sub" }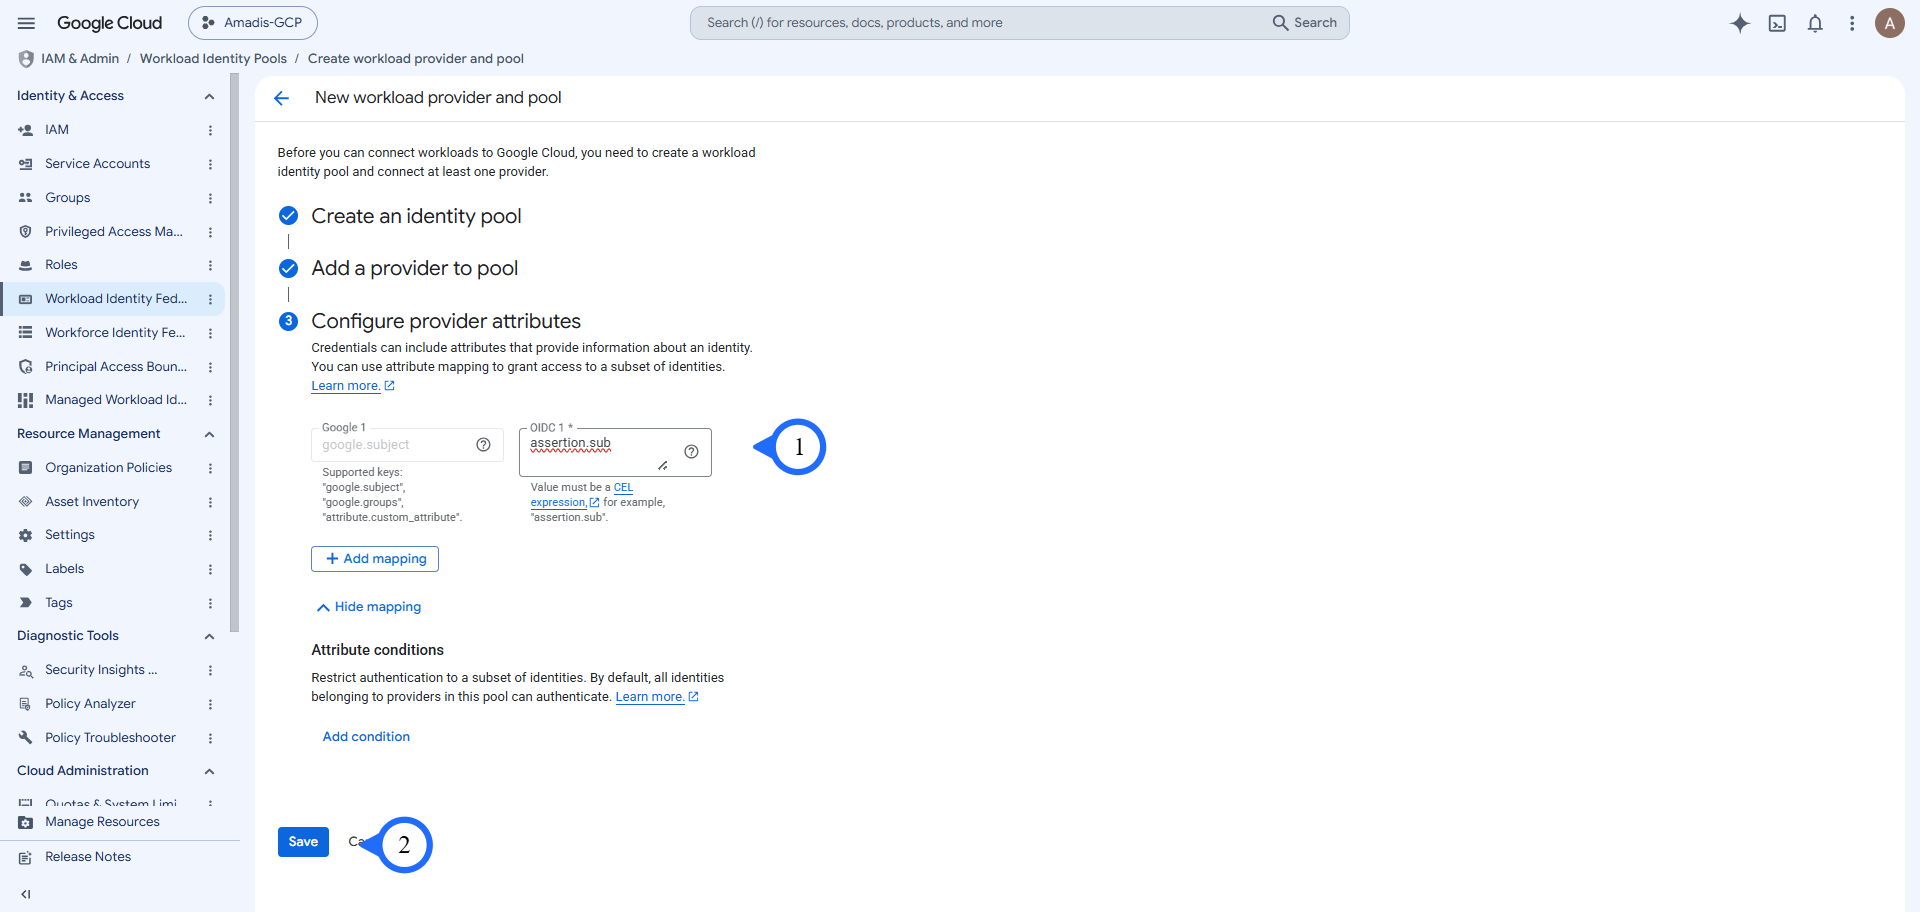
-
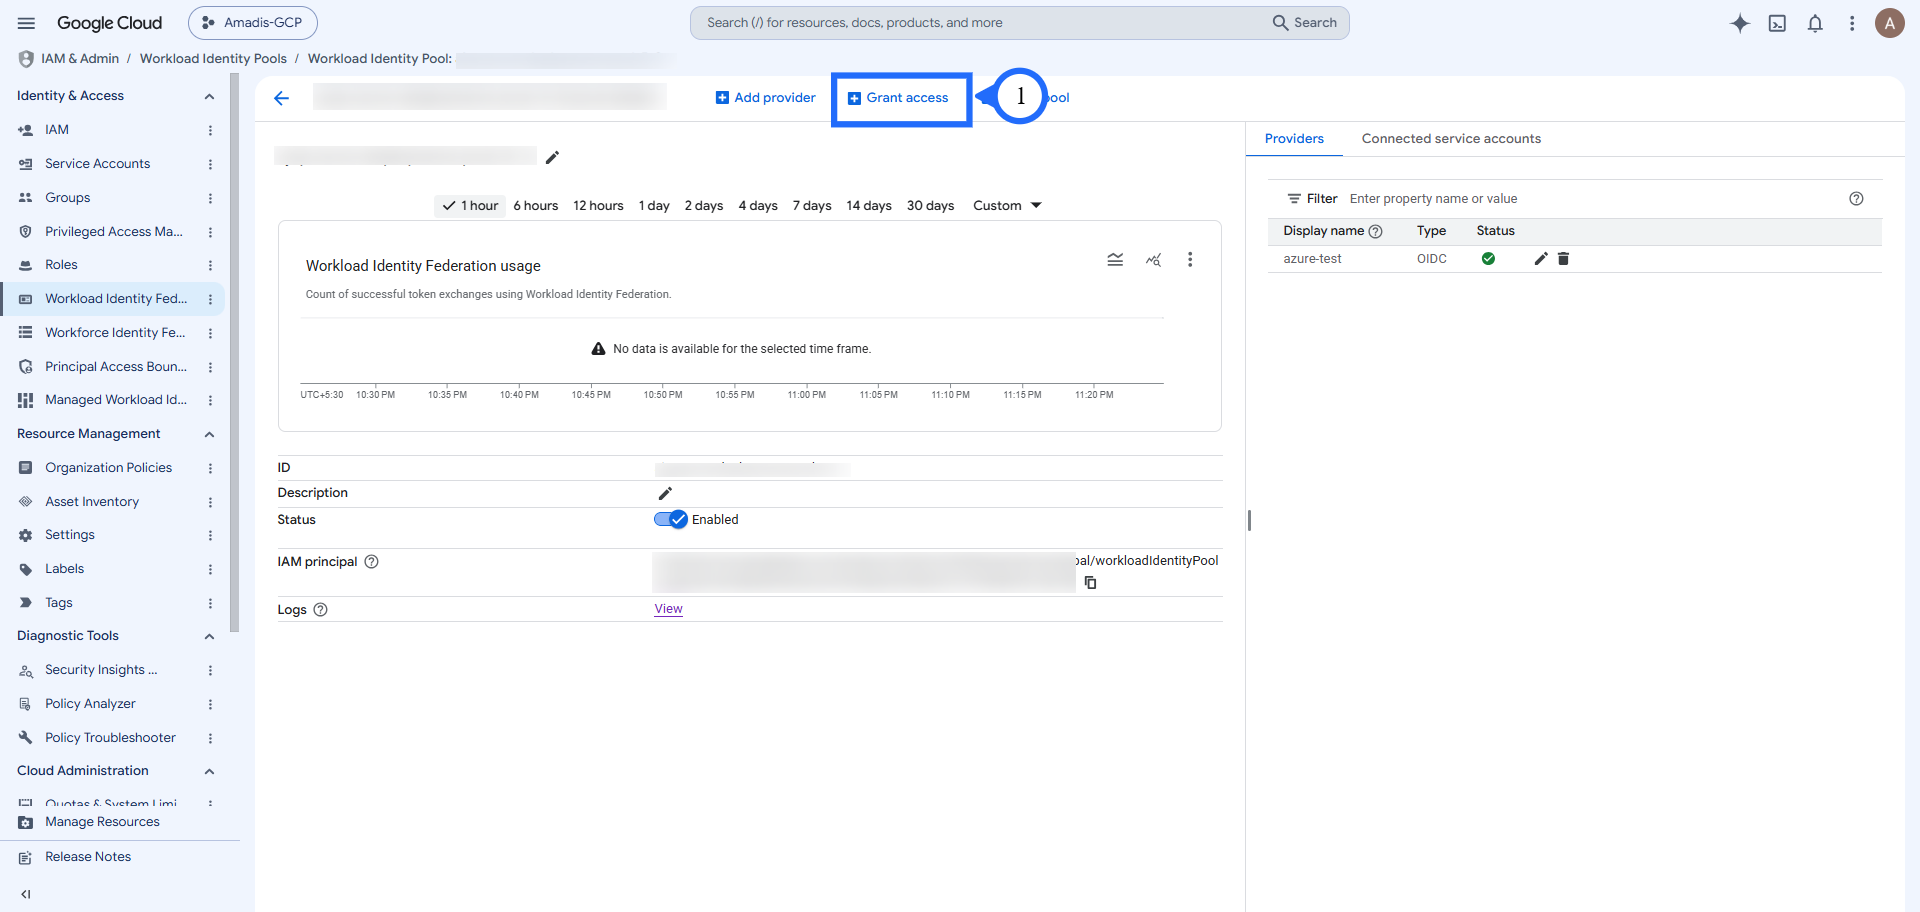
Once the pool is created, click Grant access.
-
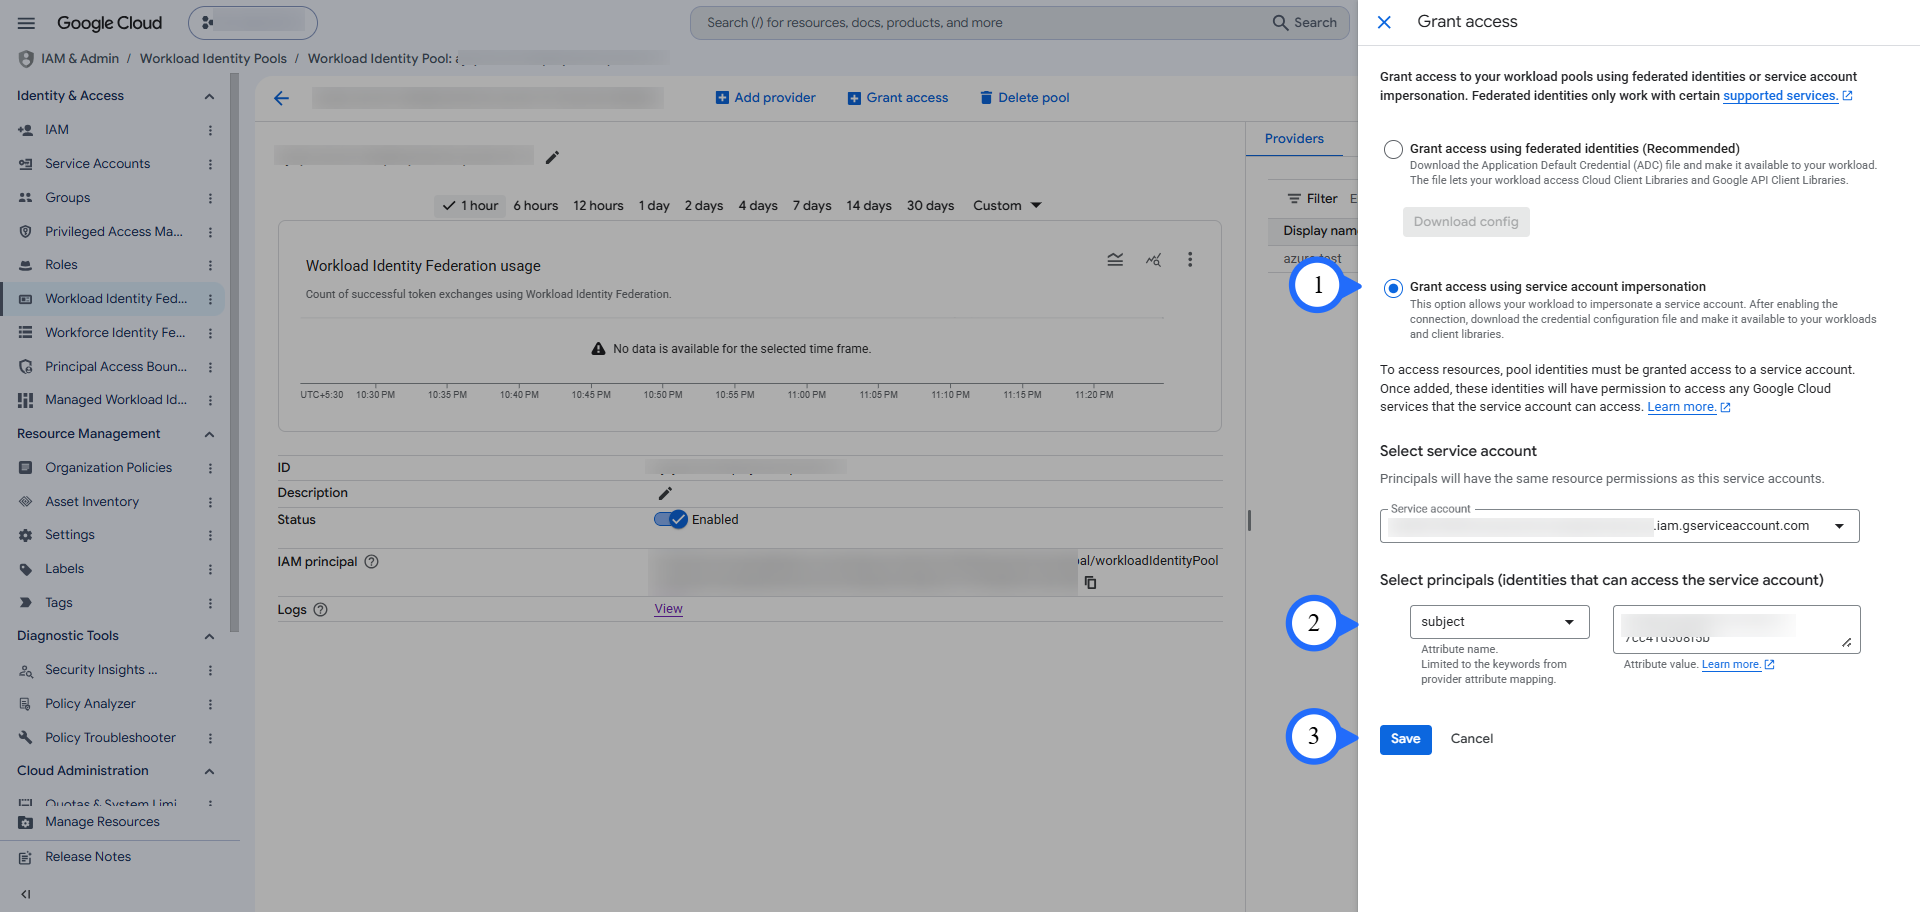
Select Grant access using service account impersonation, then select an existing service account (or create one and select it). Under Select principals, choose subject and paste the Subject value from CloudCADI's UI, then click Save.
-
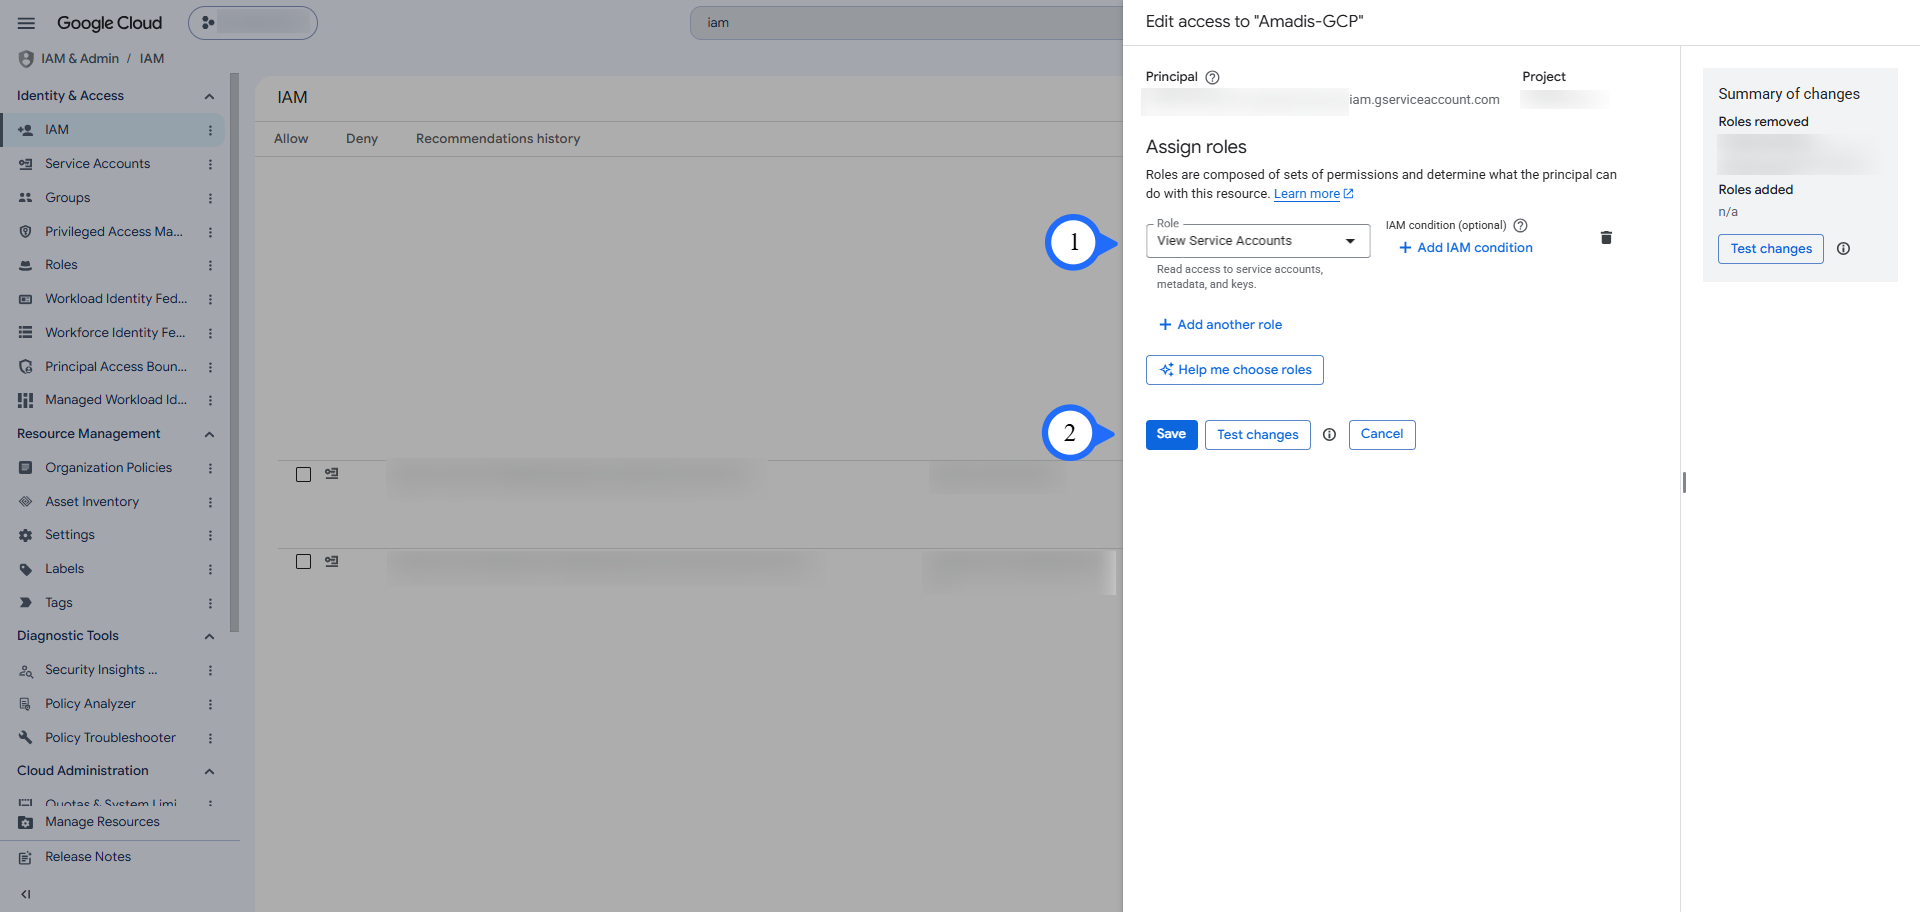
Assign the View Service Accounts role to that service account.
-
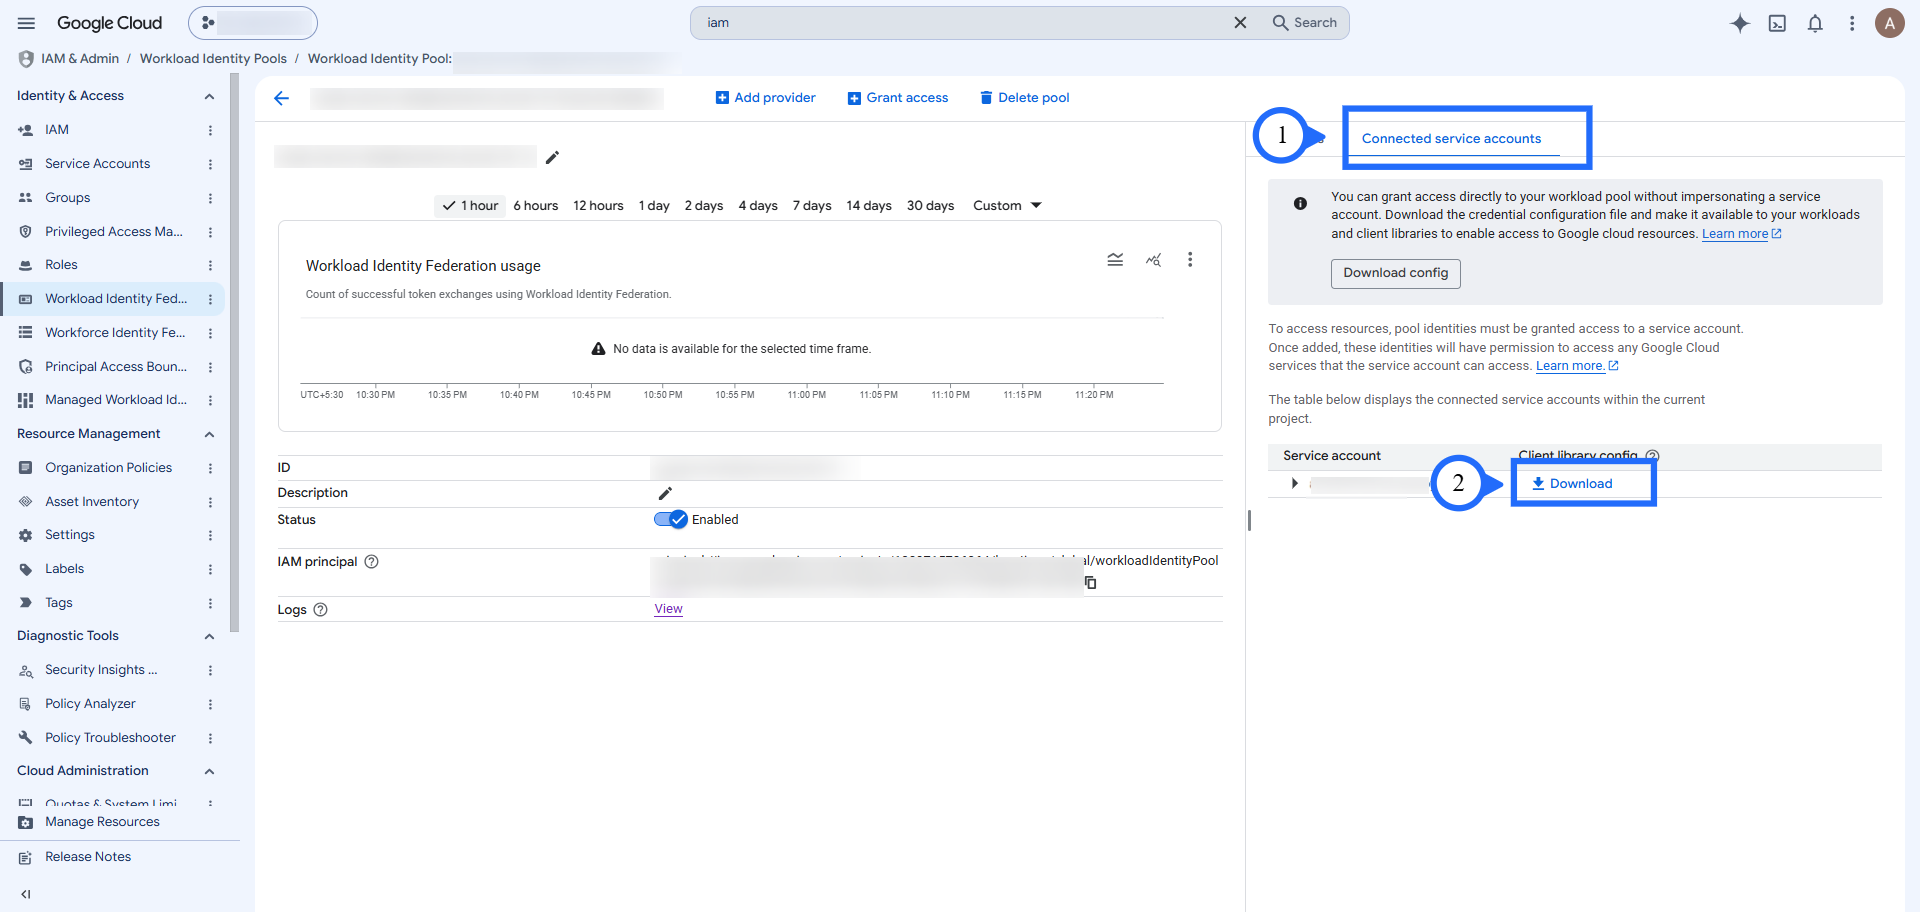
Under Connected service accounts, click Download.
-
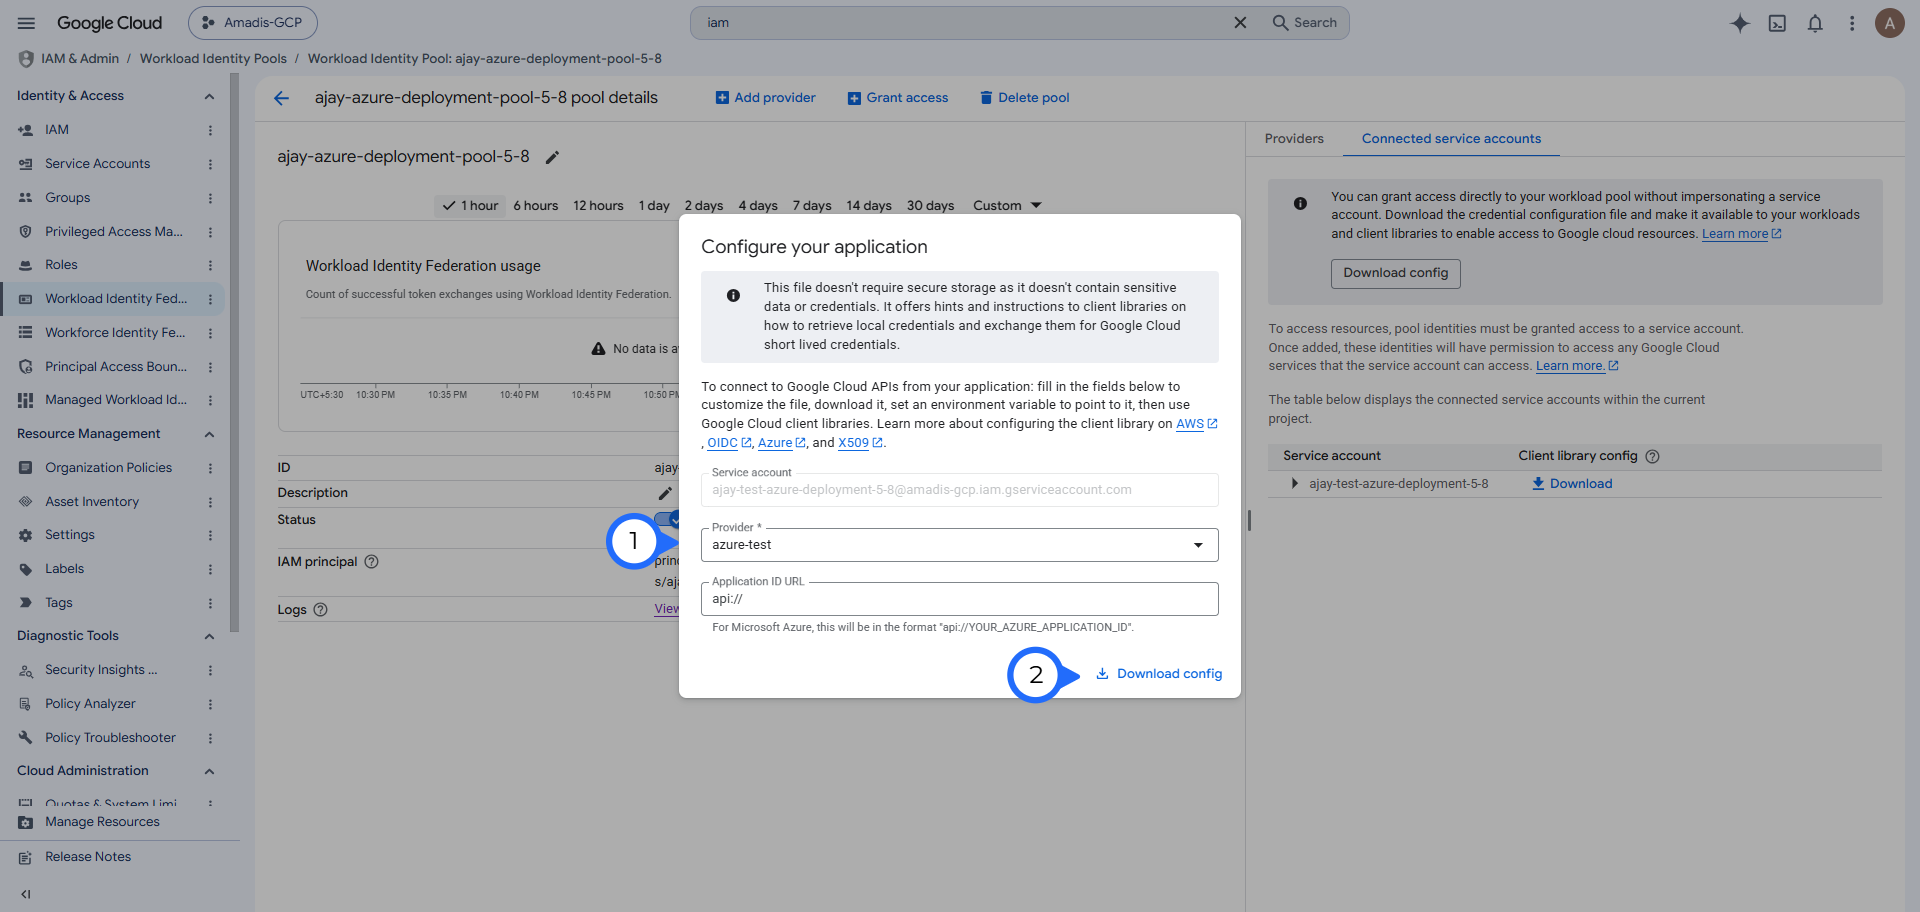
Select the provider and click Download config - this downloads a credential configuration file.
-
Back in CloudCADI, enter the GCP Organization ID and the Service Account you used, paste the contents of the downloaded file into WIF credential configuration (JSON), then click Save & Validate.
Auto and Manual Onboarding
Once the prerequisites above are complete, projects can be onboarded either automatically or manually.
Auto
-
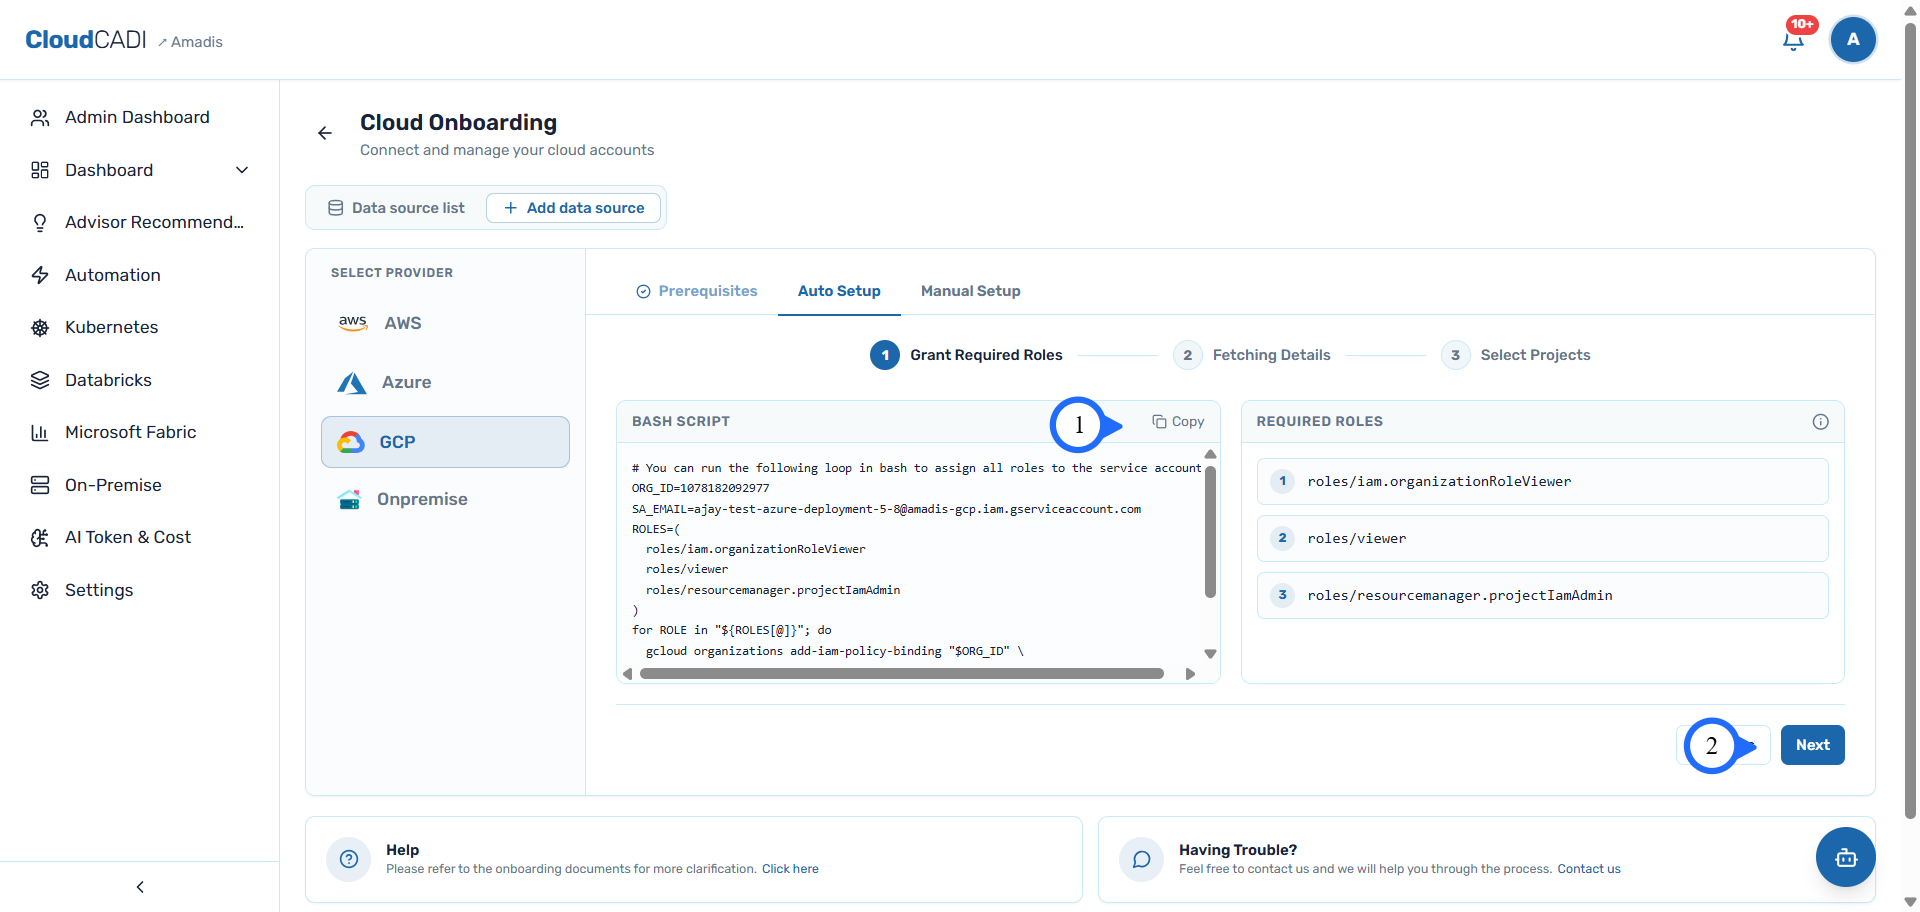
Use the CLI command to assign the three required roles, or manually assign them at the organization level.
-
Click Next - all projects under that organization with billing and pricing export enabled are fetched.
-
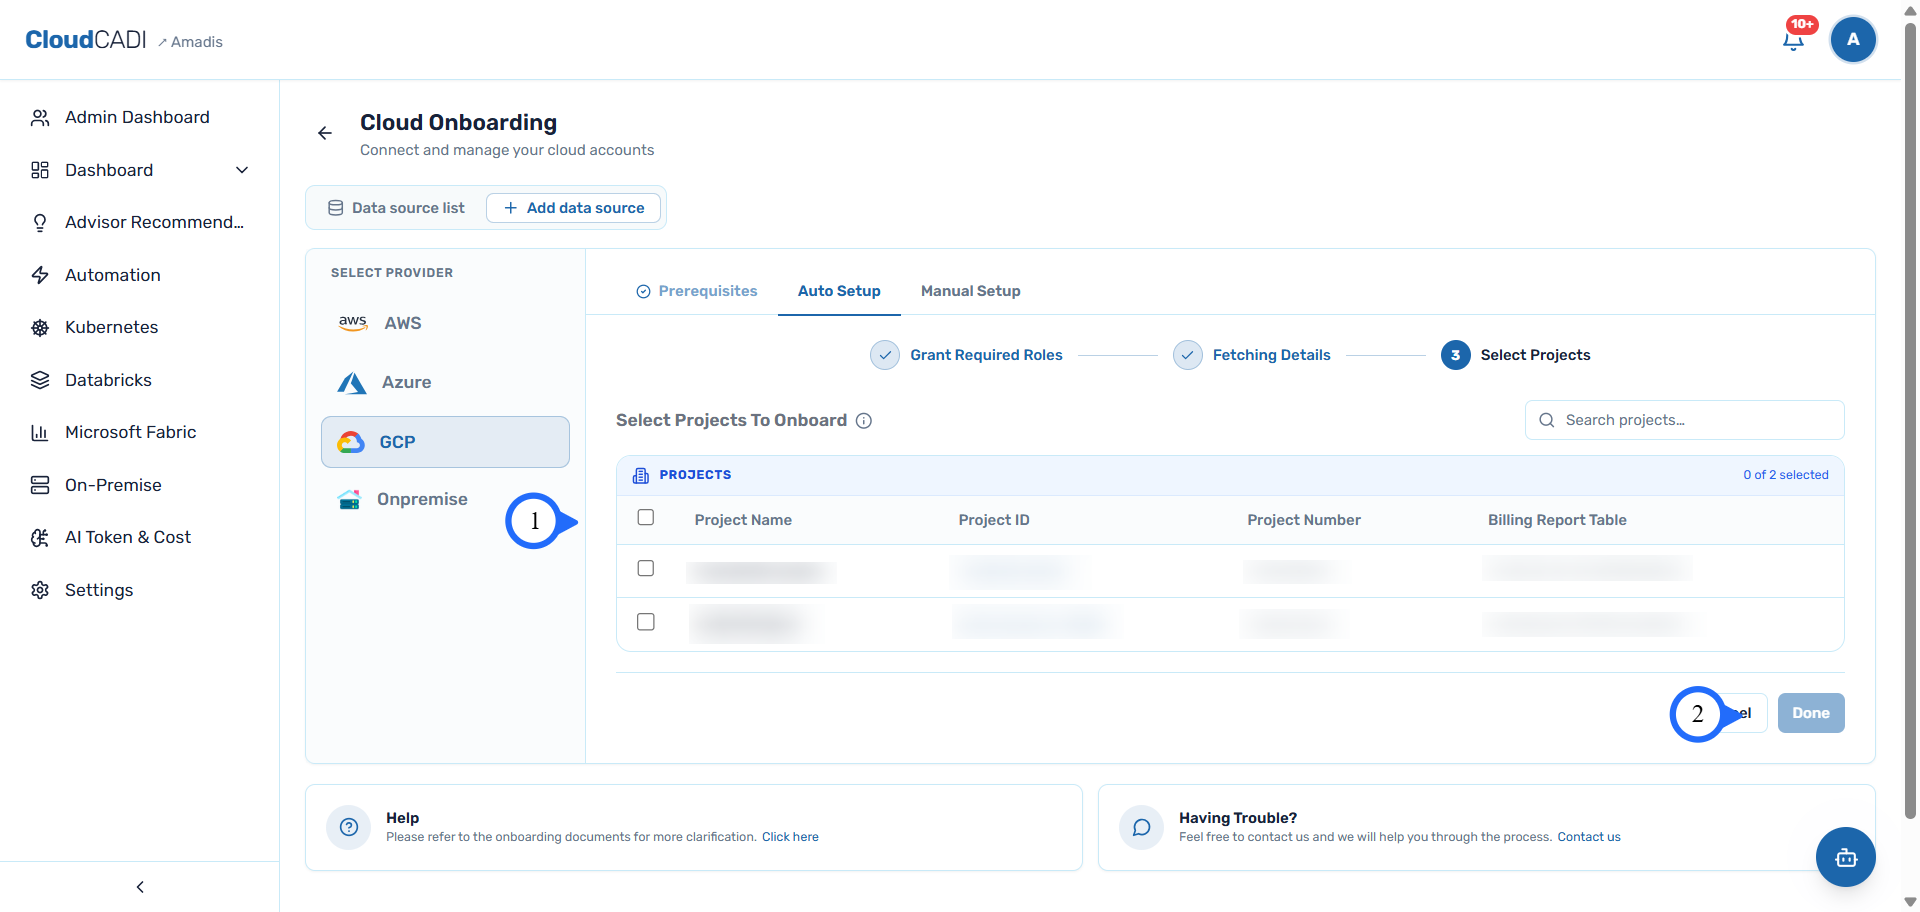
Select the projects to onboard and click Done. The selected projects are onboarded.
Manual
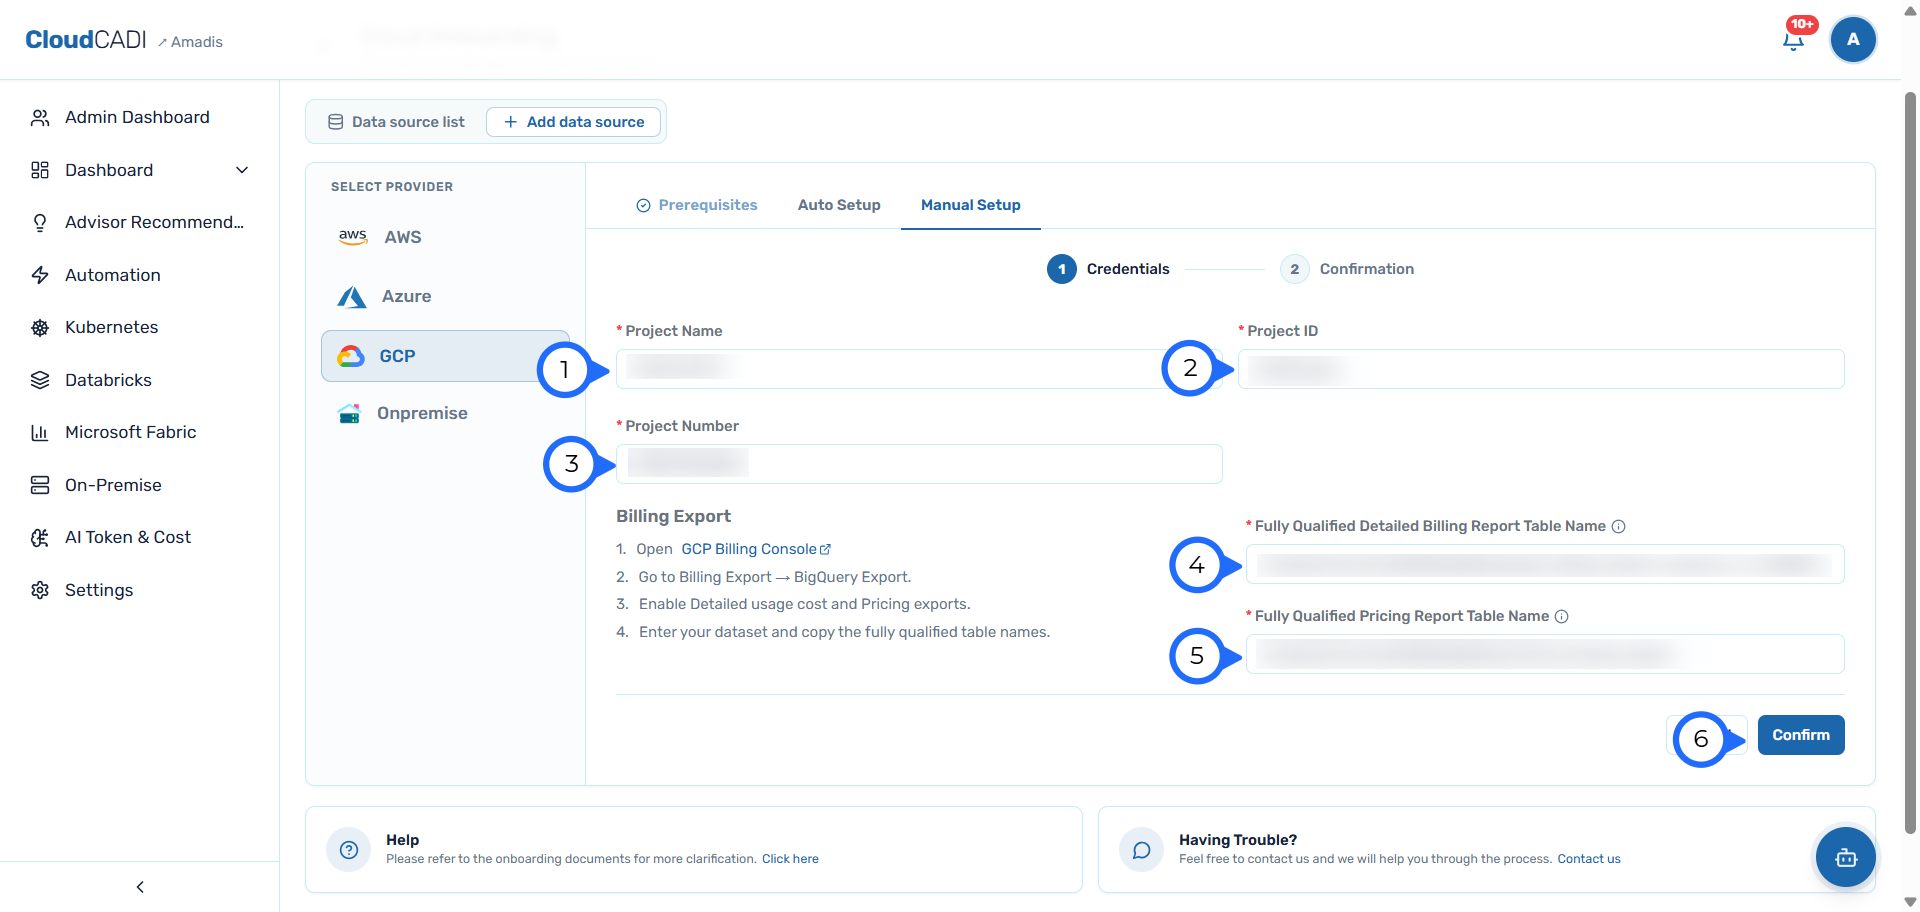
- Enter the project details and click Next.
For enabling Detailed Usage Cost and Pricing exports and obtaining the fully qualified BigQuery table names, refer to the GCP Billing Export documentation.
-
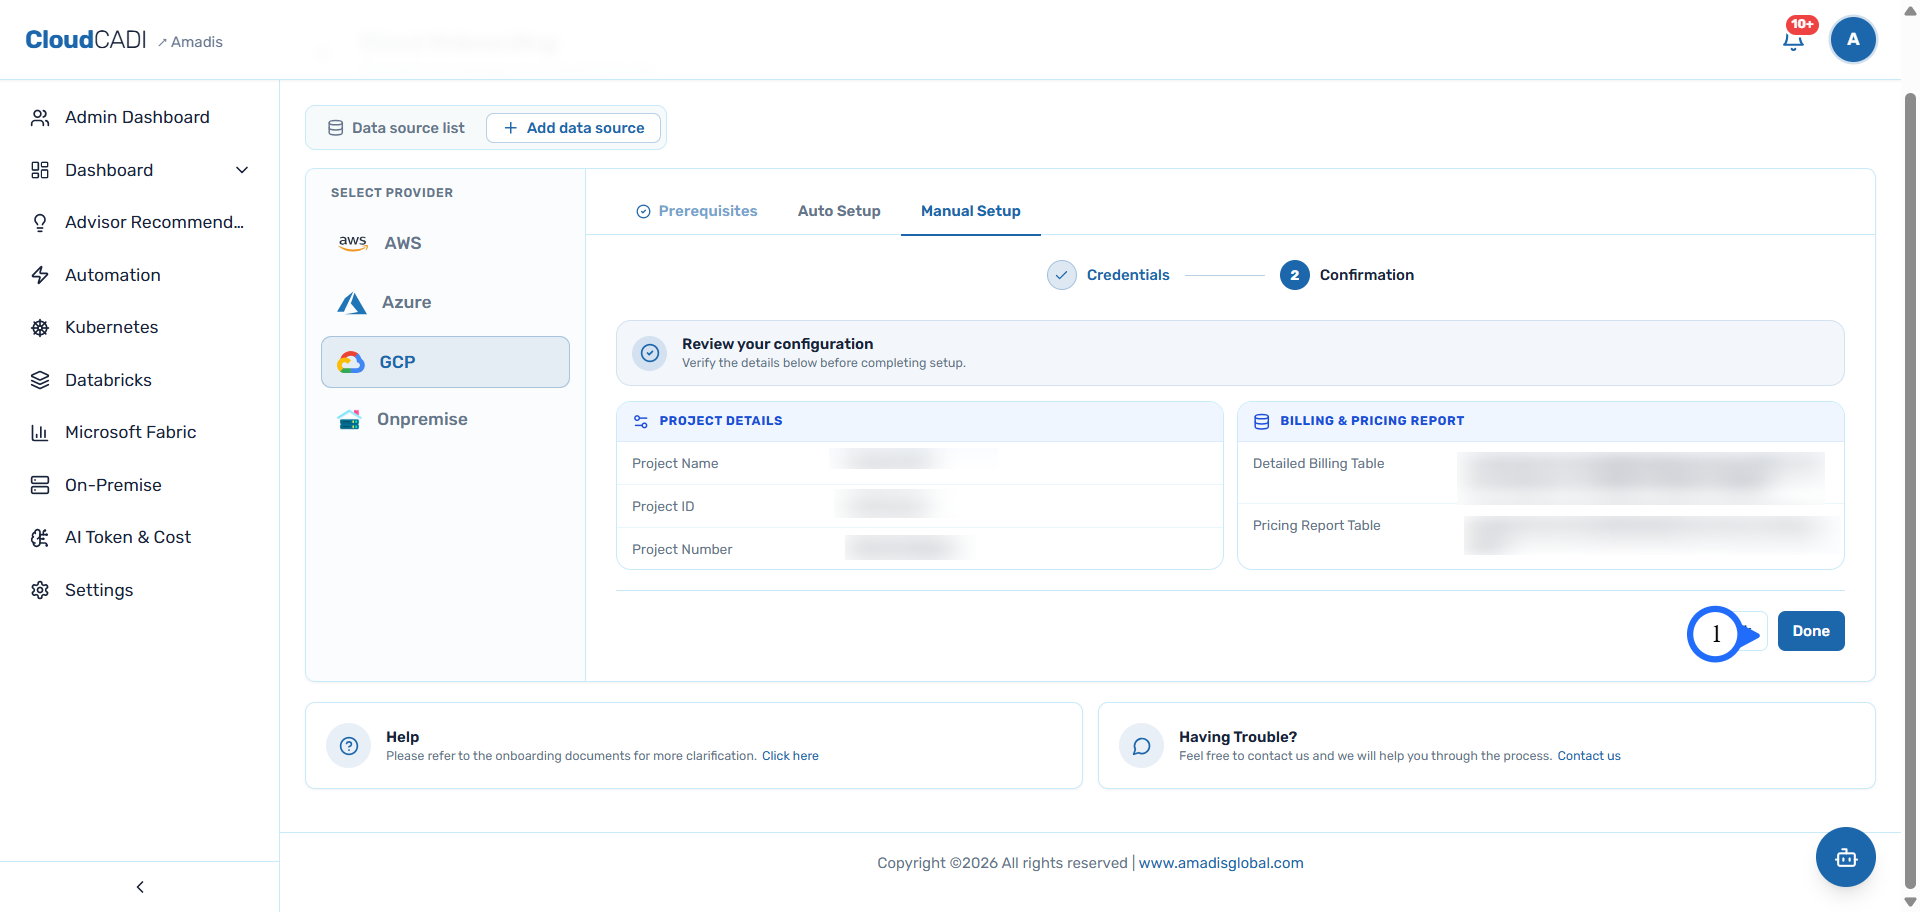
Review the configuration and click Done.